Isn’t it strange how the right gadget can make you feel like a more competent version of yourself, even when you’re still in your slippers and the cat is judging you from the windowsill?


Why I Picked the FLASHFORGE Adventurer 5M
I wanted a 3D printer that didn’t treat me like an unpaid lab technician. I needed speed without the spaghetti, precision without the PhD, and enough comfort features that I could actually tell friends, “Yes, you should try printing that,” without silently adding, “but only if you enjoy suffering.”
The FLASHFORGE Adventurer 5M promised me that life: one-click auto leveling, Core XY motion for speed and accuracy, remote control from an app, and a hotend that goes to 280°C with a nozzle I can swap faster than I can find my keys. I took the bait. And I’m happy to report it wasn’t the kind that hooks in and refuses to let go.
What I Needed in a 3D Printer
I print a lot for home projects—organizers, custom hooks, gifts for nieces who think anything with their name on it was forged by elves. I also get bored waiting around for 12-hour prints. I needed something quick, reliable, and civilized enough to live in the same room where I drink coffee.
The Adventurer 5M checked boxes that matter to me: 600 mm/s travel speed, 20,000 mm/s² acceleration, a 220 x 220 x 220 mm print area, an auto-leveling system that actually works, and a bed surface that lets go of my parts without pleading. I wanted it to be fast, but not reckless. It needed to be quiet-ish, but not secretive. It needed to be friendly, yet unafraid of hotter materials.
What the 5M Promised
With a Klipper-based brain, Core XY motion, dual cooling fans, and vibration compensation, the 5M promised to actually handle speed responsibly. The direct drive extruder supports flexible filaments, and the hotend’s 32 mm³/s flow capacity hinted that the printer wouldn’t faint mid-sprint.
The headlines were seductive: warm up to 200°C in 35 seconds, a dual-sided PEI platform, and a nozzle I can yank and replace in about 3 seconds. For beginners, this means a gentler start. For me, it means I can tinker without kneeling at the altar of calibration.

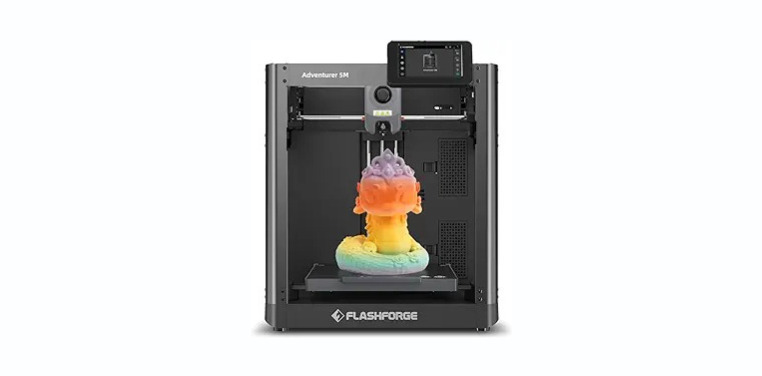
FLASHFORGE Adventurer 5M 3D Printer,600mm/s Max Speed Core XY 3D Printers with Auto Leveling,280°C Direct Extruder, 3s Detachable Nozzle, Dual-Sided PEI Platform,Dual Cooling, for Home,Kids,Beginners
Setting It Up: From Box to Bench in an Afternoon
I keep a personal record of time-to-first-print. Some printers in my past did not get off the ground until the relationship was already on thin ice. The Adventurer 5M, thankfully, did not ask for a prenup.
Unboxing, attaching a few parts, and plugging it in took less than an hour. The included documentation was clear enough that I didn’t need to consult the online sages. I placed it on a sturdy table, fed it filament, and braced for that thrilling, nerve-snapping first layer.
Unboxing Experience
The machine is mostly assembled, and the packaging was thoughtful without feeling like a Russian nesting doll of cardboard. The PEI build plate is already installed, the frame is rigid, and the wiring is tidy enough that I didn’t have to put on my “I’m sure this is safe” face.
I kept the foam—something about being an adult and keeping foam in case you need to move something makes me feel responsible. Within minutes, the Adventurer 5M looked at home and vaguely futuristic, like a coffee machine you can respect.
Assembly and DIY Enclosure Thoughts
The printer can run open-air out of the box. But if you want to print ABS or ASA, or just prefer a tidier sound profile, the 5M invites you to build your own enclosure. I took this as a permission slip for a weekend craft: a simple IKEA Lack enclosure with acrylic panels and a little LED strip—because I like to pretend I’m in Mission Control.
Flashforge even leans into this, suggesting you can “create your own unique stunning 5M 3D printer enclosure.” I appreciated the encouragement. For most materials like PLA and PETG, you don’t need an enclosure. But for fussy stuff, that extra warmth can be the difference between success and a sulk.
First Power-On, Firmware, and App Setup
On first power-up, the printer guided me through basics like filament loading and network setup. I installed Flash Maker (Flashforge’s app and software suite), connected the printer, and got a feel for remote control. For real-time monitoring you’ll want the optional 5M Camera Kit; without it, you can still send jobs, tweak parameters, and get alerts.
Klipper-based control gives it agility and nice macros. I felt like I had a very polite assistant who wouldn’t mutter when I asked for the same thing three different ways.
Auto Leveling That Actually Works
I’ve had printers with “automatic” leveling that were about as automatic as a manual transmission. The 5M’s one-click auto leveling is the first I’ve used that felt like magic—tap once, step back, and it compensates for the bed’s tiny imperfections without requiring me to chant or open a spreadsheet.
The first layer is where prints go to heaven or immediately to trash. On my early tests, adhesion was consistent and confident. No scraping, no skirting catastrophe. It just worked, and the voice in my head that usually says “here we go again” wandered off to make tea.
One-Click Leveling, First Layer, Adhesion
The compensation routine analyzes the bed, applies offsets, and starts printing with a first layer that looks like it knows what it’s doing. Even after removing prints with my usual enthusiasm, I didn’t have to run the leveling process every time. I tapped the button only when I changed the build surface or did something suspicious with my hands.
First layers laid down like frosting from a patient baker. This is crucial, because if you nail the first five minutes, you’ve greatly improved your odds of not waking up to a nylon tumbleweed.
Dual-Sided PEI Plate: A Friend to Imperfect Technique
The dual-sided PEI build plate is one side smooth, the other textured. PLA and PETG stuck well when warm and released when cool. I didn’t need to attack the plate with a chisel. I just bent it slightly and watched the part lift like it was relieved.
On the days when I forgot to adjust Z-offset after a nozzle change, the plate still gave me grace. It’s forgiving enough that I started trusting it. Trust, of course, being what separates a single print from a habit.
Speed and Motion: Core XY at 600 mm/s
Core XY motion is a bit like a figure skater whose legs can move without flinging their arms everywhere. The moving mass is lighter, directional changes are sharper, and the printer feels built to zip without panic. The Adventurer 5M claims 600 mm/s travel speed with 20,000 mm/s² acceleration. I decided to give it opportunities to show off.
At conservative speeds, the print quality was pristine. At aggressive speeds, it surprised me: crisp edges, decent overhangs, and far fewer ringing artifacts than I expected, thanks to the vibration compensation doing its quiet hero work.
Real-World Speed Tests
I printed a calibration cube at sensible settings—say 150–200 mm/s—and got a tidy little block that looked like it belonged in a math textbook. Then I turned up the speed to “impress a friend who’s visiting.” The results were still acceptably clean for functional parts.
For decorative prints, I kept speeds in that mid-range sweet spot. For brackets, organizers, and “I need this before I lose interest,” the higher speeds cut hours off my timeline. A 10-hour print became a 5–6 hour print with no real drama.
Vibration Compensation and Quality
Vibration compensation feels like a superpower. It counteracts the wobbly energy that usually shows up as ringing near sharp corners. The 5M’s implementation worked well enough that big flat faces remained flat, and text embossed on surfaces stayed legible.
The dual-fan nozzle helped lock in geometry as layers were being laid. I could see the cooling doing its job mid-print: bridges looked confident, and top surfaces smoothed out with a modest shine.
Hotend and Extrusion: 280°C Direct Drive That Means Business
If you’re printing flexible materials or moving fast, direct drive extrusion is a gift. The Adventurer 5M’s 280°C direct extruder handled TPU, PETG, PLA, and ABS without theatrics, and it was ready for action in about 35 seconds to 200°C. My kettle takes longer to consider boiling.
Filament changes were quick with the sensor catching misfeeds and pausing if I ran out mid-print. It feels like the printer is on my side, rather than passively letting me sabotage myself.
32 mm³/s Flow and 3-Second Nozzle Swaps
The hotend is rated for a 32 mm³/s flow, which translates to “don’t worry about outrunning your melt zone when printing fast with PLA or PETG.” I ran thicker layers on a 0.6 mm nozzle and pushed speed while still getting solid layer bonding.
The nozzle swapping system is comically simple. Pop it out, pop another in, and you’re back up in about 3 seconds. This made me far more likely to use the right nozzle for the job instead of stubbornly sticking to a one-size-fits-none approach.
Multi-Material Printing: PLA, PETG, TPU, ABS, ASA
- PLA: Flawless out of the gate. I used 0.2 mm layers, 0.4 mm nozzle, and higher speeds for prototyping. When I wanted a nicer finish, I slowed walls and let the cooling do the polishing.
- PETG: Adhered well but not too clingy on the PEI. I lowered bed temps after the first few layers and got tidy, glossy prints without strings.
- TPU: The direct drive fed flex smoothly. I kept speeds conservative, reduced retractions, and printed phone bumper corners that actually bounced.
- ABS/ASA: With an enclosure, these were stable. Without one, I could print smaller parts, but drafts made me nervous. Inside my DIY enclosure, they behaved—minimal warping and a satisfying matte finish.
Cooling That Keeps Up: Dual Fans, Better Bridges
Cooling is the unsung hero in the sprint for speed and quality. The Adventurer 5M uses dual fans to blast the fresh layer so it doesn’t slump into goo. With PETG, I eased fan speeds to avoid brittleness. With PLA, I let it roar.
Bridging was good out of the box, and overhangs around 50 degrees looked crisp. Printing small details didn’t turn into a melted snack. The fans are not silent, but they’re not shrieking either—more a steady whoosh that fades into background noise.

Print Volume and Space Efficiency
The 220 x 220 x 220 mm build volume feels ideal for a home printer. It’s large enough to be useful—vases, helmets for children with small heads, plenty of brackets and boxes—without requiring me to reinforce the table.
The frame uses its footprint well, and the Core XY layout doesn’t swing a heavy bed around. I found it charmingly space-smart, like a studio apartment with good light.
Noise, Smells, and The Home Test
At high speeds, you will hear it, but it’s more of a determined hum than a complaint. I printed next to my desk while working and didn’t feel like I was sitting next to a lawnmower. In a living room, it’s fine. At night, I moved it into the enclosed nook and forgot it was on.
For ABS or ASA, an enclosure helps with both temperature stability and smells. PLA and PETG are polite enough that I printed them without raising eyebrows. If you’re extra cautious, add a small air filter to your enclosure and tell guests it’s your “tiny weather machine.”
Software: Flash Maker, Klipper, and Remote Control
Flash Maker is straightforward. It includes profiles that don’t sabotage you, and because the printer brains are Klipper-based, you get the nimble control and macros that come with it. I sliced models, adjusted speeds, and pushed prints from my laptop while the cat judged me for being creative during feeding hours.
The smart app control meant I didn’t have to hover. I could be in the other room, check the status, and tweak fan speeds or flow on the fly. For real-time video, yes, you need the optional 5M Camera Kit. It’s worth it if you’re a worry-prone parent of plastic objects.
App Control, Monitoring, and Alerts
I enjoyed the peace of mind of notifications. If filament ran out or something went sideways, I got an alert instead of a surprise. Starting prints remotely felt fancy, like telling a robot to do chores while I made coffee.
I did one print from the grocery store, which felt like something out of a future I was promised as a child. I checked the app, saw layers were stacking properly, and resisted the urge to congratulate it out loud next to the produce section.
Slicer Profiles and Tuning
The included profiles are good starting points, but like all slicers, they reward patience. I nudged acceleration and jerk settings, tuned retraction for each filament, and saved different profiles for 0.25, 0.4, 0.6, and 0.8 mm nozzles.
Once dialed in, the results were consistent. I printed the same model a week later without any weird drift in quality. That predictability is the difference between a toy and a tool.
Reliability: My 100-Hour Weekend Challenge
I tested the 5M by queueing a ridiculous number of prints over a long weekend. Functional parts, decorative objects, and a lot of little gifts for kids who believe I work for Santa on contract. The printer ate the queue without complaint.
I had one misfeed due to a sloppy filament splice on my part. The filament sensor caught it, paused the job, and waited kindly for me to stop being foolish. I fed a new spool, pressed resume, and the part finished cleanly.
A Closer Look at the Specs (and Why They Matter)
Here’s a quick breakdown of the features that made the difference for me, along with what they mean in daily use.
| Feature | What It Is | Why It Matters | My Takeaway |
|---|---|---|---|
| One-click auto leveling | Automatic bed mesh compensation at a tap | First layers that just work without tinkering | I stopped carrying a feeler gauge like a security blanket |
| 600 mm/s speed, 20,000 mm/s² accel | Fast motion with Core XY | Huge time savings on large or multiple prints | My print queue shrank to a manageable size |
| 220 x 220 x 220 mm volume | Medium build area | Big enough for most household and hobby projects | I didn’t miss bigger until I tried to print a helmet in one go |
| 280°C direct extruder | High-temp, direct drive for flexible and rigid filaments | Supports PLA, PETG, TPU, ABS, ASA | I switched from trinkets to useful parts without changing machines |
| 32 mm³/s hotend flow | High melt rate | Keeps up with fast extrusion and bigger nozzles | I used 0.6 mm nozzle guilt-free |
| 3-second detachable nozzle | Quick-release nozzle swap | Encourages the right nozzle for each job | I actually switched to 0.25 mm without groaning |
| Dual-sided PEI platform | Smooth and textured surfaces | Easy adhesion and release | Parts pop off with a bend, not a battle |
| Dual cooling fans | Two fans on the nozzle | Better bridges and crisp edges | Surfaces looked clean even at speed |
| Vibration compensation | Motion tuning to reduce ringing | Keeps corners sharp and walls straight | Corners stopped echoing like a guitar string |
| Flash Maker app control | Remote prints, adjustments, alerts | Manage prints away from the machine | Add the camera kit for real-time eyes |
| Optional DIY enclosure | User-built enclosure supported | Stability for ABS/ASA and better acoustics | I had fun making mine and it worked |
Nozzle Choices and When I Use Them
I love that the printer comes with multiple nozzle sizes and makes swapping them painless. Here’s the cheat sheet I wish I’d had on day one.
| Nozzle Size | Typical Layer Height | Best For | My Notes |
|---|---|---|---|
| 0.25 mm | 0.08–0.16 mm | Miniatures, fine text, detailed models | Slow down and let the cooling work; results are gorgeous |
| 0.4 mm | 0.16–0.28 mm | General use, balance of speed and detail | My default; reliable and versatile |
| 0.6 mm | 0.24–0.36 mm | Functional parts, faster prints, PETG | Great for big stuff that doesn’t need fancy surface detail |
| 0.8 mm | 0.32–0.44 mm | Big, strong parts quickly | Layers are visible but parts are tanks |

Daily Life With the 5M
I kept the 5M on a bench near a window, partly for ventilation, partly for the drama of watching sunsets reflect off an ongoing print. I printed cable clips and then ignored them on the table for a week because this is who I am. I gave a vase to a neighbor. She asked me where I bought it. I said, “I made it,” then stood there too long, waiting for applause.
At speed, the printer gets a little louder but not in a grindy way. It sounds industrious. It warms up quickly, starts quickly, and finishes before I forget what I started. I appreciated that my mistakes were often recoverable—missed filament? It paused. Nozzle too low after a swap? The PEI plate forgave me.
Pros and Cons After Real Use
I like honesty in reviews, even when I’m fond of the thing in question. So here’s the balance sheet after weeks of testing.
-
What I loved:
- The one-click auto leveling saves time and sanity.
- The speed is real and usable, not just marketing pyrotechnics.
- The direct drive extruder plus 280°C hotend handled everything I regularly print.
- Nozzle swaps take seconds and made me a smarter printer.
- The dual-sided PEI plate makes part removal civilized.
- App control with alerts saved me from babysitting.
-
What I’d improve:
- Real-time monitoring needs the optional camera kit; I wish it were built-in.
- For ABS/ASA, you’ll want an enclosure—DIY is fun, but a bundled option would help true beginners.
- At very high speeds, expect to tune profiles; nothing wild, but you’ll need to nudge settings per material.
How It Stacks Up Against Popular Alternatives
I’ve used or borrowed several common machines in this class, and here’s how the 5M felt in that context. This is subjective, but those are my favorite kinds of truths.
- Versus slower bedslingers: The Core XY makes a noticeable difference in speed without turning prints to mush. The frame feels rigid, and it shows in corners and walls.
- Versus high-speed enclosed competitors: Some come with full enclosures and cameras by default, but the 5M gives you real speed and refinement in a friendlier price bracket, and with fewer quirks for first-timers.
- Versus pro kits: You can get fancier, but if I need to assemble an ecosystem and maintain a wiki to keep up, I’m not doing it. The 5M gets me to prints with less ceremony.
If you want an out-of-the-box enclosed machine and don’t care about making your own enclosure, you might consider a unit that ships with that built-in. If you prefer a balanced machine that respects your time, the 5M sits in a sweet spot.
Safety, Kids, and Beginners
The printer’s automatic leveling, filament sensor, and app alerts genuinely reduce the kinds of problems that make beginners quit. It’s not a toy, of course—the hotend is very hot, and moving parts are moving—but if you’re printing with kids nearby, you can make it safe with simple rules.
I introduced a teenager to 3D printing using this machine. We printed a phone stand and a nameplate, and the only moment of drama was over who got to peel the part off the plate. If your introduction to 3D printing happens without tears, that’s the machine doing its job.
Maintenance and Upkeep
I’m lazy when it comes to maintenance. I wiped the PEI plate with isopropyl alcohol now and then, checked belt tension monthly, and vacuumed the dust bunnies that inevitably try to unionize around the machine.
I greased the rods and cleaned the hotend exterior when it looked like a marshmallow had wandered too close. The nozzle swap system meant if I clogged one with an adventurous filament blend, I wasn’t stuck; I could just swap another nozzle and keep moving.
Nozzle Swaps, Filament Sensor, and Belt Care
Nozzle changes are so quick that it becomes muscle memory. Preheat, click, replace, done. The filament sensor prevented disasters more than once and is sensitive without being paranoid.
Belt tension stayed stable through dozens of prints. When I checked it, I barely had anything to adjust. The Core XY system is often fussy on cheaper machines; here, it felt well-set from the factory.
Tips and Tricks I Actually Use
- Run auto leveling after a nozzle change or build plate swap; otherwise, trust it.
- Match your nozzle to the project. The 0.6 mm nozzle is a secret weapon for strong, fast prints.
- Keep a simple enclosure for ABS and ASA. Even a cardboard test box helps, though acrylic is classier.
- Slow down the first layer and broaden the extrusion a touch. It pays off in both adhesion and peace of mind.
- Tweak retractions for each filament. PETG likes shorter retractions; TPU wants gentle handling.
- Use the app alerts. If you’re prone to forgetting you started a print, the reminders will save you.
- Clean the PEI plate. Finger oils are the original adhesion saboteur.
The Kinds of Things I Printed (And Why They Matter)
- Drawer organizers: Because chaos in the kitchen drawer is a moral failing I can’t sustain.
- Cable clips and mounts: My desk looked like it had gone to finishing school.
- Phone stands and chargers: Gifts that look store-bought and make me seem cleverer than I am.
- Plant pots: The textured surface with a 0.6 mm nozzle is shockingly chic, especially in matte green PETG.
- RC car parts: The TPU bumper survived three collisions with walls and one with pride.
- ABS brackets: Inside the enclosure, they came out strong and stable, and they didn’t warp like a vinyl record in a summer car.
Who This Printer Is For
If you’re new and want your first printer to be friendly without being basic, the Adventurer 5M is a lovely choice. It prioritizes the things that keep beginners printing—auto leveling, reliable adhesion, easy app control—and it has the headroom to grow with you into faster speeds and hotter materials.
If you’re experienced and you’ve endured the “tinker for three hours to print for one” machines, this feels like switching to a car that starts on the first turn. You can still adjust almost everything you care to adjust, but you don’t have to. That’s a kind of freedom that makes you print more and complain less.
What Surprised Me Most
The speed wasn’t just a stunt. The quality stayed high, especially in that 150–250 mm/s middle range where fast meets pretty. The vibration compensation and dual cooling are not marketing adornments—they deliver cleaner corners and better bridges than I get on slower machines that try to fake it.
And the nozzle swaps changed my habits. I used to stick with a 0.4 mm nozzle out of laziness. On the 5M, I switched nozzles like I change playlists. It was painless, and my prints were better for it.
What I’d Tell a Friend Who’s on the Fence
If you’re overwhelmed by the current crop of speedy printers with complicated personalities, the Adventurer 5M is the approachable overachiever. It sets itself up, behaves at high speeds, and gives you tools that feel premium—without making you learn a new language.
If you plan to live exclusively in ABS/ASA and never build an enclosure, consider a fully enclosed machine. But if you like the idea of a capable, quick, and forgiving printer that you can adapt as you go, this one’s a gem.
Final Thoughts After Weeks of Printing
This printer made me print more. That’s the biggest compliment I can give. It reduced the friction between idea and object, and it did it without demanding tribute in the form of time, plastic, and patience. The one-click auto leveling let me focus on models instead of bed screws. The Core XY motion and vibration compensation gave me quality I was proud to hand to other people. The 280°C direct extruder and dual-fan cooling opened up materials and shapes I used to avoid.
The Adventurer 5M isn’t just fast; it’s fast in a way that respects your standards. It’s beginner-friendly without being condescending, and it has enough headroom to keep a tinkerer like me engaged. With the Flash Maker app and optional camera, it fits into a modern workflow where your machines should bring you information, not the other way around.
If you want a printer you can trust on a weeknight and enjoy on a weekend, this is that kind of companion. I started out thinking it might replace a printer I already owned. It ended up replacing the part of me that assumed 3D printing had to be a chore.
Disclosure: As an Amazon Associate, I earn from qualifying purchases.