Have you ever watched a print that looked perfect for sixteen layers suddenly curl like a potato chip at layer seventeen, as if the universe decided you’d had enough joy for the day?
")
.")
Why I Wanted an Enclosure for My Bambu Lab A1 Mini
I didn’t buy a 3D printer so I could do yoga with painter’s tape at two in the morning. I bought it to make neat little objects appear out of thin air like I’d befriended a genie who charges by the gram. The Bambu Lab A1 Mini is lovely—small, zippy, disarmingly competent—but it’s still at the mercy of room drafts, pet hair, and that one mysterious gust that appears every time my nozzle is at a particularly tender moment.
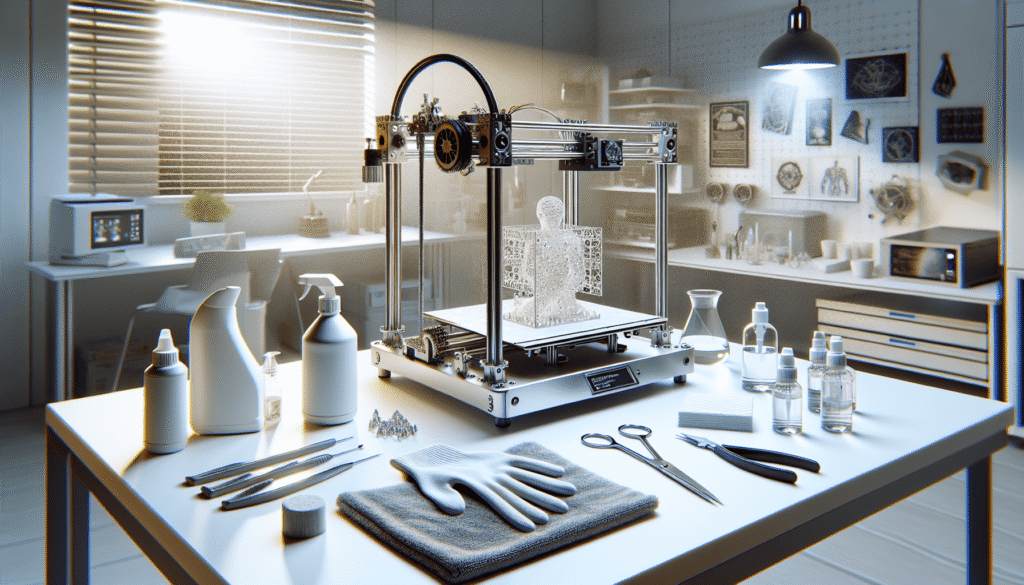
I decided to put a boundary between my prints and the chaos of my apartment. That’s where the “3D Printer Enclosure for Bambu Lab A1 Mini, Clear Acrylic Bambu A1 Mini Printer Dust Cover with LED Light, Dustproof Tent Constant Temperature Protective Cover Box (470×470×470mm)” wandered into my life like a tidy clear cube with very strong opinions about dust.

3D Printer Enclosure for Bambu Lab A1 Mini, Clear Acrylic Bambu A1 Mini Printer Dust Cover with LED Light,Dustproof Tent Constant Temperature Protective Cover Box(470×470×470mm)
$98.99 In Stock
First Impressions: Clear Acrylic, Neat Corners, and That LED Glow
Pulling it out of the box felt like unboxing a terrarium for robots. The panels are clear acrylic, which means I can still watch my print like a parent peering through a preschool window, but without the sticky handprints. The corners are satisfyingly square, the hardware doesn’t ruin the view, and the built-in LED gives the whole thing a pleasant sci‑fi hum. At night, the glow makes my A1 Mini look productive, which is more than I can say for myself after 9 p.m.
The 470×470×470 mm size works out perfectly for the A1 Mini. It’s compact enough to live on my desk, yet roomy enough so nothing feels cramped. The acrylic has that museum-display vibe—practical, protective, and just transparent enough to remind me I’m still in charge of babysitting the print.
Setup and Installation: What I Actually Did
Assembly, blessedly, did not require a third arm or a course in mechanical engineering. I set the enclosure on my workbench, peeled protective films (always satisfying, like removing a screen protector without trapping dust—a miracle), and placed the A1 Mini inside. Cables had clearance, the bed had travel, and the hotend didn’t feel like it was living in a closet.
The enclosure includes a built-in spool holder by the door, which makes filament changes almost festive. I popped on a spool, threaded the filament right into the extruder, and tried very hard not to narrate the process out loud. For anyone juggling multiple materials, there are four small holes on the right side meant for an external AMS Lite. It’s an elegant solution—no need to leave the door cracked or thread filament through a gap like a raccoon stealing spaghetti.
- Tools I used: a Phillips screwdriver, a microfiber cloth (for inevitable fingerprints), and the patience to not overtighten anything.
- Steps that surprised me: how little swearing was required.
The kit also includes top mounting brackets for the AMS Lite. A few parts need to be downloaded and printed—honestly, I enjoyed this part. You can choose colors for the printed bits so the enclosure feels like yours in that gloriously specific way only 3D printing allows.
Fitting the A1 Mini Inside and Cable Management
My A1 Mini slid in like it had been measured by someone with a tape measure and a grudge. I checked bed travel to all corners and tested the full Z-height. Nothing collided. Cables draped naturally and didn’t snag. I routed the power cable so it gently arcs, not in a way that would teach it any bad habits.
If you’re using the built-in spool holder, keep the path as straight as possible—no kinks, sharp bends, or dramatic flourishes. If you’re using AMS Lite, those right-side holes keep everything clean and simple. I fed guide tubes through, secured them with the included fittings, and congratulated myself for resisting the urge to label everything beyond reason.
Temperature Control: The Quiet, Invisible Upgrade
Here’s what I didn’t fully appreciate until I tried it: the enclosure is a mood stabilizer for filament. Without any heating element, the box itself creates a buffer from room temperature swings. The acrylic and the enclosed volume trap the printer’s own residual warmth, creating a more consistent microclimate.
In my apartment, ambient ranges from 20–24°C (68–75°F) depending on which window the sun is harassing. Inside the enclosure during prints, I saw temperatures sit around 27–33°C (80–91°F), depending on material and print duration. PLA appreciates the gentle steadiness; PETG behaves like it’s finally being listened to; and ABS—while still fussy—has fewer reasons to storm off the build plate.
The biggest differences I noticed:
- Corners lifted less often, especially on tall or flat prints.
- Layer lines looked more consistent, like they’d agreed to be friends.
- I didn’t tape sacrificial cardboard to block drafts, which felt like a promotion.
It’s not a sauna—it’s a sweater. A tidy, transparent, LED-lit sweater for your A1 Mini.
Dustproofing: The Hero My Prints Didn’t Know They Needed
Dust enters my home like it pays rent. Pet hair appears out of thin air, probably because my cat rehearses for shedding season year-round. Inside the enclosure, the nozzle is less likely to collect stray fuzz, and my filament stays cleaner as it passes into the extruder.
I’ve had fewer nozzle clogs and fewer mysterious surface pockmarks that look like the print skimmed over a crumb. Roller bearings also benefit: less grit, less crunch, more smooth travel. It’s not glamorous, but it’s what quietly keeps your printer from aging like someone who refuses sunscreen.
Filament Handling: Built-in Spool Holder vs External AMS Lite
I’ve tried both approaches. The built-in spool holder next to the door is the no-fuss option. I can swap spools in seconds without awkward contortions. The angle of the feed is friendly to the A1 Mini’s extruder—no weird resistance or friction.
For multi-color prints, the external AMS Lite through the right-side ports gives me the magical feeling of a print changing colors without me hovering nearby like a stagehand. The openings are just big enough for PTFE tubes and movement, and not so big that they turn into sweeping entryways for dust. I like that the enclosure anticipates AMS Lite users without forcing it on those who prefer the monogamous spool life.
AMS Lite on Top: Saving Space Without Wobble
The top-mount option is the small-space blessing I didn’t know I needed. The brackets and screws are included, and the remaining parts you print yourself. I loved choosing the color so it matched my printer. The AMS Lite perches up there like a clever little barn owl, managing filament without stealing desk real estate.
Weight distribution felt stable after carefully installing the brackets and checking the tightness. If your desk wobbles when you sneeze, you might want to add rubber feet or anti-vibration pads under the enclosure. I also suggest routing PTFE tubes so they arc gently—no sharp turns that make the AMS Lite work harder than it should.
Viewing and Access: Doors, Hinges, and Real-World Use
The door, with its mini corner hinges and low-profile handles, opens without blocking the view. I can get in quickly to pluck a booger of filament or rescue a priming line that’s developed a Napoleon complex. The hardware is designed so it doesn’t clutter the sightline. Yes, it’s a small thing. No, I’m not going to pretend that aesthetics don’t matter to me.
The built-in LED light is brighter than I expected, in a good way. I can see fine details in the first layer without using my phone flashlight like a miner. It’s silly how gratifying a well-lit print is, but honestly, the light is part of what makes the whole setup feel like a tiny factory instead of a hobby that keeps threatening to eat my weekends.
Optional Add-ons: Ventilation and Waste Chute
This enclosure leaves space for upgrades on both sides: a ventilation port and a waste chute, should you want them. If you print with ABS or other smelly materials, being able to vent outside is a gift to your household. The ventilation kit is sold separately, but the planning is already done—no DIY surgery required. Once installed, I’d still recommend a window vent or a dedicated air purifier nearby.
The waste chute is another delight for neat freaks. They provide files so you can print the pieces yourself and attach them. Imagine your skirt/brim and purge waste politely exiting your workspace instead of collecting under the front lip. It’s not essential, but once you get used to it, going back feels like tracking breadcrumbs into the kitchen.
Noise, Smell, and Household Harmony
The enclosure softens the mechanical chorus of the A1 Mini. It’s not silent—there’s still the stepper hum, the fan, the tiny robot conversation—but the high-frequency sounds are less piercing. With the door closed, I no longer have to explain to guests what that pleasant-but-ominous whirring is. It’s just a warm glow and a productive hum, like the audio version of a cat purring under a blanket.
Odors are also noticeably contained. PLA doesn’t smell much to begin with, but PETG and ABS can wander into the room like a chemistry set. The enclosure cuts that down; if I’m doing a longer ABS print, I crack a window or use the ventilation port. My personal rule is that if I can smell it strongly, it deserves either airflow or a break.
Safety Notes I Actually Follow
I am, by nature, a worrier who occasionally tries to grow up. I never leave the printer unattended for long, enclosure or not. The clear walls make it easier to monitor prints without standing over them like a helicopter parent.
I keep a small fire extinguisher nearby and I check cables for strain. The LED light stays cool and behaves itself. I don’t place flammable things on top. And once a month, I give the whole setup a once-over: screws snug, panels clean, no cracks, no weird smells. Perhaps overly cautious, but I prefer caution to the adrenaline of last-minute disaster management.
")
What Changed in My Prints: Real-World Results
The A1 Mini is already a solid printer. The enclosure adds the kind of stability that turns “usually good” into “consistently good.” Warping issues reduced, stringing got more predictable, and random failures—those little gremlins—stopped visiting as often. To satisfy my personal curiosity, I tracked a few runs.
My Print Comparisons: With and Without the Enclosure
Here’s a snapshot of how a few test prints behaved. Your mileage may vary depending on your room, your filament, and whether your cat secretly resents your hobbies.
| Material | Part Type | Ambient Temp | In-Enclosure Temp | Result Without Enclosure | Result With Enclosure |
|---|---|---|---|---|---|
| PLA (silk) | 180 mm figurine | 22°C | 28°C | Slight layer inconsistency at tall sections | Smoother layers; better surface sheen |
| PLA+ | 200×200 mm flat plate | 21°C | 27°C | Minor edge lift at two corners | Corners remained flat; no lift |
| PETG | Bracket with sharp corners | 24°C | 31°C | Small warping at corners; mild stringing | Reduced warping; stringing easier to tune |
| ABS | 120 mm enclosure part | 23°C | 33°C | Noticeable warp at base; early cracks | Base adhered better; fewer layer splits |
These aren’t lab experiments. They’re me printing things I actually want and noticing fewer reasons to sigh.
Feature Breakdown, In Plain English
To keep my thoughts straight (and your eyes from glazing over), here’s how the main features stack up.
| Feature | What It Is | Why It Matters to Me |
|---|---|---|
| Clear acrylic panels | Transparent, rigid walls | I can watch prints without heat loss or dust intake; it looks neat |
| Built-in LED light | Interior work light | I can monitor first layers and nighttime prints without extra lamps |
| Built-in spool holder | Holder near the door | Quick filament swaps; clean feed path |
| AMS Lite support (side ports) | Four holes for PTFE tubes | Easy multi-material feeding without gaps in the door |
| AMS Lite top mounting | Brackets + screws provided; print some parts | Saves desk space; feels stable; color-match the printed parts |
| Constant temperature protection | Passive warmth retention | More reliable adhesion; fewer warps and splits |
| Dustproofing | Enclosure reduces debris ingress | Cleaner nozzle and print surfaces; less maintenance |
| Optional ventilation port | Side reserved for a vent kit | Better control of odors and fumes for ABS and similar materials |
| Optional waste chute | Side reserved; print files provided | Tidier workspace; scrap redirects elsewhere |
| Compact footprint (470 mm cube) | Right-sized for A1 Mini | Fits on my desk without becoming a roommate |
| Unobstructed hardware | Mini corner hinges, slim handles | Full visibility; clean look; easy door function |
Everyday Use: The Little Frictions That Vanished
Before the enclosure, I kept a mental weather app for prints. Is the window open? Is the HVAC cycling on? Did I shed on the build plate when I leaned in too close? Now, I don’t think about those things as much.
- First layers behave. I can watch the squish in the LED light and not squint.
- The door gives me fast access when I need to rescue a skirt that’s becoming a nest.
- Filament changes don’t require me to do arm yoga.
- The acrylic doesn’t obstruct the A1 Mini’s status display, so I’m not guessing.
- When a friend asks what I’m printing, I can point at the little glowing box without dragging them into a discussion about bed adhesion. Unless they ask—then, fair warning.
What I Like, What I’d Change
I’m not above admitting I enjoy products that make me look more competent than I am. This enclosure does that. It also makes my desk look like an orderly human lives here.
What I like:
- The clear look and clean hardware, which make the A1 Mini feel like it’s on exhibit.
- The built-in light. Being able to see perfectly without improvising lamps is a small joy.
- Real improvements in print consistency and warping, especially on PETG and ABS.
- Easy filament handling with either the built-in holder or AMS Lite ports.
- The top-mount AMS Lite solution—it’s tidy and saves space.
- Modular add-ons (vent, waste chute) that are thoughtfully reserved in the design.
What I’d change:
- I wouldn’t say no to a stick-on temperature/humidity display in the box; I added my own.
- A soft-close door would thrill me beyond reason, though that’s a luxury, not a need.
- I’d love pre-printed parts for the top mount available as an optional add-on for those who don’t want to print before they can print. That’s a paradox I can’t help but smile at.
None of these are deal-breakers. They’re icing-on-cake territory.
Who This Is For
If you own a Bambu Lab A1 Mini and:
- You print in a room with drafts.
- You share your space with pets or dust that materializes out of nowhere.
- You’re chasing better adhesion and fewer split layers on taller prints.
- You want AMS Lite without desk sprawl—or you want it later without rethinking your setup.
- You like tidy, purposeful gear that doesn’t look like PVC pipes and a tarp.
Then this enclosure will probably feel like a meaningful upgrade.
If you only print PLA Benchies and you live in a climate-controlled utopia with no hair, dust, or drafts, you might still enjoy the neatness and the light. But you’ll notice the biggest gains if your environment or materials are a little unruly.
Maintenance and Cleaning
Acrylic is a diva in that it loves fingerprints. I keep a microfiber cloth near the printer and a bottle of acrylic-safe cleaner. Do not use ammonia-based cleaners unless you enjoy the look of foggy panels. Wipe gently. Wash your hands. Pretend you’re cleaning glasses you actually care about.
Hinges and screws don’t need much. A periodic check to see if anything loosened is enough. If you do add the ventilation kit or waste chute, make sure seals are snug so you don’t invite drafts back in for a reunion tour.
Inside the box, sweep away little crumbly bits of failed priming lines, retractions, and other print detritus. The cleanliness multiplies the enclosure’s benefits.
Tips and Tricks I Wish I’d Known on Day One
- Stick a tiny thermometer/hygrometer inside. It’s oddly satisfying to see the numbers.
- Preheat for five minutes before starting ABS or PETG to let the enclosure temperature settle.
- For PLA in hot rooms, crack the door open a hair if you notice soft overhangs. Balance is key.
- Desiccant packs inside can help if your room is humid. Moist filament is a gremlin’s favorite snack.
- Route PTFE tubes with generous curves. Resistance—even a little—shows up later as stringing or under-extrusion.
- If you’re mounting the AMS Lite on top, test-fit everything before final tightening. It will save you from redoing your work while narrating your regret to no one.
- Consider anti-vibration pads under the enclosure if your desk has a wobble. Your taller prints will thank you.
A Few Words on Materials
- PLA: Usually fine without an enclosure, but I still saw a smoother finish with this setup. It also keeps stray air currents from fussing with long, tall prints.
- PETG: Benefits from the consistency. Less warping on bigger flat surfaces, easier to dial in first layer.
- ABS: This is where the enclosure really earns its keep. The slightly warmer environment reduces both warping and layer splits. Vent or filter if odors bother you.
- Flexible filaments: Feed paths matter more here. The built-in spool holder’s short and straight path helps, especially at lower speeds.
How the LED Light Changed My Routine
I was not prepared for how much I’d enjoy the LED. It’s bright without being interrogational. I can see tiny imperfections early—little signs that my nozzle height needs a nudge or that I should clean the plate again. It’s the sort of small quality-of-life improvement that makes everything feel more polished.
And yes, my printer looks cooler. There’s no use pretending that didn’t bring me joy. I have been known to stand in the dark kitchen doorway, sipping tea, watching my little plastic factory glow.
")
A Day With and Without the Enclosure
Without the enclosure:
- Draft from the hallway wanders through.
- A single cat hair somehow becomes a structural element.
- I stage impromptu windbreaks with cookbooks and shame.
- The first layer looks fine until it doesn’t.
With the enclosure:
- I close the door and press start.
- The first layer goes down with the calm of someone who meditates, which I do not.
- Nothing sneaks in. Nothing sneaks out. I check from the couch with the smugness of a person who cleaned their kitchen.
- The LED makes bad news obvious and good news glow.
Little Design Details That Make Me Weirdly Happy
- Mini corner hinges that don’t block the view. They could have been chunky and in the way. They are not.
- Right-side port placement that respects cable management. Clean feeding is underrated.
- Door handles that behave. They don’t demand attention, but the door opens when I want and seals when I need it to.
- The sense that someone thought about the user who wants options later—ventilation, waste chute, AMS Lite—without forcing them at setup.
Concerns I Had, and What Happened Instead
Concern: Heat buildup hurting PLA over very long prints. Reality: With the LED on and the enclosure closed, PLA prints stayed happy in my 27–30°C interior range. On a 30+ hour print during a warmer week, I cracked the door slightly and had zero sagging. A little vigilance goes a long way.
Concern: Top-mounted AMS Lite wobbling. Reality: Installed properly, it felt solid. I wouldn’t do jumping jacks beside it, but normal printer motion didn’t cause drama.
Concern: Access during mid-print emergencies. Reality: The door is fast, the handles are easy, and I can reach in without feeling like I’m defusing a small bomb.
FAQ (The Questions I Ended Up Answering for Friends)
-
Does the A1 Mini fit with full Z-height travel? Yes. I tested with the gantry at max range—no bonks, no scrapes.
-
Do I have to use the built-in spool holder? No. If you prefer AMS Lite or external spools, use the right-side ports. The built-in holder is just convenient.
-
Can I install the AMS Lite on top without printing anything? You’ll have brackets and screws, but you’ll need to print some of the parts. It’s fun, and you can pick a color that brings you joy.
-
How do I handle odors with ABS? Use the reserved ventilation port with a compatible vent kit, or run an air purifier nearby. A cracked window helps. The enclosure reduces smells; venting relocates them.
-
Will it reduce printer noise? It softens it. The whine becomes a hum. Not library silent, but apartment-friendly.
-
Is there room for a camera inside? Yes. I stuck a small camera in the corner and ran its cable neatly alongside the power cord. The LED light helps with video clarity.
-
Can I still swap the build plate easily? Yes. The door opens fully, and there’s enough space to slide the plate out like a civilized person.
-
Does it come with a heater? No. It’s a passive enclosure that stabilizes temperature by trapping heat from the printer itself.
-
What if I don’t want the waste chute right away? Don’t install it. The side is reserved for it if you change your mind later.
Where This Fits in a Small Workshop
This enclosure made my printer corner feel finished. My desk no longer looks like an experiment in progress. It’s less about hiding the printer and more about framing it—giving the A1 Mini a defined, optimized space. That boundary—the clear wall between my room’s chaos and the printer’s work—is, for me, the biggest gain.
When I’m in the middle of a multi-day print, I want to glance up and see calm. The enclosure gives me that. No flap of paper caught in a gust, no hair vortex, no reason to second-guess whether the vent above my desk has opinions about my overhangs.
Assembly Notes, If You’re Hesitant
- Take your time peeling the protective film from the acrylic. It’s a confetti factory if you rush.
- Dry-fit components before tightening. It’s easier to nudge things into perfect alignment that way.
- Keep the manual nearby for the AMS Lite top mount; there’s a sequence that makes sense once you’ve read it.
- If you plan to vent, decide early so you can route cables and tubes with intention.
- Microfiber cloths are your friend. Everything looks better when it’s not smudged.
Printing the Top-Mount Parts: My Mini-Project
I printed the required parts in PETG at 0.2 mm layer height with 30% infill, because I like a bracket that doesn’t flex under side-eye. Took about two hours total and felt like the world’s most on-brand warmup for using the enclosure. I matched the parts to my printer’s accent color, which brought me disproportionate joy.
The result was a color-coordinated setup that looked intentional. And because I printed it myself, I felt a tiny sense of ownership beyond the usual “I built this flat-pack thing with an Allen key.”
The Moment I Stopped Babysitting First Layers
We all have our rites of passage. Some people bake bread. I used to hover over first layers, making micro-adjustments that would make a surgeon blush. With the enclosure, the first layer tends to go down as expected. The stabilized temperature and absence of draft let me trust my settings again. I still peek—old habits die hard—but I peek less, and I breathe more.
Why This Enclosure Beats My DIY Attempts
I’ve done the tarp-and-PVC routine. I’ve repurposed plastic storage boxes. They work, to a point, but they always look like I’m living in a prototype. This enclosure has the neat, finished presence of something designed for my exact printer, which is exactly what it is.
- The clear panels don’t haze under LED light the way some plastics do.
- The door opens properly; I’m not lifting a flap like a raccoon in hopes of a treat.
- The ports are where I want them, and they’re cleanly cut.
- The light is integrated; I’m not taping a desk lamp to a shelf like a college student.
When It Matters Most
- Tall parts with small bases: less wobble-induced weirdness and fewer tiny lifts that become big ones.
- Wide, flat parts: edges stick better, and I don’t have to talk my brim into doing its job.
- Long prints: temperatures inside remain steady, so the top layers look like cousins of the bottom layers, not long-lost acquaintances.
What This Enclosure Is Not
- It’s not a furnace. It won’t cook your ABS into submission like a heated chamber might, but it doesn’t claim to. It simply keeps the environment consistent enough that your settings get a fair chance.
- It’s not a noise-canceling booth. Your printer will still sound like a printer, just less intrusive.
- It’s not a magic cure for badly tuned profiles. If your retraction is a mess, the enclosure won’t fix that. It will, however, remove environmental excuses so you can tune with confidence.
A Week Later: The Habits That Stuck
- I close the door before every print without thinking about it, the way you buckle a seatbelt.
- I keep an eye on the little thermometer inside and feel a childish satisfaction at the numbers.
- I no longer keep a stack of random objects to stop drafts.
- I clean the acrylic on Sundays. It’s oddly calming.
- I’ve printed bolder shapes knowing warping won’t ambush me as often.
If You’re On the Fence
Ask yourself what problem annoys you most right now. If it’s warping, dust, drafts, or the general untidiness of a printer that’s one coffee sneeze away from chaos, this enclosure is a simple, good-looking fix. If your prints are pristine and your room is a climate-controlled bubble, consider it a quality-of-life improvement: better lighting, cleaner workspace, easier filament management, and AMS Lite compatibility that tucks the whole operation into one tidy footprint.
Final Thoughts
I didn’t buy the “3D Printer Enclosure for Bambu Lab A1 Mini, Clear Acrylic Bambu A1 Mini Printer Dust Cover with LED Light, Dustproof Tent Constant Temperature Protective Cover Box (470×470×470mm)” to transform my printer into something else entirely. I bought it to give the A1 Mini a better room to do its job. It did that, and then some.
The steady temperature smoothed out my results. The dustproofing spared me from mysterious gremlins. The LED made me feel like a responsible adult who has lighting. The built-in spool holder and AMS Lite options gave me flexibility. And the clean, compact design made my workspace look less like a workshop exploded and more like I planned any of this.
It’s the rare accessory that adds both performance and polish. My prints look better, my room smells less like molten polymer, and I find myself printing with more confidence. If you want fewer little frustrations and more time watching a tiny robot succeed, this tidy acrylic box is worth it.
Disclosure: As an Amazon Associate, I earn from qualifying purchases.