Have you ever wondered how you can transform a plain white mug or t-shirt into a vibrant, personalized work of art? Well, join us as we unravel the fascinating world of sublimation printing. This process may sound like something straight out of a chemistry lab, but fear not, it’s an exciting and rewarding venture perfect for those of us who enjoy a touch of creativity. If you’ve ever thought about starting your own little printing business or simply want to understand more about how to make those custom gifts, this guide is just for you.

Understanding Sublimation Printing
What is Sublimation Printing?
Before diving into the mechanics, let’s talk about what sublimation printing really is. Sublimation is a printing technique where we use heat to transfer dye onto materials such as a special kind of paper or synthetic fabrics. Unlike other methods, sublimation ink transitions from a solid to a gas without becoming a liquid. Basically, it’s like magic—heat the ink, and it vaporizes straight into your material, fusing with it on a molecular level without any mess.
Why Choose Sublimation Printing?
Sublimation printing offers several advantages that make it an appealing choice for beginners and seasoned printers alike. First, it produces high-quality images that are both durable and vibrant. Picture those brilliantly colored mugs you see at your favorite café—that’s sublimation in action. Additionally, the prints are long-lasting and resistant to fading, as they become part of the fabric or material itself. So, goodbye to peeling and chipping designs!
Considerations for Beginners
As beginners, we have the luxury of a fresh perspective but also the challenge of navigating unknown territory. Sublimation requires specific materials and equipment, and there might be a learning curve. Don’t worry, though—in the following sections, we’ll cover everything from equipment setup to ensuring your first sale.
Setting Up Your Sublimation Printing Studio
Essential Equipment for Sublimation
Setting up might seem overwhelming at first. However, by breaking it down, we can tackle it effectively. Here’s what we need to get started:
| Equipment | Description |
|---|---|
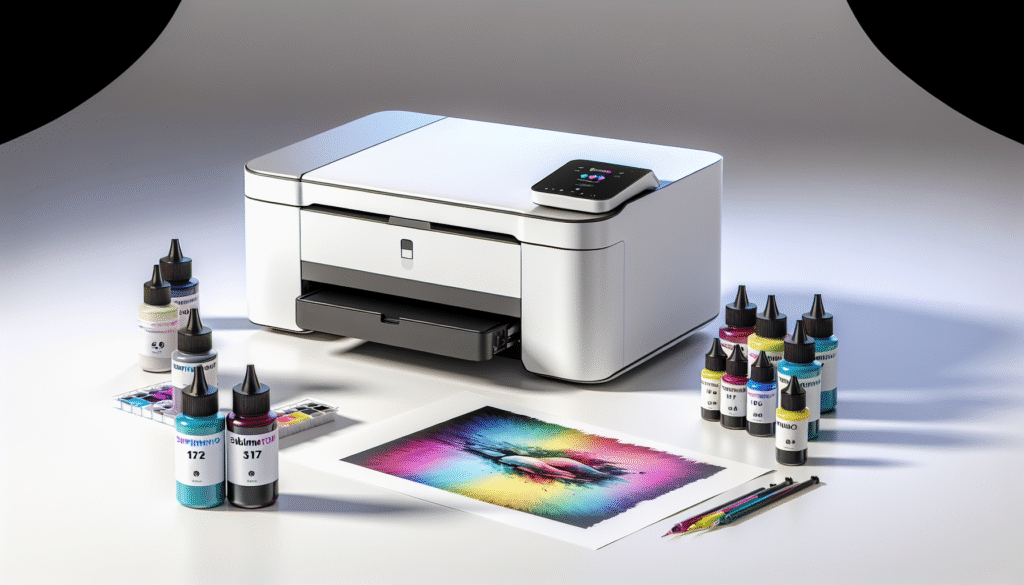
| Sublimation Printer | Choose a printer that supports sublimation inks, typically from brands like Epson or Sawgrass. |
| Sublimation Inks | Special inks that turn into gas at high pressure and bind with your chosen material. |
| Sublimation Paper | This paper is designed to hold the ink in place before transferring it to your final product. |
| Heat Press Machine | Used to transfer the design from the paper to the product. Whether it’s a heat press for mugs, shirts, etc., depends on what you plan to create. |
Choosing the Right Printer
As we are newbies, it’s important to pick a sublimation printer wisely. You can convert certain inkjet printers, but starting with a purpose-built sublimation printer can save a lot of time and potential headaches. We should look for models that support wireless printing and have user-friendly software, especially if we’re still getting the hang of this.
Selecting Your Sublimation Inks and Papers
This part is critical because not all inks are made equal. The inks should be compatible with your printer and have colors as vibrant as a summer’s day. Similarly, our sublimation paper should hold the design clearly without any smudging. There’s a slight thrill in watching your chosen colors come to life against a stark white textile or ceramic.

Preparing Your Designs
Graphic Design Basics
If the canvas is our stage, then the design is the performer. Designing for sublimation can be done using software like Adobe Photoshop or Illustrator. However, if we’re just embarking on our creative journey, free software options like GIMP or Inkscape are remarkably effective. Start with simple designs; after all, we are learning a new skill—not auditioning for a graphic design award.
Importing and Adjusting Designs
Once we’ve got a design, importing it into your chosen printing software is the next step. Adjust the size, ensure the colors are accurate, and double-check alignment. These tweaks can make the difference between a design that pops and one that flops.
Understanding Color Management
Sublimation involves transferring vibrant colors, thus understanding color management is essential. It’s all about ensuring the colors on our screen are what we’ll see on the final product. Monitor calibration tools and ICC profiles can assist us in achieving accurate results.
The Sublimation Printing Process
Setting Up Your Heat Press
Using a heat press might sound like a daunting task, but it’s quite straightforward with a bit of guidance. Set the temperature according to the material. While shirts might heat up perfectly at 380°F for 50 seconds, a ceramic mug usually requires a different temperature and duration. Always check the product guidelines.
Printing and Transferring the Design
Now comes the moment we’ve all been waiting for—printing! Print the design on sublimation paper and carefully position it on your chosen item. Using special heat-resistant tape can help keep everything in place.
Heat and Pressure Guidelines
With our items placed beneath the heat press, apply the required heat and pressure evenly. This ensures that our design is transferred properly without any ghosting or dull spots.
Troubleshooting Common Issues
Sublimation isn’t without its hiccups. Maybe our image looks faded, or there are strange marks on the final product. Typically, adjusting the temperature, checking paper alignment, or ensuring even pressure solves many common issues.
Getting Creative with Sublimation Products
Types of Products We Can Create
The beauty of sublimation is its versatility. The list of possible products seems endless:
- Mugs and drinkware
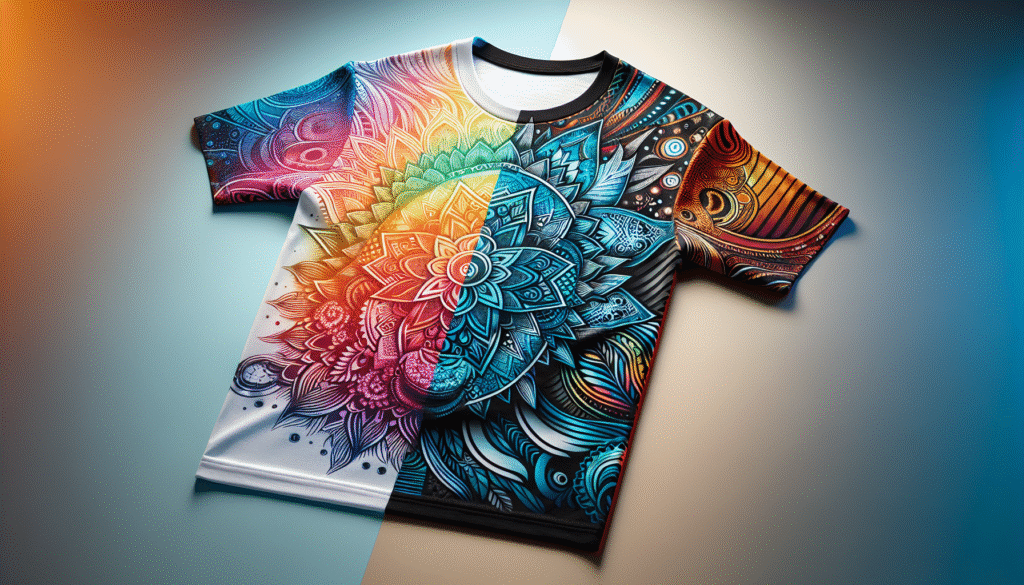
- T-shirts and apparel
- Mouse pads and coasters
- Customized puzzles
- Phone cases
Each of these products can become canvas for our creativity, opening doors to many personalized gifting options or business opportunities.
Customizing and Personalizing Designs
Adding our personal touch to items makes them special. Personalization can be straightforward, like adding names or important dates, or something more creative, like tweaking color schemes to align with seasonal trends. The key here is to blend functionality with aesthetics.
Exploring Trends and Niches
It’s essential to think beyond what everyone else is doing. Assessing the trending products in the market can help pinpoint lucrative directions. Maybe personalized pet products or custom kitchenware are in demand—find those unique opportunities and capitalize on them.
Selling Your Sublimation Creations
Setting Up an Online Store
Having your own corner on the web is like securing a prime booth at a craft fair—only bigger. Platforms like Etsy, Shopify, or even a self-hosted site can serve as our storefront. Each comes with its pros and cons, so picking one depends on our comfort level with technology and our vision for customer interaction.
Photographing Your Products
With our online store ready, it’s showtime for our products. Images can make or break online sales. Using a good camera and taking photos in natural lighting will help us portray our items in their best light. Remember, the trick is to make the potential customer feel they can touch and experience your product through the screen.
Crafting Descriptions That Sell
While a picture is worth a thousand words, a well-crafted description can add the nuance those thousand words might miss. Focus on highlighting the material quality, printing method, and any personalization options. It’s almost like penning a little love letter about why someone would adore and need this product.
Utilizing Social Media for Promotion
Social media platforms like Instagram or Pinterest are superb for visual-centric businesses. By sharing our products, behind-the-scenes creation processes, and engaging with potential customers, we can create a loyal community of followers.
Pricing and Managing Logistics
Determining the Right Price
Finding the sweet spot between covering costs and making a profit involves a little number crunching. Calculate the cost of materials, time spent on creating each item, and factor in market prices. This ensures we’re competitive while also valuing our own effort.
Handling Shipping and Packaging
Shipping is the bridge between our studio and the customer’s hands. Choose packaging that protects our products while minimizing costs. Reliable shipping partners ensure the items arrive promptly and safely. Including a thank-you note can add a personal touch that sets us apart.
Customer Service and Retention
Amazing customer service is where our small enterprise builds its reputation. Respond promptly to inquiries, handle complaints with grace, and always seek constructive feedback. Once we’ve developed trust and satisfaction, loyal customers will not only return but also recommend us to others.
Conclusion: Our Creative Journey from Setup to Sale
Stepping into the sublimation world offers endless possibilities for creative expression and business opportunities. From understanding the basics and setting up our workspace to designing, printing, and finally selling, each step in this process fosters immense satisfaction.
Remember, while the beginning might feel like uncharted territory, with curiosity and perseverance, creating our custom items becomes an art—one where each product tells the story of our journey from setup to the very first sale. Let’s continue to experiment, learn from mistakes, and find the distinctive elements that make our sublimation printing adventure uniquely ours.