Have you ever wanted a machine that prints so fast you start to suspect it’s judging your procrastination?


Why I Chose This Printer for My Workshop Life
I didn’t adopt the Creality Ender 5 Max because I needed more chaos. I already had that. I chose it because I was tired of stitching together big prints like a guilt-ridden tailor, and because every time I waited hours for a small bracket, I wondered if I would live long enough to see the finished result. A large-format printer with claimed speeds up to 700 mm/s sounded like a love letter to my impatient heart. Add a 64-point auto-leveling system, a 300°C capability, a 1000W heatbed, and linear rails for precision, and I felt like this printer was offering to meet me halfway on my dreams and my attention span.

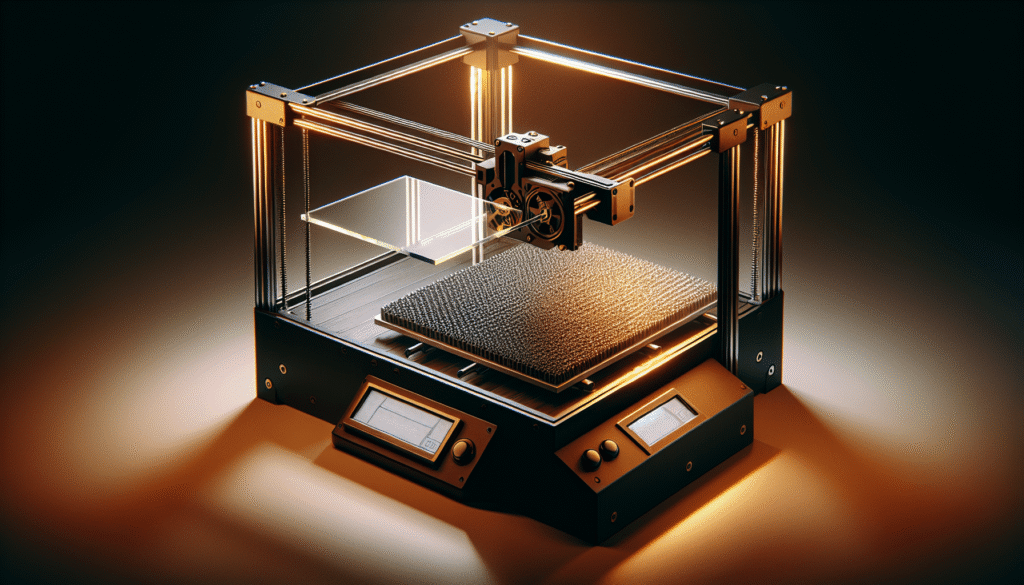
Creality Ender 5 Max 3D Printer, 3D Printing Machine with 700mm/s High-Speed Printing, 400 * 400 * 400 Large Print Area, 64-Point Auto Leveling 300℃ High Temp Precise Linear Rail
$749.00 In Stock
The Big Promises That Got My Attention
When a product shows up with a build volume of 400 × 400 × 400 mm and promises head-turning speed, I perk up. I envision helmets, cosplay parts in one piece, a chessboard the size of my kitchen table, and enough organizer bins to bring my junk drawer to its knees. This machine doesn’t whisper; it announces itself like a neighbor with a drum kit. But beneath the theatrics, I quickly realized it offers practical strengths—especially if I need big prints, batch production, or first layers that don’t require me to hold my breath.
The Elevator Pitch as I Heard It
I read “700 mm/s,” “64-point auto-leveling,” “300°C high temp,” “400 cube build volume,” and “1000W heatbed” and felt a familiar cocktail of optimism and caution. Speed matters, but only if the results aren’t a melted impression of a real object. Yet the linear rail system and beefier X/Y motors (42-76 steppers) made me think this one might be serious about both speed and precision. Also, the three-color status light visible from 10 meters sounded like something I didn’t know I needed until I imagined my future self glancing across the room and not standing up.
Unboxing and Setup: The Part Where I Pretend to Be Calm
The Ender 5 Max arrived like an oversized promise. I set aside a few hours for assembly because I’ve learned that any printer described as “quick to set up” will demand at least one trip to find a hex key you swear you left “right there.”
Assembly and First Encounter
The frame components felt solid, and the motion system—anchored by precise linear rail—was reassuring in a way I wish more of my life choices were. I appreciate printers that feel rigid, and this one is a flex-free refrigerator of a machine. The gantry glides like it knows it’s being watched. The instructions were clear enough that I didn’t need to plead with a stranger on the internet for help (a first). And when I powered it on, the status light twinkled its color-coded truth from across the room like a traffic light for my crafts.
The Immediate Wins
- The 64-point fully automatic leveling felt like a spa day for my nerves. I watched it probe the bed like a surveying robot gently judging my past life choices. Getting a clean first layer without shims, prayers, and a feeler gauge made me reconsider everything I believed about “manual leveling builds character.”
- The heatbed is 1000W, which is the 3D printing equivalent of a strong coffee. It shot the aluminum alloy bed to 80°C in roughly 200 seconds, with a maximum of 100°C. For PLA, PETG, PA, ABS, and ASA, this meant less pacing and more printing. For me, this meant feeling both powerful and slightly terrified at how fast it heated—like discovering your toaster could also recharge a car.
Build Quality: Square, Sturdy, and Serious
This printer’s frame is the story here. The industrial stiffness makes everything else work better. A big build volume is only a gift if the machine can keep parts square beneath it. The Ender 5 Max holds its shape like a stubborn grandparent who refuses to sit in the back seat.
Linear Rails and Motion Accuracy
Linear rails on the motion system are the grown-up way to move a print head. I felt a literal difference when I jogged the axes. There’s less slop and more confidence—a trait I wish I could borrow for conversations with contractors. Paired with the 42-76 stepper motors on both X and Y, there’s torque and predictability. The result is tighter lines, better accuracy on big moves, and fewer mysteries when I evaluate defects.
Bed Construction and Heating
The bed is an aluminum alloy slab warmed by that 1000W heater. It’s a serious platform. At this size, flatness and heat distribution are not luxuries; they’re the whole game. Even heating across a large area matters, and the combination of power plus 64-point mesh bed leveling produced the kind of first layers I used to see in commercials and assume were faked. With this, they weren’t.
That Three-Color Status Light
The 3-color indicator light sounds small until I had multiple printers running. Being able to look up from across the room and know if it’s heating, printing, or finished meant fewer steps, fewer “what’s that noise?” moments, and less of me opening the enclosure door to interrupt the magic.
Speed: The Tasteful Way to Go Fast
Is it fast? Yes. Does it hit 700 mm/s for everything? Not in my world, and not if I want prints I can display without caveats. This is normal. Speeds that high are typically for infill or carefully chosen geometries. What matters: this machine is equipped with the mechanics and power to go fast where it counts.
My Real-World Numbers
For functional parts and visible surfaces, I found happiness around:
- Perimeters: 150–250 mm/s (adjust depending on geometry)
- Infill: 250–500 mm/s
- Travel moves: as high as I can push without stringing or ringing
Acceleration and jerk settings matter more than raw speed. I focused on tuning those to match the mass of the toolhead and the constraints of the frame. The linear rails let me push harder than common belt-and-wheel designs. To me, the claim of 700 mm/s isn’t a constant; it’s permission to sprint when it makes sense. The bigger win is that the printer stays accurate when going fast, and that saved me hours on batch runs.
The First Layer: The Quiet Hero
I would nominate the 64-point auto-leveling system for an award if I ran an award show. It measures the bed at 64 points and compensates dynamically. The result is a first layer that behaves like the ground is level, even if it isn’t. On a platform this big, that’s the difference between sticking and sadness.
My Little Rituals for First-Layer Success
- Preheat the bed to printing temperature and wait a couple extra minutes. Big beds lag. Patience is adhesive.
- Clean with isopropyl alcohol. If I forget, the printer remembers, and reminds me with curling edges.
- Start the first layer slower than ego allows. 20–30 mm/s and a generous line width always pay off.
Big Build Volume: The Projects I Finally Said Yes To
The 400 × 400 × 400 mm build volume let me print things I used to avoid. I stopped splitting helmets into awkward puzzle pieces. I printed plant pots big enough to make my windowsill look purposeful. I created storage bins with built-in labels, and I even made a lampshade that didn’t require interpretive dance to assemble.
Batch Jobs vs. One-Piece Wonders
- Batch printing small parts: I filled the bed with brackets and knobs like a candy tray. The machine didn’t flinch.
- Large one-offs: Long jobs (20–40 hours) gain most from the speed. When you cut a 40-hour print to 28 because you can push infill, you feel it in your schedule.
Materials: What Worked For Me
The hotend reaching 300°C opened the door to a healthy list of plastics: PLA, PETG, PA (nylon), ABS, and ASA. The bed hitting up to 100°C helped with adhesion across this range.
Temperature and Practical Tips
- PLA: Bed 55–60°C, nozzle 200–220°C. Big parts with sharp corners still benefit from a brim or lower cooling early on.
- PETG: Bed 70–85°C, nozzle 230–250°C. Watch retraction—this material loves to bring souvenirs.
- ABS/ASA: Bed 90–100°C, nozzle 240–260°C. Enclosure recommended for large parts, or at least a draft shield. On an open frame, tall ABS prints may fight you.
- PA (Nylon): Bed 70–90°C, nozzle 250–280°C. Keep it dry—bone dry. Nylon treats humidity like a buffet.
I don’t use exotic composites for every job, but the 300°C hotend means I can when I need stiffness or temperature resistance. The important note: this is a powerhouse for practical plastics, and I never felt stuck wishing for more temperature headroom for the materials I actually print.
Print Quality: The Part That Matters to My Eyes
Speed and size are nothing without quality. I care about layer lines, flow consistency, and clean corners. The linear rail motion system paid dividends here. It controlled ringing better than the average large-format printer and let me print with higher accelerations before artifacts showed up.
Layer Consistency and Corners
With proper E-steps and flow tuning, I got smooth vertical walls that didn’t ripple when the printer changed directions. Corners looked crisp at sensible accelerations. Bridging was above average when I left a little extra cooling—though at large sizes, I tried to avoid heroic bridges and instead added light supports that saved me from heartbreak.
Dimensional Accuracy
On test cubes and calibration objects, I found X/Y accuracy easy to tune and maintain. The frame stiffness helps. The bed mesh made Z consistency less of a chore. For tight tolerances, I used horizontal expansion settings in my slicer to dial in fits for press-in bearings and snap assemblies.
The 3-Color Status Light: The Nonchalant Genius
The indicator visible from up to 10 meters turned out to be a daily quality-of-life upgrade. I could glance up while typing and know if the machine was heating, printing, or waiting for me to admire it. In a room with multiple machines, this small signal spared me from being a helicopter parent. I don’t need an app notification when a tiny traffic light already tattles.

Heat-Up Time: Less Waiting, More Printing
Going from “cold room” to “ready to print” is faster with the 1000W bed. Getting to 80°C in about 200 seconds felt like someone finally respected my desire to start now. The power means consistent adhesion over a large surface and less time sparring with corners that peel up out of stubborn pride.
Power Awareness
This kind of heater will show up on your power bill if you print constantly at higher bed temps. For me, the time saved was worth it, but I got used to planning prints so the bed spent fewer hours idling hot while I hunted for a missing file or changed filament.
Noise, Vibration, and Where to Put It
I didn’t buy this machine expecting it to whisper. Yet the noise was reasonable for a printer this large and fast. The linear motion tempered rattles, and the frame didn’t shimmy like some smaller models with less mass. On high-speed travel moves, it announces itself, but not in a way that made me question my life choices.
Placement and Surface
- Put it on a sturdy table. A wobbly surface becomes a dance partner you don’t want.
- Keep airflow gentle, especially for ABS and ASA; drafts are saboteurs.
- Give yourself space to access the bed and the gantry for maintenance.
Maintenance: My Agreement With the Machine
Large printers reward regular attention. This one was no exception, but the maintenance was easy to schedule and do.
My Routine
- Linear rails: Light lubrication every few weeks of use. A single drop goes a long way.
- Belts: Check tension monthly. I prefer firm but not guitar-string tight.
- Nozzle: Swap proactively if I see extrusion inconsistencies. At high speeds, worn nozzles confess themselves quickly.
- Bed surface: Clean with isopropyl alcohol frequently. On PETG, I use a slight layer of glue stick to avoid overly passionate bonding.
Spare Parts and Upkeep
I kept spare nozzles and a backup hotend heater/thermistor kit, not because I distrusted the machine, but because I distrust my own tendency to push schedules. When something wears out mid-project, the only cure I’ve found is preparation.
Software and Slicer Settings That Helped Me
I used popular slicers (Cura and PrusaSlicer both did the job). The trick wasn’t finding a perfect profile—it was tailoring speeds and accelerations to match the mass and capability of this printer. When I adopted sane acceleration values, the queue in my workshop went from “waiting room” to “checkout counter.”
Baseline Slicer Choices I Like
- Wall speed: a bit slower than infill to keep surfaces pretty
- Infill: aggressive when hidden
- Acceleration: moderate for walls, higher for infill and travel
- Line width: a hair wider than nozzle diameter for stronger layers
- First layer speed: deliberately slow; it pays me back over the next 20 hours
Reliability on Long Prints
The first time I ran a 30-hour job, I hovered like a nervous parent. I learned to trust the machine after a few successful runs. The combination of bed leveling, heating performance, and steady mechanics made long prints boring in the best way. On oversized objects, I added a brim and checked the first layers like a pilgrim waiting for a sign. Once the base was down, I relaxed.
What I’d Improve If Granted Three Wishes
- Better stock guidance on acceleration and jerk settings for high-speed printing. These settings can transform a job from “serviceable” to “chef’s kiss,” and they’re worth more clarity.
- A standardized enclosure option. This printer can do ABS and ASA, and it deserves a matching coat to keep drafts away.
- A filament path that’s more forgiving with flexible materials. It’s not advertised as a TPU champ, and while I did print TPU slowly, I wouldn’t buy this machine specifically for flexible filaments.
Who This Printer Suits Best
- Me, when I want large functional parts without splitting them.
- People who batch print organizers, brackets, fixtures, and props.
- Anyone who values a fast heat-up time, a reliable first layer, and an extra-large build volume.
- Users who want to print PA (nylon), ABS, and ASA with a plan for environmental control, especially on larger items.
Where It Might Be Overkill
- If you only print tiny trinkets and are afraid of a printer taller than your coffee machine.
- If your projects rarely exceed 220 mm and you prefer a compact footprint.
- If you need silent operation in a bedroom. This is better in a workspace or dedicated corner.
The Truth About the “700 mm/s” Claim
I can hit high speeds, but quality printing is a balancing act. On infill and certain geometries, I enjoyed the headroom. On visible walls and details, I pulled back. The important part is that the machine can handle fast moves without losing its composure. For me, the number isn’t a lie; it’s a ceiling that gives me freedom to choose what to trade.
The Long Print Test: My Helmet Moment
I printed a full-size helmet in one piece because I’m a person who makes choices and then seeks validation from plastic objects. With PLA, a slow first layer, and cautious perimeters, it finished in far less time than my older machines would allow. There were no layer shifts, no tragic warping, and I didn’t have to glue halves together like a desperate dentist. This was the moment the Ender 5 Max proved its purpose to me.

A Table to Break Down What Mattered to Me
| Feature | What It Is | Why I Care | My Tip |
|---|---|---|---|
| Build volume | 400 × 400 × 400 mm | One-piece helmets, giant props, batch parts | Add a brim for large flat items; drafts are enemies |
| Max speed | Up to 700 mm/s | Headroom for fast infill and travel | Prioritize acceleration tuning over chasing raw speed |
| X/Y motors | 42-76 stepper motors | Strong, consistent motion control | Recheck belt tension monthly for best precision |
| Leveling | 64-point auto-leveling | Uniform first layer across a huge bed | Preheat before probing for the most accurate mesh |
| Bed heater | 1000W aluminum alloy bed | Rapid heating, stable adhesion | Wait a few extra minutes for the bed to equilibrate |
| Bed temp range | To 100°C (80°C in ~200s) | Supports PLA, PETG, PA, ABS, ASA | For ABS/ASA: shelter from drafts whenever possible |
| Hotend temp | Up to 300°C | Lets me use higher-temp materials | Dry nylon thoroughly; print from a dry box |
| Motion system | Precise linear rail | Smooth, accurate movement at speed | Light lubrication keeps it buttery and quiet |
| Status light | 3-color, visible up to 10 m | I can tell status at a glance | Position the machine so you can see it from your desk |
| Use cases | Big models, batch parts | Less fiddling, more doing | Save sane profiles for each material and project type |
My Favorite Prints So Far
- A single-piece cosplay helmet that looked purpose-built rather than hand-assembled under duress.
- A modular drawer system that made me feel like a person who labels things on purpose.
- A series of brackets that used to take three days across multiple machines, now done in one day on one large bed.
- A light-diffusing lampshade that people think I bought until they touch it and say, “Oh.”
Practical Considerations I Learned the Gentle Way
- Use a slightly thicker initial layer on big prints—0.28 or 0.32 mm. It forgives microscopic bed sins.
- Slow down small islands and narrow towers for cooling. Big machines move big air when they move fast.
- Don’t be shy with brims and rafts for ABS/ASA, especially on large cross-sections.
- Keep filament dry. The larger the print, the more obvious the moisture problem gets.
- Set travel paths to avoid zippers on faces you care about. The faster you go, the more those zippers can gossip.
Safety Habits I Keep
- I don’t leave the room for the first 15 minutes of a large print. It’s the “critical window” when problems love to audition.
- I ensure nothing flammable cuddles up to the bed heaters. 1000W is a lot of love.
- I use a surge protector and keep a smoke detector in the room, not because I don’t trust the machine, but because I trust entropy.
The Emotional Part: How It Changed My Workflow
Before this printer, my week was an endless negotiation between size and time. With the Ender 5 Max, I stopped splitting models reflexively. I batch more. I think bigger. It’s not that I became a different maker; it’s that the machine let me stop pretending small was always smarter. I plan less around “will it fit?” and more around “what’s the best way to print it?”
Problems I Had and How I Solved Them
- Slight ringing on sharp corners at high speeds: I backed down acceleration on outer walls and kept infill fast. Pretty on the outside, speedy on the inside.
- PETG over-adhesion: A whisper of glue stick on the bed made the part release like a polite guest.
- Nylon stringing: I dried the filament like my sanity depended on it. The difference was night and day.
- Large ABS part trying to warp: I used an enclosure and added gradual cooling only near the very top layers. Warping gave up.
The Unseen Benefit: Confidence in Long Jobs
There’s something soothing about a printer that can babysit itself. The 64-point mesh and consistent heat gave me that. The status light meant I didn’t pace. The linear rails meant I wasn’t constantly second-guessing the squaredness of the frame. This all adds up to the experience of a machine that lets me think about the object, not the process, which is how tools should feel.
My Wish List of Prints I Can Now Attempt Without Fear
- Oversized architectural models with single-piece roofs that don’t sag like a tent after rain.
- Big cosplay armor panels that match each other because they were printed on the same bed with consistent settings.
- Custom storage bins to fit under every shelf in my life, because I’m on a quest to put everything in a labeled box like a museum curator of nonsense.
- One-piece RC car chassis plates, because I wanted to stop pretending a spliced joint was “part of the design.”
Pros and Cons As I Live Them
What I Love
- Truly useful build volume that actually stays flat and level thanks to 64-point mesh.
- High-temp capability up to 300°C that lets me use real-world materials like ABS, ASA, and PA when needed.
- Linear rail motion that produces clean surfaces and sharp corners at speeds that would embarrass lesser machines.
- A 1000W bed that shortens warm-ups and holds adhesion over large surfaces.
- That 3-color status light—the little sanity helper I didn’t know I needed.
What Makes Me Mutter
- I wish for official, detailed guidance on aggressive acceleration/jerk configs matched to typical nozzle sizes.
- An enclosure path would make ABS/ASA use more accessible, especially for tall prints.
- Not the quietest kid in the class at full speed, though the result justifies the hum.
If You’re New to Large-Format Printing
Start with PLA to learn the machine. Fill the bed with a grid of simple parts, or print a single large vase at moderate speeds to see how the motion behaves. Learn how the first layer looks when it is right, and take a photo for comparison. A picture of success is more useful than ten paragraphs of advice. Then graduate to PETG and ABS or ASA with careful environmental control. By the time you attempt nylon, you’ll treat desiccant like a sacred spice.
Why I’m Keeping It on My Main Bench
This isn’t a novelty machine for me; it’s become a daily tool. The speed and size mean I can say yes to projects without carving them into parts. The quality of motion and the thorough bed mapping mean I don’t roll a dice with each print. And the heat-up time makes me feel like my time matters, which is rare and priceless in hobby-adjacent activities.
My Bottom Line in Plain Words
The Creality Ender 5 Max 3D Printer is a workhorse with theater. It’s fast when I need it, precise enough to make me proud, and big enough to change how I plan projects. The 64-point auto-leveling gives me perfect starts, the 1000W bed slashes waiting, and the linear rails keep the results tidy even when I nudge the speed. The large 400 × 400 × 400 mm build volume isn’t just a statistic; it’s an everyday luxury that saves me from stitching and sanding seams I used to pretend were “design choices.”
If you want a large-format FDM printer that can actually keep up with ambitious schedules, handle common engineering filaments, and start reliably without endless tinkering, this machine earns its spot. I came for the speed, stayed for the first layers, and kept it because it prints the way I wish I worked: fast, steady, and unapologetically big.
Practical Tips I Wish I Had on Day One
- Save separate profiles for “Showpiece,” “Functional Fast,” and “Prototype,” and switch based on what actually matters that day.
- Use brims for anything with sharp corners larger than your hand, especially with ABS/ASA.
- Keep an eye on belt tension after the first few long prints; things settle.
- Don’t chase the headline speed for everything. Pick your battles: fast infill, careful walls.
- Keep a microfiber cloth and IPA by the printer. Cleanliness is next to stickiness.
A Final Word From My Bench
I measure tools by whether they earn their space. This one did, immediately. Between the auto-leveling, the muscular heating, and the linear rails that make everything feel deliberate, the Ender 5 Max became the printer I reach for first when the part matters and the deadline is too real. It hasn’t made me more patient, but it has made my impatience look well managed, and at this point in my life, that’s a miracle I’m happy to take.
Disclosure: As an Amazon Associate, I earn from qualifying purchases.