Have you ever watched a print turn its head like a parrot and flash you a different color, and thought, is this magic or just good filament?
Why I Chose a Blue-Green Silk Filament Instead of Being Sensible
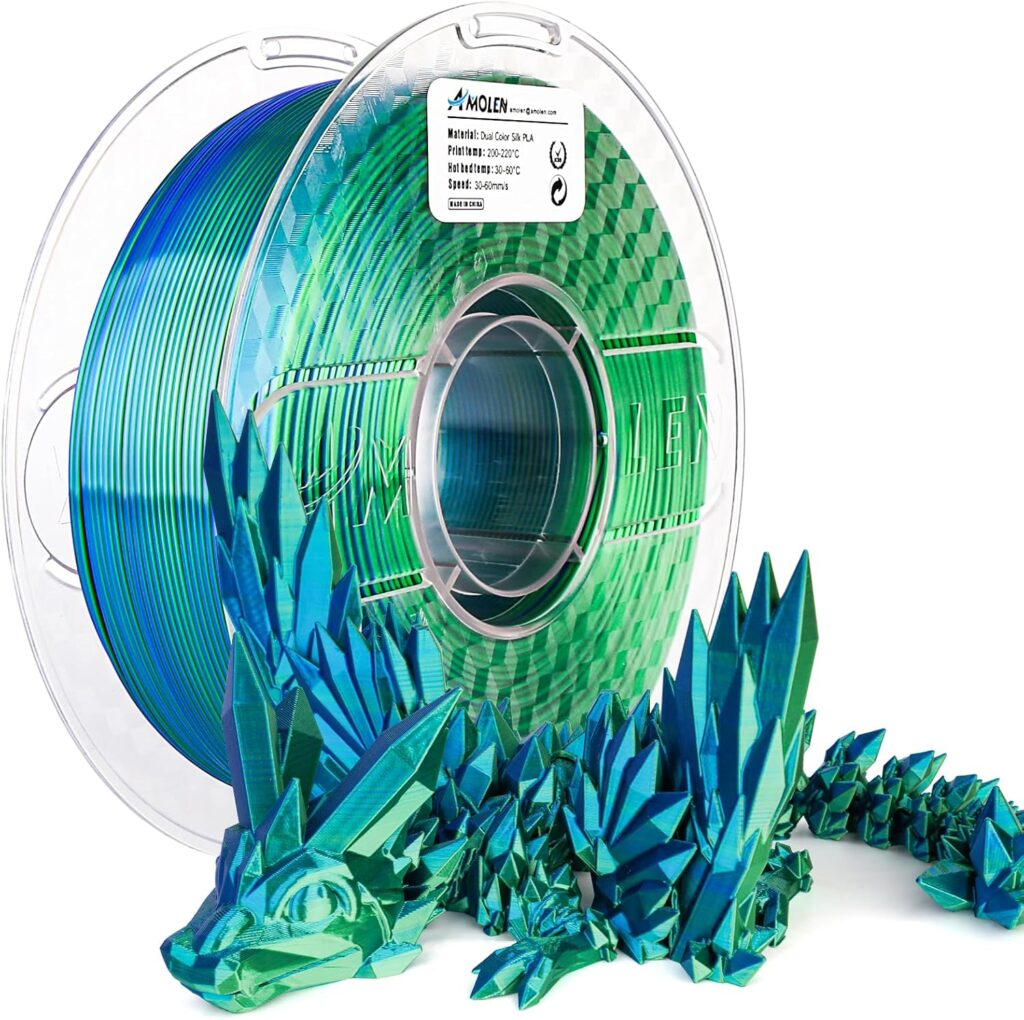
I’ll admit it: I have a weakness for materials that show off. The AMOLEN Silk PLA 3D Printer Filament, Silk Dual Color Blue Green PLA Filament 1.75mm, Shiny Coextrusion PLA Filament, Color Change 3D Printing Filament 1KG/2.2lb is a show-off in the best way. I picked it because I wanted prints that look like they hired a lighting designer and a makeup artist, and I wanted to get that without spending days sanding or polishing.
I’ve used a lot of standard PLA that behaves like a dependable accountant—predictable, flat color, verified returns—but sometimes I want something that turns heads. This spool promised glossy, dual-color magic—blue on one angle, green on another—without extra finishing. Beginner and expert-friendly? Bold finish out of the box? I was in.
AMOLEN Silk PLA 3D Printer Filament, Silk Dual Color Blue Green PLA Filament 1.75mm, Shiny Coextrusion PLA Filament, Color Change 3D Printing Filament 1KG/2.2lb
$27.99 In Stock
Unboxing and First Impressions
When I opened the box, I found the filament vacuum-sealed with a desiccant pack, which always makes me feel like I’m buying a nice ham. The spool itself was cleanly wound, no obvious crossovers, and the label was legible without squinting like a detective at a clue. The blue-green sheen in filament form is subtle; it really kicks in once it’s laid down in layers.
I like when a brand signals “we care” through presentation, and this felt considered. The spool rolled smoothly, and the filament had a uniform thickness. No brittle bits, no visible kinks. It’s the small stuff that reassures me I won’t be spending the evening prying a clogged nozzle like a dentist.
The Dual-Color Trick: Why the Two Sides Look Different
Silk “coextrusion” PLA layers two colors in a way that makes the surface look different depending on which side you’re seeing and where the light hits. With this AMOLEN spool, one side reads blue and the other green, and the sheen sells the effect. You rotate a print, and the color flips like a holographic sticker from the 90s. It’s oddly gratifying.
What surprised me is how much I could control the color swap by rotating the model on the build plate. Turn the model 90 degrees, and suddenly the “front” is green instead of blue. It’s not just luck—it’s geometry and the way the extruded lines reflect light. If you like dialing in visuals, this is catnip.
Printer Setup and Settings That Worked for Me
With silk PLA, I go a little slower and cooler than with standard PLA. The polymers that give that glossy finish can be a bit stringy if you go too hot. Here’s what worked well for me across a Prusa MK3S+ and an Ender 3 (with a metal extruder upgrade):
- Nozzle: 0.4 mm brass
- Nozzle temperature: 200–210°C (sweet spot: 205°C on my Prusa, 208°C on my Ender)
- Bed temperature: 55–60°C on PEI or glass (I used 60°C on glass, 55°C on textured PEI)
- Print speed: 35–55 mm/s (I stayed around 40–45 mm/s for exterior walls to keep that glossy finish clean)
- Retraction:
- Direct drive: 0.8–1.2 mm at 25 mm/s
- Bowden: 4–6 mm at 35–45 mm/s
- Cooling fan: 80–100% after the first two layers (I used 100% for sharp detail and that crisp silk)
- Layer height: 0.2 mm for general prints; 0.12–0.16 mm for very smooth vases or figurines
- Flow/Extrusion multiplier: 95–100% (I ended up at 97% for the shiniest surface)
- Build plate adhesion: Skirt or brim for tall, narrow pieces; otherwise not necessary
- Supports: If possible, reorient to avoid exterior supports—they can dull the sheen where you remove them
I imported a profile labeled “silk PLA” in PrusaSlicer and adjusted temperatures slightly. If you’re using Cura, enabling “Combing Mode: Within Infill” helps hide travel lines, and “Z Seam Alignment: Sharpest Corner” can tuck the seam into an interior edge.
My Personal Settings Snapshot
- Printer: Prusa MK3S+
- 0.4 mm nozzle
- 205°C nozzle / 55°C bed
- 0.2 mm layer height
- 45 mm/s print speed (25 mm/s outer walls)
- 1.0 mm retraction at 25 mm/s
- 100% fan, after layer 2
On the Ender 3 V2 with a Bowden setup, I nudged the nozzle to 208°C and retraction to 5.2 mm. Both machines printed smoothly once tuned.
First Prints: What I Tried and What Surprised Me
I started with the usual suspects: a calibration cube, a Benchy, and a curved vase mode spiral. Then I printed a small dragon and a shell-shaped bowl, because if a filament promises drama, I’m going to give it a stage.
- The calibration cube was excellent for dialing in lengthwise color. One face blue, the next green, a subtle gradient on the edges—like an art school final that actually worked out.
- The Benchy turned out shiny, with only slight zits around the seam when I forgot to slow outer walls. Rerunning with lower outer speed gave me a near showroom gloss.
- Vase mode was the star. The silk effect in spiralized prints is gorgeous—glossy, continuous, and good enough that I started imagining a house full of faux-luxury plant pots I don’t need.
- The dragon’s scales caught highlights like brushed metal. Plus, the color flip down its spine drew attention to the details even at 0.2 mm layers.
What caught me off guard was how much I could choreograph which side got the green and which got the blue by rotating the model. It’s a simple trick with outsized results.
Surface Finish and Detail: The Shine That Steals the Show
This filament doesn’t bury details the way some overly glossy materials do. I could still see crisp layers and small features, especially on faces that weren’t abrasively angled. The shine is like satin: high gloss but not mirror-like enough to lose texture. The result is that everything looks a little more expensive than it has any right to be.
Layer lines were gentler to the eye than in matte prints. The silk finish creates a soft, reflective transition between layers, which makes curves look smoother and corners pop just enough.
Dimensional Accuracy: Does It Hit the Numbers?
AMOLEN lists 1.75 mm diameter with a tolerance of +/- 0.02 mm, and that looked about right in practice. My digital calipers spotted 1.74–1.76 mm on multiple points of the spool. That consistency matters when you’re trying to avoid under- or over-extrusion.
On a 20 mm calibration cube:
- X measured 20.03 mm
- Y measured 20.01 mm
- Z measured 20.00 mm
Once I tuned flow to 97%, I hit closer to 20.00–20.01 mm across the board. If you’re printing parts that need to mate with other components, it’s predictable enough to trust, especially for non-mechanical pieces.
Strength and Functionality: Where It Shines and Where It Doesn’t
Silk PLA is for show. It’s as if someone told ordinary PLA, “You’re going to be photographed,” and it spent a little extra time on its hair. That said, it’s slightly more brittle than a no-frills PLA, and I wouldn’t use it for parts that will be squeezed, flexed, or thrown in a hot car.
For display models, decor, cosplay props, centerpieces, seasonal ornaments, and the kind of functional-ish items that won’t bear weight (think pen cups, cable holders, and desk whatnots), it’s perfect. Just don’t use it for brackets in your garage unless your hobby is watching things drop.
Reliability: Feeding, Warping, and Clogging
In terms of feeding, this spool was drama-free. No bubbles, no visible manufacturing flaws, and no mid-print tangles. I didn’t encounter any clogs, which I credit to a clean nozzle and the filament’s consistent diameter.
Warping was basically a non-issue on medium footprint prints, especially with a 55–60°C bed and a touch of glue stick on glass. On PEI, I printed straight on the plate after wiping with isopropyl alcohol. For tall, skinny parts, I added a brim just to be safe.
Stringing was low once I dialed temperatures and retraction. At 205–208°C with healthy cooling, I was able to keep even thin spires crisp.
The Color Show: Blue vs. Green and How to Control It
The fun is in the flip. The glossy shimmer amplifies how the two colors present themselves. If you orient a model so the “front” faces a certain axis on the build plate, you can choose whether it shows blue or green when viewed head-on.
The trick is to rotate the model in your slicer so that the external walls receive extrusion lines oriented to catch the right color at the viewing angle you want. I found that a 90-degree turn can turn a blue-forward print into a green-forward one, which feels like cheating but with fewer consequences.
Quick Reference: Settings, Ranges, and Notes
I made myself a cheat sheet while tuning, and it saved me from fiddling more than necessary.
| Parameter | My Setting | Range That Worked | Notes |
|---|---|---|---|
| Nozzle Temp | 205–208°C | 195–215°C | Too hot = stringing; too cool = under-extrusion |
| Bed Temp | 55–60°C | 50–60°C | Glass likes 60°C with glue; PEI fine at 55°C |
| Speed | 40–45 mm/s | 35–55 mm/s | Slow outer walls for shine: 25–30 mm/s |
| Layer Height | 0.2 mm | 0.12–0.28 mm | Finer for vases/figurines |
| Retraction (Direct) | 1.0 mm @ 25 mm/s | 0.8–1.2 mm | Keep travel short to reduce zits |
| Retraction (Bowden) | 5.2 mm @ 40 mm/s | 4–6 mm | Adjust if stringing persists |
| Fan | 100% after layer 2 | 80–100% | More fan = crisper details |
| Flow | 97% | 95–100% | Slight reduction improves gloss |
Compared to Other Filaments I’ve Used
Compared to standard PLA, this silk dual color is more theatrical. It’s not a workhorse material—you use it when you want to be remembered. Versus matte PLA, it hides layer lines better thanks to reflectivity.
Against PETG, it wins in gloss and ease of printing but loses on toughness and heat resistance. TPU is not even in the same conversation—great for flexibility, but the shine’s not comparable. Versus other silk PLAs I’ve tried, AMOLEN’s coextrusion color flip is pronounced and consistent around the spool; I didn’t hit any weird patches where the color suddenly went muddy.
As for multi-color alternatives like multi-material units or filament swapping mid-print, those are more precise but also more fussy. This filament gives a two-color effect with zero hardware changes. It’s smarter than it has any right to be for the effort required.
Best Use Cases: When This Filament Feels Like a Party Trick
Here’s where it absolutely sings:
- Seasonal decor and ornaments: Christmas baubles, Easter eggs, tree toppers, snowflakes that look like they’re made from candy.
- Cosplay and costume pieces: Helmets, emblems, belt buckles, gauntlets—particularly where light hits curved surfaces.
- Desk accessories: Pencil cups, headphone stands, cable organizers—things you keep seeing at an angle.
- Gifts: Vases, jewelry dishes, keycaps, small statuettes—the “how did you color that?” kind of present.
- Event signage or room decor: Letters, number stands, menu holders that catch light and smugly outshine everything else on the table.
It’s also a great way to quickly prototype color-focused designs without having to commit to multi-material setups. The wow-factor-to-effort ratio is unusually good.
Tips to Maximize the Color Flip
I learned a few tricks that improved the effect:
- Rotate the model: Spin it 90 degrees to swap which side reads blue or green. Print small test chips to preview.
- Favor smooth curves: Cylinders, domes, spirals, and rounded surfaces show off the shimmer more dramatically.
- Use higher wall count: Two to three perimeters make the sheen richer without over-thickening delicate features.
- Keep outer walls slow: 25–30 mm/s helps lay down glossy lines that don’t scuff.
- Hide seams: Place the seam at the back or in a corner. A well-placed seam keeps the illusion clean from the front.
- Avoid sanding: Sanding dulls the silk finish. If you must, clear coat after to bring back some shine.
Troubleshooting: If Things Go Sideways
If you get stringing: Drop the nozzle temperature by 3–5°C, increase retraction slightly, and ensure your fan is at least 80% after the first few layers. Also, travel moves over infill help minimize visible wisps.
If you see under-extrusion or gaps: Raise the nozzle temp a touch (2–3°C), check that your filament path isn’t snagged, and verify that the filament diameter is correctly set to 1.75 mm in the slicer.
If your glossy finish looks “matte” in spots: Wipe the nozzle; residue can scuff the surface as it passes. Slow the outer wall speed, lower flow to 97%, and make sure your fan is actually spinning.
If layers split on tall prints: It’s rare with PLA, but if you see it, reduce cooling a bit (80–90%), increase nozzle temp by 2–4°C, and add a brim for stability.
If bed adhesion is fussy: On glass, a light glue stick layer and 60°C bed work wonders. On PEI, a clean surface (IPA wipe) and 55–60°C bed are usually enough. Let the bed cool before removal—the part should self-release.
Post-Processing: What Works and What Ruins the Shine
I avoid sanding because the silk sheen lives in the intact surface. If you must smooth, use very fine grit (1000+), then a gloss clear coat to restore shine. Paint adheres fine with a light scuff and primer, but honestly, the whole point here is the glamorous finish, so I left the paint in the drawer.
Glue: Cyanoacrylate (super glue) or epoxy both work for multi-part assemblies. A tiny dab is all you need, and tape holds while curing to keep the seam aligned.
Threads: If you’re inserting heat-set inserts, keep temps low and go slow—PLA softens fast, and silk PLA more so. I sometimes pre-drill to a size that allows a gentle push fit.
Bed Adhesion and Removal: Save Your Patience and Your Part
I’ve had excellent results on:
- Glass with glue stick at 60°C bed, letting the part cool to room temp so it releases on its own.
- Smooth PEI at 55–60°C after wiping with isopropyl alcohol.
- Textured PEI works too, though it slightly diffuses the sheen on the base. If you’re picky about the bottom shine, use glass.
One more thing: don’t pry when the print is still warm. Letting it cool saves your fingernails, your scraper, and your mood.
Environmental and Safety Notes
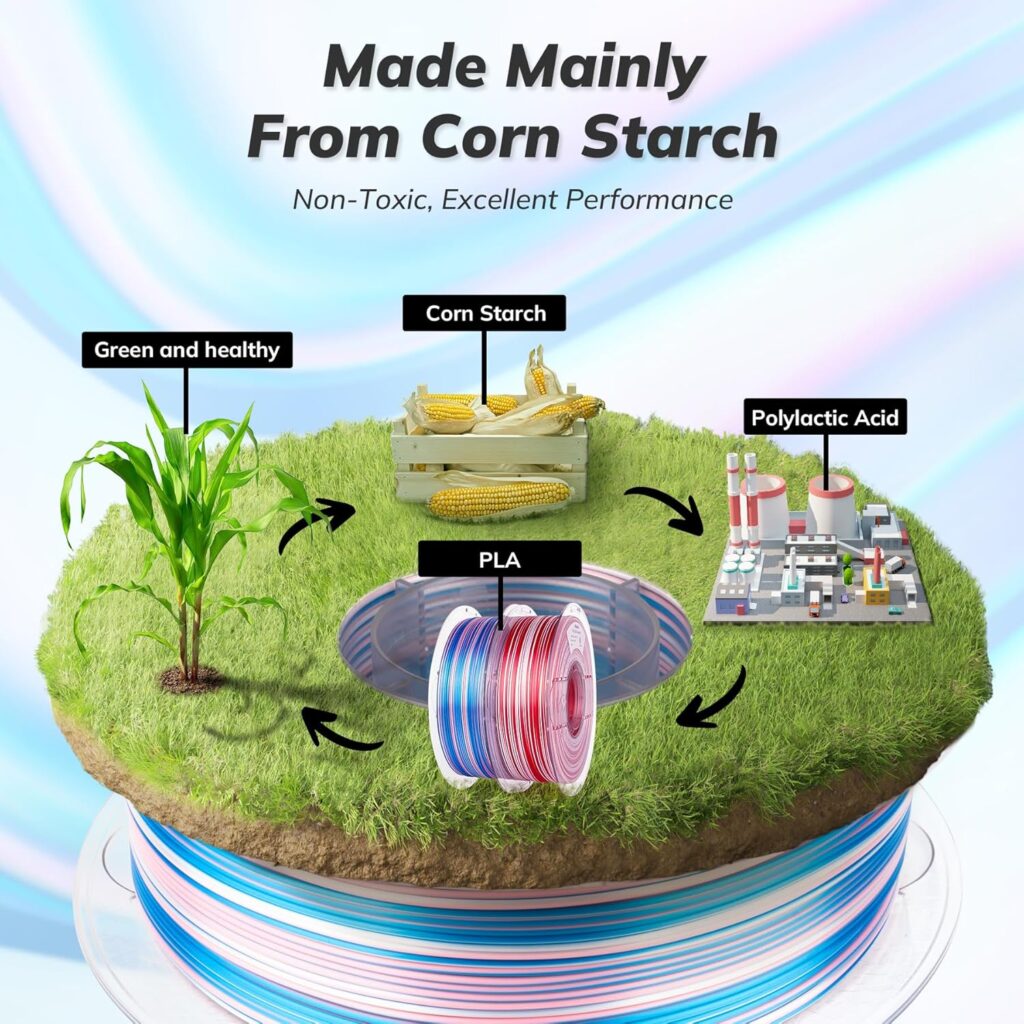
This is PLA, which comes from plant-based sources like corn starch, but that doesn’t mean it’s compostable in your backyard. Dispose of it like regular plastic unless you have access to industrial composting that certifies for PLA.
Fumes are mild, but I still print with decent ventilation. PLA is not food-safe unless formulated and processed specifically for that purpose, and the layer lines are bacteria hotels. It’s best to avoid contact with foods and very hot liquids. Also, don’t leave silk PLA parts in prolonged sun or hot cars—heat can deform them.
Storage and Moisture Management
Moisture turns silk PLA from glossy to moody. I store my spool in a sealed container with silica gel packets. If you hear extra popping when extruding or see wispy stringing even at low temps, dry the filament.
Drying method: 45–50°C for 4–6 hours in a filament dryer or an oven with accurate control. Keep an eye on it; an oven that runs hot can warp the spool or over-soften the filament.
Tech Specs Recap at a Glance
Here’s a compact summary of what matters for setup.
| Spec | Detail |
|---|---|
| Material | Silk Dual Color PLA (Coextrusion) |
| Color | Blue / Green, angle-dependent |
| Diameter | 1.75 mm |
| Tolerance | +/- 0.02 mm |
| Net Weight | 1 KG / 2.2 lb |
| Recommended Nozzle | 0.4 mm (brass is fine) |
| Nozzle Temp | ~195–215°C (205–208°C sweet spot for me) |
| Bed Temp | 50–60°C |
| Cooling | 80–100% after first layers |
| Print Speed | 35–55 mm/s (slow outer walls) |
Customer Service and Support
One thing I appreciate is when a company stands by their filament. AMOLEN makes a point of focusing on quality and innovation, and they offer 24/7 customer service with technical guidance. I didn’t need hand-holding, but knowing help exists at unreasonable hours makes me feel less alone with my slicer.
If you hit an actual flaw—like a bad section of filament or an inconsistent spool—document it with photos and reach out. My experience across their spools has been consistent enough that I’d expect a swift resolution.
Value for Money: Where It Lands
Silk dual-color PLA sits above plain PLA in price and below exotic composites or specialty materials. For the effect you get—two-color sheen without multi-material gear—it feels well priced. One spool goes a long way when most of your prints are decorative or medium-sized.
I mentally divide spools into “workhorse” and “showstopper.” This is showstopper stock. I don’t run it for utility parts. I save it for arrivals, gifts, or any print I want people to pick up and turn in their hands while asking questions I can answer with smug restraint.
Limitations You Should Know About
- Not a structural champion: Slightly more brittle than plain PLA. Avoid stressed or load-bearing designs.
- Heat sensitivity: Don’t use for outdoor or car-in-summer applications.
- Supports can mar the finish: Orient prints to minimize supports on visible surfaces.
- Seams are sneaky: Hide them in corners or less visible sides to preserve the illusion.
- Sanding dulls the magic: Clear coat can bring it back, but the original silk finish is best unaltered.
None of these are deal breakers for the category—they’re just the rules of the game with silk-style filaments.
Who I Think Will Love This
- Beginners who want immediate success: It prints easily and looks finished right off the plate.
- Cosplayers and prop-makers: Big surfaces, bold curves, dramatic highlights.
- Crafters and DIYers: Holiday decor, photo props, centerpieces, and personalized gifts.
- Teachers and makerspace mentors: Quick wins that keep students engaged.
- Anyone bored of beige: If your shelf of prints looks sleepy, this wakes it up fast.
Real-World Projects That Made Me Smug
- A shell-inspired vase in vase mode: The color rolled like a wave from blue to green, and I felt like I’d accidentally grown taste.
- A dragon bust: Scales reflected like brushed metal in two tones; I posted photos and got messages asking what sorcery I’d used.
- Holiday ornaments: Snowflakes that changed color when the tree lights blinked. I couldn’t stop rotating them like an easily pleased raccoon.
- A headphone stand: Functional, sure, but it also looked like it was on its way to a nightclub.
Care and Longevity
Treat prints like nice costume jewelry. Keep them out of prolonged sun, off hot appliances, and away from elbows and accidental drops. If they get dusty, a soft microfiber cloth does the trick. If you seal with a gloss clear coat, do a test first; some sprays change the color slightly under certain lighting.
Small Habits That Improved Every Print
- Start with a clean nozzle: Gunk drags and scuffs the glossy surface.
- Cold pull occasionally: Keeps the hot end happy.
- Wipe the bed: Oils from your hands can sabotage adhesion.
- Add a draft shield if your room is breezy: Prevents cooling artifacts.
- Resist changing five variables at once: This is true in printing and, frankly, life.
Frequently Asked Questions I Would Have Asked Myself
Does the filament actually change color?
It doesn’t change color chemically; it presents two colors depending on the angle and light, thanks to how the coextrusion lays down the hues. Rotate the part, and you’ll see blue from one side and green from another.
Is it hard to print compared to regular PLA?
Not at all. It’s beginner-friendly. Use a slightly lower speed and temperature, plus good cooling, and you’ll get very consistent results.
Can I sand and polish it?
You can, but sanding dulls the silk finish. If you must sand joints, consider a gloss clear coat afterward to bring back shine. I usually design around sanding altogether.
Will it warp without an enclosure?
PLA rarely needs an enclosure, and this filament was stable for me on a 55–60°C bed without curling. Very tall, thin prints may like a brim.
Can I use it for functional parts?
I wouldn’t. It’s better for display and light-duty items. For functional parts, go with PETG, ABS, or a sturdy PLA+.
What nozzle should I use?
A standard 0.4 mm brass nozzle is fine. If you print abrasive filaments in general, swap to hardened steel when needed, but this particular filament isn’t abrasive.
How do I get the “right” side to be green or blue?
Rotate the model in your slicer. A 90-degree rotation often flips which side shows which color. Print a small orientation test if you’re picky.
Is it food-safe?
Assume no. Layer lines harbor bacteria, and most filaments (and the printing process) are not certified for food contact.
Does it absorb moisture?
Yes, like most PLA. Store it with desiccants in a sealed container. If it gets stringy and dull, dry it at 45–50°C for a few hours.
What’s the weight of the spool?
1 KG (2.2 lb) of filament, which is standard and plenty for multiple medium-sized prints or a parade of ornaments.
A Note on Bed Surfaces and Bottom Layers
If you love mirror-gloss bottoms, glass at 60°C with glue stick can produce a reflective base that pairs beautifully with the silk walls. On textured PEI, the base will have a pebble texture, which can be charming in its own way. I often increase bottom layers to three or four and slow the first two layers to 20 mm/s for a flawless foundation.
For Creators Who Sell Prints
If you sell decor or gifts, this filament is a client magnet. The color flip looks premium in photos and even better in person. Include a note for buyers about avoiding heat and direct sunlight, and you’ll save yourself returns. I also recommend a small hangtag explaining the dual-color effect—it turns curiosity into perceived value.
Why This Spool Earned a Spot on My Shelf
A filament earns shelf space by solving a problem or sparking joy. This one does both. It solves the “how do I make this look finished without finishing” problem, and it sparks joy every time a color changes because you breathed on it. The consistency lets me focus on design instead of fussing with settings all night.
The Little Things AMOLEN Got Right
- Tolerance: +/- 0.02 mm, consistent through the prints I did.
- Clean winding: No crossovers or sudden tight loops.
- Smooth feeding: No squeaks, no resistance.
- Clarity of the dual hue: The blue and green are saturated without muddiness.
- Support: Clear access to help, should I need it, which is the filament equivalent of knowing there’s a spare umbrella near the door.
A Few Print Ideas to Steal Shamelessly
- Spiral vases and lamp shades: The color gradient looks hypnotic under light.
- Board game accessories: Tiles and tokens with edges that flash green when you move them.
- Phone stands: A daily-use item that makes you look more pulled together than you are.
- Nameplates and signage: The color shift draws the eye across the text naturally.
- Holiday garlands: Lightweight, repeatable designs that batch-print well.
If You’re New to Silk PLA, Start Here
- Pick a small model with curves: a 60 mm sphere or a spiral cup.
- Use 205–208°C nozzle, 55–60°C bed, 0.2 mm layers, 40 mm/s speed.
- Rotate the model to choose your “front” color.
- Hide seams on the back side.
- Print, admire, reslice with a 90-degree rotation, and print again to see the flip.
That one-two punch teaches you how to aim the effect without a single YouTube rabbit hole.
The Print That Finally Sold Me
I printed a scalloped-edge bowl, the kind you’d put keys in and then never actually use. The lip went green under kitchen light from one side and blue from the other, like it was auditioning for a role as an ocean. It looked as if I’d spent hours finishing it, which I didn’t. That’s the moment this filament graduated from novelty to staple.
Final Verdict
If you want prints that get noticed without extra work, AMOLEN Silk PLA 3D Printer Filament, Silk Dual Color Blue Green PLA Filament 1.75mm, Shiny Coextrusion PLA Filament, Color Change 3D Printing Filament 1KG/2.2lb deserves a spot in your lineup. It’s easy to print, impressively consistent, and the dual-color sheen can be directed like stage lighting just by rotating your model.
It’s not for mechanical parts or summer dashboards, and sanding will dull its charm. But for decor, cosplay, gifts, and any print where the finish should do the talking, it’s reliable and gloriously extra. The first time you turn a piece in your hands and watch it swap from blue to green, you’ll understand why I keep this spool handy. It’s the pleasant surprise I can plan for—and those are the best kind.
Disclosure: As an Amazon Associate, I earn from qualifying purchases.
