Have you ever watched your printer make a heroic mess of molten plastic and thought, “This must be my fault,” while quietly blaming the filament?
 today.")
What I Bought, What I Hoped For
I picked up “3D Printing Materials Explained: Everything you wanted to know about Filaments (Beginner’s Tutorials to 3D Printing)” because my relationship with spools was getting complicated. I was past the honeymoon phase with PLA and hit that awkward stage with PETG where everything sticks—just not to the bed. I wanted a book that didn’t talk to me like I was twelve, but also didn’t require a PhD in polymer science. This one promised beginner-friendly guidance focused squarely on filaments, and I thought, perfect: let me fix the plastic part before I blame the printer and start pricing out upgrades I can’t justify.
The title sounds like it was written by someone’s search engine, but I’m happy to report the content feels human. It’s practical, organized, and occasionally funny in the way only someone who’s ruined more Benchies than they care to admit can be.
Who I Think This Book Is For
If you’ve ever asked “What filament should I use for this?” or “Why is my ABS curling up like it’s afraid of commitment?”—you’re in the target audience. The book assumes you’ve printed a few things and survived the first layer jitters. It’s for people who want results, not a laboratory tour. Teachers, hobbyists, and anyone who has a drawer full of failed parts will feel seen.
How It’s Organized
Chapters are grouped by filament families (PLA, PETG, ABS, TPU, Nylon, etc.), then followed by sections on print settings, storage, troubleshooting, and safety. The layout feels like a conversion chart you’d stick to a wall: straightforward, repeatable, and easy to reference mid-print while you nervously hover near the nozzle. There are step-by-step tutorials for dialing in each material, plus simple projects that show what the plastic does best.
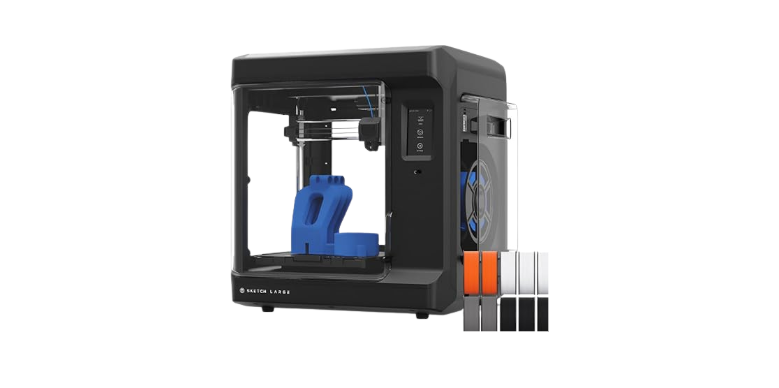
3D Printing Materials Explained: Everything you wanted to know about Filaments (Beginner's Tutorials to 3D Printing)
First Impressions: Friendly Without Being Fluffy
I felt like I was being guided by a person who’d made every mistake twice and finally learned to write them down. The explanations are plain English, but the author doesn’t dumb anything down. They use actual data, mention temps that make sense, and don’t get precious about brand allegiances. There are photos of prints gone wrong (stringy dragons, glossy blobs) next to prints gone right—like a true before-and-after of a polymer glow-up.
Voice and Clarity
The sentences are clean, a little playful, and occasionally confessional in tone. I appreciated the author admitting to reprinting the same calibration cube twenty times like it was a devotional practice. I felt permitted to fail and try again without feeling like the class dunce.
Layout and Usability
Each material section has:
- A quick profile (what it is, why you’d use it)
- Recommended temps and bed surfaces
- Slicer settings to start with
- Common failure modes and fixes
- A beginner-friendly print project
I kept the book open beside my printer like a cookbook with marinara fingerprints, except in my case it was fingerprints of IPA.
The PLA Chapter: Your Friendly Gateway Plastic
I’ve used PLA for years, and still learned a few tricks. The book calls PLA the “default yes” of materials. It prints cool, behaves on most printers, and forgives slicer sins you’ll cry about later with PETG. The author recommends modest nozzle temps (195–210°C for most brands), bed temps around 50–60°C, and slow cooling fan ramp-ups to keep corners from lifting.
The best advice I picked up: PLA is honest. If your prints look rough in PLA, don’t blame the plastic. Check the first layer height and your extruder calibration. This stung a little but was fair.
What I Printed in PLA After Reading
I made a phone stand with a gentle overhang and a small cable slot. The book suggested slowing the outer walls and keeping the fan at 50–60% in the first few layers. The result was stiffer edges and fewer of those crispy overhang fringes. I used a basic satin PLA and it came out pleasantly matte, almost like I meant it.
PETG: The Clingy Cousin With a Heart of Gold
The PETG section made me feel normal for owning scrapers, chisels, and a vocabulary I’m not proud of. According to the author, PETG is the “Goldilocks” plastic for functional parts: tougher than PLA, easier than ABS, and semi-transparent like it has nothing to hide.
Key tips that worked for me:
- Lower fan speeds (0–30%) to avoid layer separation
- Slightly higher nozzle temps (225–245°C)
- Modest retraction to reduce stringing, not eliminate it
- A bit of Z-hop if your nozzle likes dragging across perimeters
- Bed surfaces matter; smooth PEI needs a dash of glue stick as a sacrificial release layer
My PETG test piece, a hinge that actually hinged, turned out strong and glossy, with only two hairs of stringing like it was growing a mustache. I’ll allow it.
ABS: Hot-Box Therapy
I’m not brave enough to run ABS in open air anymore. The book is honest: without an enclosure, ABS is a dice roll rolled inside a wind tunnel. But the guidance is still kind to folks who want to try:
- Nozzle 230–250°C, bed 90–110°C, chamber warmth if possible
- Turn the fan off unless your part is tiny
- Brims are your friend—think of them as training wheels for thermal movement
- Acetone smoothing can hide cosmetic sins, but it won’t fix structural issues
The troubleshooting here is excellent, particularly the difference between warping at the edges (usually bed temp or draft issues) and layer splitting (often chamber temp or fans). I tried a small ABS bracket in a makeshift enclosure (cardboard box with a side-eye from my smoke detector) and it printed beautifully—no cracks, minimal lift. I felt like a magician who forgot his own trick.
TPU: A Flexible Guide That Doesn’t Bend the Truth
Flexible filament has a sense of humor. I learned the hard way that TPU will happily try to escape through any gap in your extruder, like toothpaste living its best life. The book recommends:
- Slowing way down (20–35 mm/s)
- Minimal retraction (0.5–1.5 mm for Bowden, less for direct drive)
- Lower temps to keep the strand from going gooey (200–220°C, varying by brand)
- Keep the filament path constrained—no sharp turns, no friction festivals
My TPU gasket printed like a birthday miracle. I used the suggested single-wall perimeter test to calibrate flow, and the result was consistent thickness and no chewed filament. I didn’t even swear. Much.
Nylon: Thirsty, But Worth It
Nylon is like the house guest who drinks all your water. It’s strong, tough, and surprisingly forgiving—once it’s dry. The section on drying and storage shines:
- Bake nylon at 70–80°C for 6–8 hours before use (check your brand’s datasheet)
- Store it in a sealed bin with desiccant like you’re hiding snacks from roommates
- Print slower with a hot nozzle (240–260°C), higher bed (70–90°C), and low fan
- Use garolite or textured build plates for best adhesion
I printed a set of garden clips and stepped on one by accident. It survived and judged me silently from the ground.
ASA and PC: When the Weather Is the Enemy
ASA is ABS’s weatherproof cousin. The author’s verdict: If your part will live outside, ASA is your anchor. It resists UV like a stoic SPF 50 advocate. You still want an enclosure for best results, but it warps less than ABS and fuses more predictably. PC (polycarbonate), on the other hand, wants heat like a sunbather. PC printed best for me at 260–280°C with a bed at 100°C and a toasty chamber. Strong, clear-ish, and dramatically unforgiving of drafts.
Soluble Supports and Composites: Fancy, With Caveats
The book treats soluble supports like culinary garnish: brilliant when you need them, wasteful if you don’t. PVA dissolves in water, HIPS dissolves in limonene (which smells like you’re cleaning your printer with lemonade). The author is firm about storage; PVA absorbs moisture so fast you’ll think it’s part sponge.
For composites—wood, carbon fiber, glow-in-the-dark—the book gives level-headed advice:
- Hardened steel nozzle or ruby tip for abrasives like carbon or glass fiber
- Larger nozzle sizes (0.6 mm) for woodfill to avoid clogs
- Slow down and lower temps a touch to preserve surface finish
I tried a woodfill PLA bookmark, and my room smelled like a craft store. The print looked like I whittled it with a printer, which is my favorite kind of lie.
The Tutorials: Not Just “Print This Benchy Again”
Each material section includes a calibration routine and a real object you can actually use. The suggested prints aren’t just mascots—they’re practical:
- PLA: cable clip, desk organizer tray, small phone stand
- PETG: hinge, soap dish, brackets for a shelf that has commitment issues
- ABS/ASA: car vent clip, enclosure latch, outdoor number plate backing
- TPU: cable grommet, wallet card sleeve, vibration dampers
- Nylon: gear, living hinge test, plant stakes that survive the summer
- PC: clear-ish protective cover, latch with snap-fit tabs that don’t crumble
I followed three of the tutorials and ended up with parts I kept instead of throwing in the Drawer of Good Intentions.
Troubleshooting: Where I Felt Understood
There’s a whole matrix of symptoms and fixes. The tone is realistic: “Stringing is natural for PETG; aim for less, not none.” It treats issues as normal phases, like learning to parallel park. I liked the explanations for:
- Elephants foot (why it happens, how to fix it with a tiny initial layer horizontal expansion)
- Stringing versus oozing (cooling and retraction versus temps and travel time)
- First-layer mysteries (re-leveling is not a personality; lift the nozzle a hair or recheck flow)
- Layer bonding (material and fan speed have feelings, and you should listen to them)
It also includes visual clues: photos of problems that look exactly like the ones I’ve pretended not to notice. I felt gently called out.
Storage and Drying: An Intervention I Needed
If the book had a secret agenda, it’s to get you to take moisture seriously. PLA can get away with neglect for a while, but PETG, TPU, and especially nylon and PVA will punish you. The instructions are sensible:
- Reseal filament spools in bags with desiccant
- Keep a few rechargeable silica packs rotating like a tiny laundry routine
- Use a food dehydrator or a dedicated filament dryer, not your oven if it runs hot and lies about it
- Print directly from a dry box if you can; friction management matters
I dried a spool of PETG I’d called “fussy” and suddenly it was less fussy. I apologized to it and to the friends I’d complained to.
Safety: Minimal Drama, Maximum Sense
The safety section is blessedly practical. No scolding, just reminders:
- Ventilation matters, especially for ABS, ASA, and PC
- Don’t inhale your victories
- Wear gloves when you’re smoothing with acetone; wear glasses when you’re snapping parts off
- Keep a fire extinguisher near a hobby that melts things on purpose
- Unplug the printer when you’re playing electrician with heaters and thermistors
I added a small carbon filter to my enclosure. It made a difference in smell and, presumably, in my long-term ability to boast about my hobbies.
Slicer Settings: The Book’s Best Cheat Sheet
The author gives start points rather than universal truths. A printer is personal, like sourdough starters and skincare routines. But I appreciated the way they frame settings:
- Nozzle temp: high enough to bond layers, low enough to avoid drool
- Bed temp: enough to keep the part seated without turning the bottom glossy goo
- Fan: a friend to PLA, an enemy to ABS, a complicated co-parent to PETG
- Retraction: a balancing act between zits and seams—chase consistency, not perfection
- Flow rate: test with single-wall measurements; calibrate, don’t wish
The charts and quick starts are the kind you copy into your slicer and keep as profiles with silly names that make you feel like a scientist.
A Handy Table I Kept Bookmarking
| Material | Nozzle Temp (°C) | Bed Temp (°C) | Fan | Strengths | Watch-outs | Best Uses | Ease (1–5) |
|---|---|---|---|---|---|---|---|
| PLA | 195–215 | 50–60 | 60–100% | Easy, pretty, precise | Heat softening, brittleness | Prototypes, decor, jigs | 5 |
| PETG | 225–245 | 70–85 | 0–30% | Tough, chemical resistant | Stringing, bed adhesion too strong | Functional parts, containers | 4 |
| ABS | 230–250 | 90–110 | 0% | Heat resistant | Warping, fumes, needs enclosure | Automotive, enclosures | 3 |
| ASA | 240–255 | 90–110 | 0–20% | UV resistant | Warping less than ABS but still | Outdoor parts, signage | 3 |
| TPU (95A) | 200–220 | 30–50 | 30–50% | Flexible, grippy | Retraction issues, slow prints | Gaskets, cases, feet | 3 |
| Nylon (PA6/PA12) | 240–260 | 70–90 | 0–20% | Tough, wear resistant | Moisture hungry | Gears, hinges, clips | 2 |
| PC | 260–280 | 100–110 | 0–20% | Strong, heat resistant | Needs enclosure, prone to cracking | Functional housings, latches | 2 |
| PVA | 190–210 | 45–60 | 30–100% | Water soluble | Moisture sponge, clogs | Supports | 2 |
| HIPS | 220–240 | 90–110 | 0–20% | Limonene soluble | Solvent handling | Supports for ABS | 3 |
| Composites (CF/Glass) | +10–20 over base | Base +10 | 0–30% | Stiff, dimensional stability | Abrasive, needs hardened nozzle | Jigs, drone parts | 2 |
The table matches the spirit of the book: sensible ranges, honest warnings, and the kind of quick comparisons you need at 2 a.m. when your part is halfway done and making noises like a raccoon at a vending machine.
Projects I Tried Because I’m Suggestible
- PETG hinge: I printed the recommended hinge with a 0.2 mm layer height, slowed outer walls, and low fan. It clicked into motion like it had been mentally rehearsing. I pretended to need a hinge on everything for a week.
- TPU cable grommet: I followed the feed path advice and printed slowly with short retraction. It slid onto a panel hole like a polite handshake.
- Nylon plant clips: Printed after drying. Springy, strong, and impervious to my watering schedule, which is a mixture of memory and hope.
I’m usually 40% skeptical of tutorials, but these behaved.
What’s Missing or Could Use More
No book is perfect, even one that saved me from PETG rage. A few things I wanted more of:
- Printer-specific notes: I get why the author avoided model-specific advice, but a side panel of “Bowden vs direct drive behaviors” per material would help beginners understand whether their struggles are personal or universal.
- A bit more on high-speed printing: Speed is the new craze, and I would have loved a section on how Speedbois affect filament choice and temps.
- More on multi-material printing: The soluble supports chapter is strong, but a small section on “material pairings that love each other” for dual extruders would have been gold.
- Brand nuance: They wisely avoided endorsements, but a candid note on variance between “budget” and “premium” spools—diameter tolerance, pigment loads—would help people decide where to splurge.
These are wishes, not dealbreakers. The foundation is rock solid.
How It Compares to Other Resources I Use
- YouTube tutorials: Great for visuals, but often brand-heavy and printer-specific. This book gives baseline principles. I need both.
- Manufacturer datasheets: Useful, sometimes optimistic. The book’s ranges feel more real-world.
- Online guides: Many are scattershot or updated by committee. This book reads as a single clear voice that learned by fire and wrote it down so you don’t burn your eyebrows.
I still use slicer profiles from trusted creators, but I now put them through the book’s lens. It keeps me from copying settings like recipes without tasting the soup.
What I Learned That Changed My Printing
- Dry your material before you accuse it of being low quality.
- PETG wants a gentle touch, not a fan tornado.
- PLA masks mechanical sins; PETG exposes them; ABS ignores you unless you build it a warm room.
- TPU is not hard, just particular. Slow down and shorten retraction.
- Nylon is the friend who texts “I’m outside” and means it—be prepared with a dry box or it leaves.
The confidence boost was real. I know what to try first when prints go sideways. I don’t blame the filament anymore without an internal jury.
A Tiny Glossary I Didn’t Think I Needed
- Warping: Your print’s way of saying it’s cold and leaving the bed.
- Stringing: Polymer cobwebs from hot, chatty filament and long travels.
- Layer bonding: The handshake between layers—it’s firmer when warm and calm.
- Elephant’s foot: The squished bottom layer that acts like a platform sandal.
- Hygroscopic: A fancy word meaning “drinks water and ruins your day.”
The book explains these without condescension. I wrote some on sticky notes like I was studying for a midterm.
Safety and Sanity Checklists
Before printing a new material, I now run brief checklists, thanks to the book:
- Is the spool dry? (If not, dry it for a few hours.)
- Does the bed match the material’s preference? (PEI smooth, textured, garolite, glass.)
- Are temps realistic, not bravado levels?
- Is my fan helping or sabotaging?
- First layer: Does it look like firm spaghetti or like a crepe?
This takes one minute and saves me two hours. I can now enjoy prints without kneeling near the bed like it’s a sports broadcast.
The Writing I Didn’t Expect to Like
There’s a warmth to the advice—like a neighbor who lends you the right tool and tells you the story of how they bought it after learning the hard way. The author even admits to naming prints mid-failure, a habit I immediately recognized in myself. When a part lifts, I call it “Treacherous Carl” and re-slice with a brim. The book made me feel less odd about this.
Who Should Buy This
- Newer users who want better parts with fewer headaches
- Intermediate folks expanding into TPU, ASA, Nylon, or PC
- Teachers setting up a makerspace who need reliable reference material
- Anyone who wants to stop arguing with PETG in public
If you’re already printing Ultem at home, you don’t need this. You need a trophy and possibly a permit.
Value for Money
I’ve spent more on one roll of exotic filament than this book. In terms of saved prints, it paid for itself in a weekend. Even the old pros might appreciate the consolidated tables and the “why” behind settings. I love a tidy reference that doesn’t require Wi-Fi and a dozen tabs.
My Favorite Practical Nuggets
- Glue stick on smooth PEI for PETG—not for adhesion, but for release.
- Slow external perimeters when gloss or dimensional accuracy matters, especially with PETG and PC.
- Initial layer horizontal expansion: a subtle fix for elephant’s foot without messing with Z offset.
- Fan discipline: Don’t blast materials that need heat to fuse. PLA is the exception.
- Don’t chase perfect string-free PETG; you might sacrifice layer bonding. A little post-processing beats a weak part.
I printed these on a small card and taped it near the printer. My future self is grateful, even if my past self feels judged.
Frequently Asked Questions I Had, Answered by the Book
- Do I need a hardened nozzle for carbon fiber? Yes, unless you enjoy accelerated nozzle wear. Hardened steel or ruby.
- Can I print nylon without drying it? You can, but you’ll hear it popping and watch it get fuzzy. Dry it.
- Why does TPU keep buckling? Your extruder path is too open and your speed is too high. Constrain and slow down.
- My ABS corners keep lifting. What now? Enclosure, higher bed temp, brim, and less fan. Consider ASA if you can.
- Is higher temperature always better for layer adhesion? To a point. Too hot gives you drooling, elephant’s foot, and “chewed gum” surfaces.
It’s like a mentor who answers the question you actually asked, not the one they wish you’d asked.
The Part About Failure I Needed to Hear
The author treats failure like practice, not a diagnosis. They offer short calibration prints that burn through a few grams, not half a spool. I ran the temperature tower for PETG, tagged the levels with a Sharpie, and rested easy knowing which band gave me glossy perimeters without goat hair stringing.
The most reassuring line, paraphrased: “If you switch brands, repeat your tests. You didn’t train ‘PETG’; you trained that PETG.” Reader, I felt seen.
How I Use the Book Now
- I keep profiles for each material based on the book’s ranges, adjusted for my printer.
- I print small tests whenever I open a new spool—flow cube, retraction test, and a little cantilever.
- I store my moody filaments in a sealed bin. I treat nylon like a gremlin—no water after midnight.
- I use the troubleshooting pages like a restaurant menu: I point at my issue and order the fix of the day.
This routine shrank my pile of shame prints. The cat misses her plastic mountain, but I do not.
Strengths That Make It a Keeper
- Clear, repeatable start points for each filament
- Honest notes on trade-offs (strength vs aesthetics vs speed)
- Friendly, skilled voice that doesn’t pretend materials are all the same
- Good balance between “why” explanations and “do this now” steps
- Practical projects that showcase real strengths of materials
I also appreciated the lack of brand cheerleading. The advice sticks even when your favorite spool is out of stock and you’re buying the one with the cartoon astronaut on it.
Weak Spots That Didn’t Ruin It
- I wanted a few pages on high-flow nozzles and rapid printing trends
- A touch more on multi-material compatibility would help dual-extruder users
- Some photos could be bigger with arrows pointing to specific artifacts
- I wish there was a printable quick-reference sheet included as a PDF
These feel like update opportunities for a second edition rather than flaws.
Practical Workflow I Adopted From the Book
- Choose material by environment (indoor/outdoor, heat exposure, flexibility).
- Pick a baseline from the book’s ranges and make a saved profile.
- Dry the filament if it’s nylon, TPU, PVA, or generally suspicious.
- Print a small test for temperature and retraction, adjust within a narrow band.
- Run the real part with a conservative first layer and moderate speeds.
- Post-process lightly (trim strings, chamfer edges in slicer, or sand).
- Document results in the slicer profile notes so future me can glide.
I now trust my process, not just my luck.
Did It Make Me Better?
Yes. Not superhuman, but better in the measurable, smug way that makes you want to print a bench organizer you don’t strictly need. I’ve stopped blaming ghosts for stringing and started drying spools on purpose. I’ve even printed with PC without tearing a motivational poster from the wall.
Final Verdict
“3D Printing Materials Explained: Everything you wanted to know about Filaments (Beginner’s Tutorials to 3D Printing)” delivers exactly what I wanted: an approachable, thorough guide that translates filament quirks into steps I can follow. It respects your time and your electricity bill. It won’t turn a wobbly printer into a miracle worker, but it will teach you why your PETG squeals, your ABS sulks, and your TPU tries to escape. If you want your prints to look like you meant them to, this book earns a spot on the workbench.
I keep it within reach. When a print goes wrong—and they still do—I open to the right chapter, sip something calming, and stop acting surprised that plastic behaves like plastic. It’s not glamorous, but it is satisfying. And my parts are stronger, cleaner, and less likely to be used as coasters, which still counts as progress in my house.
Disclosure: As an Amazon Associate, I earn from qualifying purchases.