Is there anything more satisfying than watching a line of melted plastic become a small, useful sculpture right in your kitchen, like a magician who cleans up after himself?


Why I Chose the TRONXY CRUX 1 Mini 3D Printer
I wanted a compact 3D printer that didn’t demand an engineering degree or a garage. The TRONXY 3D Printers, CRUX 1 Mini 3D Printer for Beginners checked most of my boxes before I even had a chance to second-guess my enthusiasm. It’s small but not toy-like, portable but solid, and promises an easy start with about 95% of the machine pre-installed. I’m a skeptic by nature and a chronic instructions-overreader, so when a company says “you can start the first print within minutes,” I brace myself for three hours of muttering. The CRUX 1 actually did what it said.
At 5.8 kg, it’s light enough that I can move it with one hand and a determined posture. The print size is a neat 7.08 x 7.08 x 7.08 inches, which is a nearly perfect cube of possibility for folks who aren’t printing tool chests or life-size helmets. It’s also billed as a good pick for teens, which feels right. If I’d had this as a teenager, I might have been less obsessed with building model houses out of cereal boxes and glue sticks.

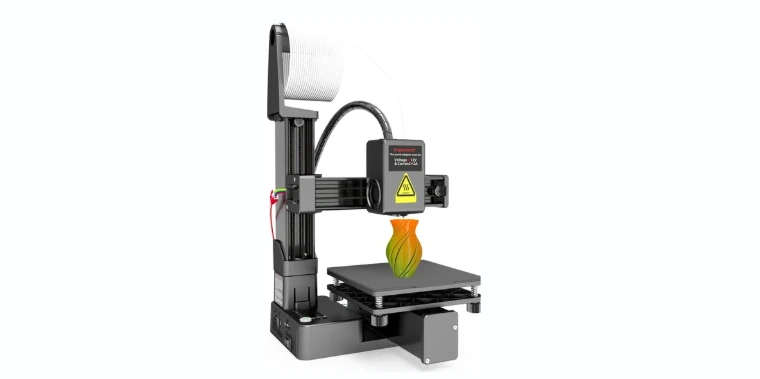
TRONXY 3D Printers,CRUX 1 Mini 3D Printer for Beginners,Fast Assembly Direct Drive Desktop Portable with PEI Magnetic Sticker Platform, Impresora Small 3D Printer Print Size 7.08x7.08x7.08 inch
Unboxing and Setup: The Five-Minute Promise Meets My Kitchen Table
Opening the box, I found a machine that looked more like a completed appliance and less like a weekend project. With the CRUX 1, the frame, printing mechanism, and electronics live together like well-behaved roommates. The power supply is integrated into the base, which feels safer and tidier than those external bricks that dream of rolling off tables.
The “95% pre-installed” claim wasn’t just optimistic marketing. I attached a few obvious parts, checked a couple screws, plugged it in, and within a short stretch of time I was on the touchscreen selecting my first print like a person who had done this many times before. I hadn’t. The UI didn’t mind.
Setup Snapshot
I find it reassuring to know what I’m getting into, so here’s a quick breakdown of what setup looked like for me and how long it took.
| Step | What I Did | Time It Took | Notes |
|---|---|---|---|
| Unboxing | Removed packing, protective foam, and plastic straps | 5–10 min | The parts were sensibly laid out |
| Assembly | Attached gantry, plugged cables | 10–15 min | Most connections were keyed or labeled |
| Bed Check | Confirmed the PEI magnetic platform was seated | 1 min | Snaps on/off easily |
| Leveling | Manual four-corner leveling | 5–10 min | Typical paper method worked fine |
| First Print | Loaded PLA, picked sample file | 20 sec | The 2.8-inch screen made it simple |
Design and Build Quality: Compact but Thought-Through
I appreciate machines that have opinions. The CRUX 1 clearly wants to be small, quiet, and uncomplicated. The metal frame feels sturdy enough to withstand casual bumps, and the machine doesn’t wobble or shimmy like a folding table at a yard sale. The X and Y axes ride on external double-axis roller guide rails, and the motion feels smooth in that satisfying way that makes you want to push it around by hand and nod knowingly.
There’s also a calm: the pulleys are quiet, the motors aren’t overbearing, and the fans do their job without sounding like they’re preparing for liftoff. It’s not silent, but it won’t keep anyone awake unless you set it up on a delicate side table in a small sleeping compartment.
Touchscreen and Interface: Small Screen, Big Help
The 2.8-inch full-color touchscreen is the tiny conductor of this orchestra. It’s not cinematic, but it’s bright, responsive, and it actually helped me do things instead of just showing me what I failed to do. It supports eight languages, which is a thoughtful touch. I tapped through options, preheated the nozzle, loaded filament, and felt like I knew what I was doing before I actually did.
If you’re new to 3D printing, the menu simplicity matters. You don’t want a printer that asks you to choose between “Bézier spring alignment” and “trapezoidal belt hermeneutics” before you’ve had coffee. This one gives you the essentials in plain language.
Print Volume: The Goldilocks Cube
A print size of 7.08 x 7.08 x 7.08 inches hits a sweet spot for desks, shelves, and actual real-world projects. I made household organizers, giftable trinkets, cable holders, drawer inserts, miniature planters, and a phone stand with a satisfying gentle curve that suggested I knew what I was doing. The cube-like volume is easier to mentally measure than some odd rectangles, too.
Is it large enough for helmets, full-sized props, or big articulated dragons? Not in one piece. But it’s plenty for a surprising range of useful and decorative models, especially if you’re comfortable splitting files.
Direct-Drive Extruder: Small Toolhead, Big Personality
The CRUX 1’s direct-drive extruder sits close to the hot end, which means retractions can be shorter and control over filament is tighter. I printed with PLA and PETG without fuss, and then I pushed my luck with flexible filament (TPU). The extrusion was stable and predictable, and flexible parts came out like bendy little miracles. If you haven’t watched a flexible phone bumper print layer by layer, I recommend it. It feels like making a thing that shouldn’t exist and then putting it on immediately.
Direct drive isn’t just for novelty filaments; it helps with everyday prints, too. I got less stringing than I expected and cleaner walls at conservative speeds. I’m not saying it cured every bad habit I have as a slicer, but it forgave a few.
The PEI Magnetic Platform: Sticks When You Need It, Lets Go When You Don’t
I’ve used glass, textured sheets, tape, glue sticks, and the occasional desperate prayer. PEI is my current favorite compromise. The CRUX 1’s PEI magnetic platform lets prints grab firmly when hot and release more politely after cooling. I don’t like wrestling with prints. With this bed, I didn’t have to.
When I needed to clean it, I just popped the sheet off, wiped it with isopropyl alcohol, and felt like the kind of person who maintains things. No scraping gouges, no elaborate rituals with hairspray that smell like a salon full of nervous birds.
Motion System and Noise: Smooth Operators
The X and Y axes ride on external double-axis roller guide rails, which makes movement feel smooth and well-guided without the rattle you get in some ultrabudget setups. The dual-axis metal guide rails provide better durability over time, and I felt comfortable running the machine for long prints without monitoring every twitch.
I’m not sensitive to white noise, but I do live with people who are. The CRUX 1 made it through several weeknight prints without a single complaint from the other room. That counts for something in my house, where the tolerance for appliances that “sing” is low.
First Prints and Print Quality: From Benchy to Useful Brackets
I started with the usual suspects: a calibration cube, Benchy, and a small articulated lizard. The cube told me what I expected: a slight need to nudge flow and temperature, minor elephant’s foot that vanished when I raised the Z-offset a hair, and crisp enough corners to suggest the belts weren’t slacking.
Benchy looked like a boat and not a tragedy. The smokestack was straight, the text legible, and the overhangs behaved better than I have in certain holiday situations. Overhang quality improved when I set the part cooling fan to kick in more aggressively after the first few layers.
When I switched to useful objects—hooks, a pegboard basket, and a cable comb—the results felt production-worthy. Holes fit bolts, snap joints snapped and stayed snapped, and I only reprinted one bracket after measuring my screws with the confidence of a guessing game.
Everyday Speed and Reliability: Comfortable and Calm
I ran most prints at 50–60 mm/s because I prefer reliability over seeing what happens when I hurry. The machine kept up, the lines stayed clean, and I didn’t find myself reslicing the same model five different ways at three in the morning. I did push to around 80 mm/s on simple parts and got acceptable results, though detail-heavy prints preferred a gentler pace. I’ll take “predictable” over “impressively fast” any day.
The big takeaway: the CRUX 1 simply kept printing. No drama, no inexplicable layer shifts, and no mysterious clunks that make you pause and stare at the wall.

Slicer Settings That Worked for Me
I used Ultimaker Cura because it’s familiar, and made a custom profile for the CRUX 1’s 180 mm cube build volume. If you prefer PrusaSlicer, it will also work well once you set bed size and nozzle details. The direct-drive extruder lets me keep retraction low, and the PEI bed prefers a clean surface, not extra adhesives.
Here’s a quick snapshot of what I used as starting points. Your filament brand will nudge these numbers slightly.
| Material | Nozzle Temp | Bed Temp | Retraction Distance | Retraction Speed | Print Speed | Notes |
|---|---|---|---|---|---|---|
| PLA | 200–210°C | 55°C | 0.6–1.2 mm | 25–35 mm/s | 50–60 mm/s | Great adhesion on PEI when clean |
| PETG | 235–245°C | 70–80°C | 0.6–1.0 mm | 25–30 mm/s | 40–50 mm/s | Lower fan speed to reduce brittleness |
| TPU (95A) | 210–220°C | 40–50°C | 0.4–0.6 mm | 20–25 mm/s | 20–30 mm/s | Disable coasting, keep speeds steady |
I kept layer heights between 0.16 mm and 0.28 mm depending on whether I wanted detail or speed. The 0.4 mm nozzle is a good default; if you switch to a 0.6 mm nozzle, you’ll get tougher parts faster, and this little machine can handle it if you dial speeds down slightly.
Bed Leveling: Manual but Manageable
The CRUX 1 doesn’t advertise auto bed leveling, so I took the traditional route. I used the standard paper method at each corner and the center, then adjusted the Z-offset until the first layer looked like gently overlapped ribbons rather than spaghetti. Once set, it stayed put through many prints and a few relocations. The PEI sheet’s flatness helped, and I didn’t feel like I was starting from scratch every weekend.
If you’re new to manual leveling, don’t let the process intimidate you. It’s essentially the printer equivalent of making sure the dining table doesn’t wobble, except you use a sheet of paper and tiny knobs instead of folded napkins.
Safety and Power: Integrated and Tidy
The built-in power supply gives me more confidence than a dangling brick, and it means fewer things on the floor for me to worry about tripping over. The wiring is routed sensibly, and I never had the sense that something might detach or rub against moving parts. I appreciate when a manufacturer chooses integrated design and doesn’t ask me to hide electronics like a squirrel stashes nuts for winter.
Portability and Size: Apartment-Friendly Footprint
At 5.8 kg and with a compact frame, the CRUX 1 is the kind of printer I can pick up and move to the kitchen table when I need more room. The footprint is small enough to share a desk with a laptop and still leave space for a mug and a quiet sense of pride. The magnetic PEI sheet won’t go flying when you move the machine; it clings resolutely but pops off when you pull.
I’ve taken it to a friend’s place for a little weekend print-along (this is a thing now), and the setup-to-print ratio made me look more competent than I am.
What I Printed and How It Turned Out
I made:
- A cable comb: clean edges, no warping, slots fit standard USB-C and thicker cables without cracking.
- A pegboard basket: light enough to hang, sturdy enough to hold the odd screwdriver and a roll of painter’s tape.
- A phone stand: smooth curves and a snug lip, printed in PLA with a .2 mm layer height, no supports.
- A cookie cutter shaped like a cat’s head: sharp edges, food-safe after a proper wash and a layer of common sense (I used brand-new filament and cleaned it thoroughly).
- A small planter with drainage holes: printed in PETG for durability, no stringing with retraction tuned to 0.8 mm.
I also printed the obligatory Benchy and calibration cube. While Benchy didn’t make me cry tears of joy, it didn’t make me curse either. The text under the boat was readable, and the smokestack didn’t look like it had been through an argument.
The Interface and Workflow: Less Fuss, More Print
The touchscreen made it painless to preheat, load filament, start prints, and baby-step the Z-offset mid-print if needed. Pausing a print to change filament worked without drama, and the resumption didn’t leave an obvious scar. I wish every interface could be this direct and unassuming: clear buttons, obvious icons, and no snarky messages.
Table: What You’re Getting with the CRUX 1
For quick reference, here’s how I’d summarize the main features and what they meant to me in actual use.
| Feature | What It Is | Why I Liked It |
|---|---|---|
| 95% Pre-Installed | Minimal assembly required | I was printing faster than my coffee cooled |
| 2.8-inch Color Touchscreen | Eight-language UI | Clear menus, easy preheating and controls |
| Direct-Drive Extruder | Filament feeds directly into the hot end | Great for flexible filaments, less stringing |
| PEI Magnetic Platform | Removable, grippy when hot | Easy part removal and quick cleanup |
| External Double-Axis Roller Guide Rails | Smooth X/Y movement | Quiet, reliable motion and stable prints |
| 7.08-inch Cube Build Volume | 180 x 180 x 180 mm | Big enough for useful parts, still compact |
| Integrated Power Supply | Built-in PSU | Safer, tidier, and more portable |
| 5.8 kg Weight | Lightweight frame | Easy to move without feeling flimsy |
Limitations and Realistic Expectations
No machine is perfect, and this one isn’t pretending to be a professional production beast. Here’s what I had to work around:
- Build volume limits: You’ll need to split larger models. Not a deal-breaker, but plan accordingly.
- Manual bed leveling: It’s straightforward, but it’s manual. If you want automatic everything, this isn’t that.
- No enclosure: If you’re printing ABS or other fussy, high-temperature materials, you’ll need an enclosure or a more specialized printer.
- Fans are audible: Not loud, but you’ll hear them. That’s normal for this size and class.
- Limited height for tall, skinny prints: With a smaller build height, slender, dramatic towers will challenge your brim-and-adhesion skills.
None of these surprised me, and none of them kept me from making what I wanted.
Who I Think Will Love It
I find it helpful to imagine who would get the most joy out of a machine like this.
- Beginners who want a painless start without building a robot from parts.
- Hobbyists who want a reliable second printer on the desk.
- Teachers or teens who want a safe, compact, classroom-friendly option.
- Apartment dwellers who care about noise, size, and ease of storage.
- Practical makers who print organizers, replacement parts, gifts, and small tools.
Who Might Want Something Else
I love this machine for what it is, but I wouldn’t push it on:
- People who need to print large cosplay armor, in one piece, right now.
- Tinkerers who want to modify everything with linear rails, Klipper, and a new brain by next Tuesday.
- ABS specialists who require a heated chamber and peace treaties with drafty rooms.
- Those who crave auto-leveling and hands-off everything.

Tips That Made My Prints Better
I keep a small list of habits that keep the gremlins away:
- Clean the PEI sheet with isopropyl alcohol before long prints. Finger oils are tiny saboteurs.
- Keep retraction short with direct drive; start around 0.8 mm and adjust from there.
- Use a brim for taller parts with a small footprint. Gravity and physics need bribes.
- Don’t overcool PETG; aim for moderate fan speeds to avoid brittle layers.
- Lower first-layer speed to about 20 mm/s for gorgeous adhesion.
- Check belt tension occasionally; snug, not guitar-string tight.
- Save profiles per filament brand; they’re all a little different, like cousins at a reunion.
Maintenance: The Five-Minute Routine
My routine is simple and arguably therapeutic:
- Wipe the bed with IPA before prints.
- Brush the nozzle with a soft brass brush when warm, not hot.
- Vacuum crumbs of filament from the base every few weeks.
- Check the rollers for smooth movement; adjust if they’re too tight or too loose.
- Update firmware only when you need a specific fix. I like stability more than novelty.
Learning Curve: Beginner-Friendly Without Talking Down
I taught myself the basics as I went: level the bed, set the Z-offset, load the filament, slice a model sensibly, and watch the first layer like a hawk with an art degree. The CRUX 1 guided me rather than lectured me. If you’ve never used a 3D printer, this one is a gentle introduction. If you already have one, it’s the kind of machine you’ll keep near your elbow for the prints you want to finish today.
A Note on Filament Choices
- PLA: My default for almost everything not living in a hot car. It prints beautifully on this machine.
- PETG: Perfect for functional parts and anything that might encounter moisture. Expect a bit of tuning for stringing, but it’s manageable.
- TPU: The star of the direct-drive show. Print slow and steady and watch it become all the squishy things your heart desires.
I didn’t print ABS because the open frame and lack of enclosure encourage drafts and warping. That’s less a flaw and more a sign the machine knows its strengths.
Reliability Over Time
I ran print after print—long and short, decorative and dull—and the machine behaved like a courteous guest. No weird temp fluctuations, no sudden Layer Episode, and no mid-print mysteries. If something did go wrong, it tended to be me, living out my usual dance with bed-leveling or forgetting to wipe the PEI sheet. The hardware itself gave me confidence that I wasn’t one bump away from disaster.
Real-World Use Cases That Earned a Place on My Desk
- A custom drawer organizer that saved me from the sea of paper clips and odd screws.
- A set of cable clips that made me feel like a person who has her life together.
- A small mount for a Raspberry Pi that no one can see but me, and that’s enough.
- Gift trinkets: key fobs, mini planters, geometric coasters. People were impressed in a way that made me feel taller.
- Replacement feet for a cutting board. Printing useful things is a deeply underrated pleasure.
Troubleshooting Moments and How I Fixed Them
- First-layer elephant’s foot: Raised Z-offset by 0.05 mm and lowered bed temp from 60°C to 55°C for PLA.
- Mild stringing in PETG: Lowered nozzle temp by 5°C and reduced retraction distance to 0.8 mm.
- Curling on a tall, thin part: Added a 10–12 mm brim and slowed print speed by 10%.
- Underextrusion blips: Increased flow to 103% for a specific filament brand; solved.
None of these required disassembling anything or ordering obscure parts from someone’s garage.
A Friendly Comparison Without Drama
There are bigger printers with taller build volumes, and there are advanced machines with automatic bed leveling, input shaping, and the ability to print a chair if you leave them alone long enough. The CRUX 1 isn’t pretending to outrun those. It’s here for beginners and for practical makers who value a small footprint, a straightforward UI, and hardware that’s smartly chosen: direct-drive extruder, PEI magnetic sheet, integrated PSU, and those smooth external roller guide rails.
What makes it special isn’t sheer speed or raw size; it’s the dependability and the way it gets out of your way so you can make things.
My Favorite Quality-of-Life Details
- The PEI sheet’s snap-on, snap-off ease.
- The quiet confidence of the motion system.
- The no-fuss touchscreen menus that don’t bury simple actions under six taps.
- The fact that I didn’t have to hide an external power brick somewhere like a secret shame.
- The compact footprint that doesn’t take over my workspace.
Things I’d Change If Granted Three Wishes
- Add an automatic bed leveling sensor. Manual is fine, but automation is nicer.
- Include a slightly larger spool holder or a more universal adapter; some spools are surprisingly chubby.
- Offer a textured PEI option as a second sheet in the box. Smooth is great, but texture hides a multitude of sins.
A Day in the Life With the CRUX 1
I’ll put on a print in the morning while making coffee. The first layer goes down cleanly, and I glance at it with the affection of a person who has made peace with thermoplastics. Later, I pop the finished print off the bed, wipe it with IPA, and start another. There’s no drama. The machine doesn’t need attention or applause; it simply performs.
At night, if a print is still going, it hums along quietly, and I resist the urge to lean in and watch every movement. I’ve become the person who prints doorstops and custom hooks and thinks they’re the height of civility.
Frequently Asked Questions I Asked Myself
- Can I print flexible filaments? Yes. The direct-drive extruder handled TPU like a champ at slow speeds.
- Do I need glue or hairspray on the bed? No. Clean PEI plus the right bed temperature worked for me.
- Will it fit on a small desk? Yes. It’s compact and light.
- Is it too limited for serious projects? Not at all, unless your projects are physically huge. For everyday parts, it’s a dependable workhorse.
- Can a beginner learn on it? Absolutely. It’s one of the easier paths into the hobby without skimping on features that matter.
Longevity and Care
Parts that usually wear—nozzles, PTFE tubing, belts—are standard and easy to source. The dual-axis metal guide rails inspire confidence, and the roller system kept moving smoothly with minimal tinkering. I don’t baby my machines, and this one didn’t require babying. It asked for little and gave me a lot.
The Heart of the Matter: What This Printer Does to My Brain
Owning a machine like the TRONXY CRUX 1 makes me notice problems I can solve and gifts I can make. Instead of buying a hook, I print one. Instead of wrestling my cables into a drawer, I print a bracket. Instead of buying another gadget to hold a gadget, I design a little thing and print it. It’s a quiet shift from consumer to maker—at least inside the limits of a seven-inch cube—and that shift is addicting in the nicest way.
Final Verdict on the TRONXY CRUX 1 Mini 3D Printer
I judge a tool by how often I reach for it. I reached for this one a lot. The TRONXY 3D Printers, CRUX 1 Mini 3D Printer for Beginners is compact, friendly, and sturdier than its size suggests. The 95% pre-installed build made my first hour feel like a win. The direct-drive extruder and PEI magnetic platform pulled their weight every day. The motion system stayed quiet, and the interface never got in my way.
If you need a straightforward, portable printer with a 7.08-inch cube build volume, a simple touchscreen, and real capability with common materials—including flexible filaments—this is an easy recommendation. It’s not a machine for giant projects or exotic, high-heat materials, but it’s exactly the kind of tidy, confident tool that turns ideas into objects without turning your weekend into a troubleshooting saga.
I started printing within minutes and never looked back. That, to me, is the best kind of review I can give: I used it, I liked it, and I kept making things.
Disclosure: As an Amazon Associate, I earn from qualifying purchases.