Have you ever held a freshly printed part so smooth and precise that you forgot it didn’t come from a factory?


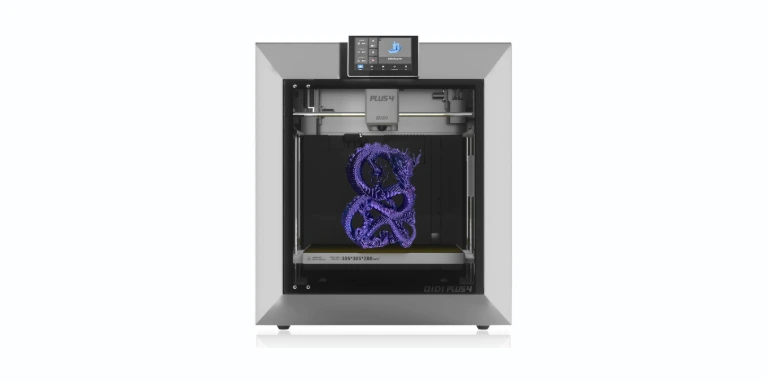
QIDI MAX3 3D Printer Review: My Time With a High-Speed CoreXY That Means Business
I didn’t set out to replace my workshop’s resident printer. I simply wanted something that wouldn’t mutter excuses when I asked for speed and precision at the same time. The QIDI MAX3 3D Printer, with its 600mm/s headline speed, Klipper firmware, and a build volume large enough to embarrass my first apartment’s oven, felt like it might finally be the grown-up I needed on the bench. What I found was a machine that’s fast, precise, and—this might be the highest praise—a little boring in the best possible way.
The Short Version Before I Get Chatty
I took the MAX3 out of the box, leveled it, and printed a calibration cube that looked like it had been machined. Then I threw bigger parts, trickier filaments, and questionable choices at it. Between its CoreXY motion system, all-metal frame, and a 65°C heated chamber, it behaved like a printer that’s been to finishing school: polite, efficient, and unflappable. I still had to learn its rhythms, but the rhythm was clear and dependable.

$729 In Stock
The Spec Sheet in Human Terms
Specs look good on paper; they’re better when they translate into prints that fit together and don’t warp at the corners. Here’s how the MAX3’s headliners have played out for me.
- Max speed: 600mm/s with 20000mm/s² acceleration. It’s not a fantasy number; it’s a top-end that’s actually achievable with the right settings and models. I don’t run everything that fast, but I push speeds to 250–350mm/s regularly without turning my models into melted ravioli.
- Build volume: 325 × 325 × 315mm (12.8 × 12.8 × 12.4 inches). Big enough for helmets, large functional parts, and multi-part assemblies laid flat without Tetris-level puzzle solving.
- CoreXY all-metal structure: The motion platform is incredibly stable. Less ringing at speed, and the frame stays square without needing kid-gloves handling.
- Direct drive extruder: Flexible filaments behave. I printed TPU gaskets without the long-distance push drama you get with Bowden setups.
- Auto leveling: I press a button, and it sorts itself out. It’s the kind of feature that makes you wonder what we did to deserve this.
- 65°C heated chamber: ABS, ASA, and CF-reinforced nylons warp less and behave more.
- Klipper firmware: Input shaper and pressure advance are standard, not exotic. The interface is clean, and remote control is a reality—cameras and custom macros are within reach.
- Fully assembled: Real plug-and-print, not the kind where “plug-and-print” is a euphemism for “get out your calipers.”
Quick Reference Table: What Matters and Why
| Feature | What It Is | Why I Care |
|---|---|---|
| Max speed 600mm/s, 20000mm/s² acceleration | High-speed motion with CoreXY | Fast prototyping without ruinous artifacts |
| Build volume 325×325×315mm | Large-format FDM | Full-size helmets, big functional parts, fewer sectioned prints |
| All-metal frame + 6mm thick aluminum heatbed plate | Rigid construction, stable bed | Less vibration, better first layers, fewer failures |
| 10mm wide belts + ⌀10mm hardened hollow steel linear shafts | Heavy-duty motion components | Smooth, stable travel at high speed |
| Direct drive extruder | Filament fed right at the nozzle | Better control with TPU and fiber-filled filaments |
| Enclosed chamber with 65°C heat | Controlled ambient temperature | Reduced warping, stronger layer bonds |
| Dual cooling fans | Part + hot end cooling management | Fine details without droopy edges |
| Klipper firmware with Input Shaping and Pressure Advance | Smarter motion and extrusion control | Crisp corners, minimal ringing, consistent flow |
| QIDIslicer software | User-friendly slicer tailored for the machine | Good presets, less guesswork |
| Open-source, remote options | Customizable and extensible | Macros, monitoring, camera support |
Unboxing and First Print: No Assembly Hangover
When a printer arrives fully assembled, I take a deep breath and prepare for the kind of “fully” that implies two hours of calibration. The MAX3 was genuinely ready. I pulled it from the box, removed the protective packaging, leveled the bed to humor it, and loaded filament. The auto-leveling routine ran beautifully. The first layer went down like it was painting a parking lot stripe.
What I Did Immediately
- Ran the auto-leveling and bed mesh sequence.
- Checked belt tension—those 10mm wide belts hold their tension like a new gym membership in January.
- Loaded PLA and, for once, did not preemptively worry.
The first print was the standard calibration cube. At a brisk speed, I expected visible artifacts; instead, I got sharp corners and uniform walls. When I printed a functional hinge bracket in PETG at an ambitious speed, the layers were bonded tightly, and the hinge pin fit the first time.
Speed vs. Quality: The 600mm/s Conversation I Had With Myself
I rarely print at 600mm/s. It’s like owning a car that can do 160 mph: it matters less about using it and more about what the engineering to support it does at normal speeds.
The CoreXY design loves speed because it moves the toolhead without dragging the whole bed around; that reduces inertia. With Klipper’s Input Shaping, vibration artifacts drop off. Pressure Advance keeps corners clean by timing the extrusion. Put together, these features let me push speed without sacrificing sanity.
What I Actually Use Day-to-Day
- PLA/ASA: 200–300mm/s for detailed parts, 350mm/s for fast drafts.
- PETG: 180–250mm/s depending on the part’s geometry.
- Nylon/CF blends: 120–200mm/s, prioritizing part strength and stability.
At extreme speeds, I get faint ringing on sharp corners—physics still exists—but it’s easily tamed by adjusting acceleration and input shaper profiles. The prints don’t just look acceptable; they look good.
Print Volume: Big Without Being Ridiculous
The 325 × 325 × 315mm build volume translates into practical freedom. Instead of splitting an enclosure lid into three parts and praying the seams looked intentional, I printed it in one go. Cosplay helmets fit without reconfiguring them into origami. I printed a drawer organizer that actually filled the drawer, not just a timid corner of it.
Projects That Benefited From the Space
- A full face shield for a costume in ABS, finished in a single print.
- A drone frame with extended arms in PA12-CF, where stiffness mattered.
- A large vase-mode lamp in PETG, which actually looked designed, not compromised.
On smaller printers, I often compromise on orientation. With the MAX3, I orient for strength and surface quality first, then figure out support strategy second, and it’s luxurious.
Materials: From PLA to PA12-CF Without Drama
The direct drive extruder and heated chamber feel designed to be adult supervision for unruly filaments. In PLA and PETG, it’s quietly excellent. In ABS and ASA, it starts to show off. With nylon and carbon-fiber blends, it gets downright impressive, assuming you respect moisture and print environment.
What I’ve Successfully Run
- Everyday materials: PLA, ABS, ASA, PETG, TPU.
- Engineering materials: PC, PA (nylon), PA12-CF, PAHT-CF, PET-CF, ABS-GF.
Fiber-filled blends produce crisp edges, dimensionally stable parts, and textures that feel like they were industrially made. I keep the chamber at a steady, warm temperature and dry the filament because carbon fiber blends absorb moisture like a sponge in a sauna. Do that, and the results are strong and striking.
Generalized Material Settings I Use as Starting Points
These are ballpark ranges that I tune per spool. I always check manufacturer recommendations.
| Material | Nozzle Temp (°C) | Bed Temp (°C) | Chamber | Notes |
|---|---|---|---|---|
| PLA | 200–220 | 50–60 | Off–Warm | Excellent finish at high speed with Input Shaping |
| PETG | 230–250 | 70–85 | Warm | Reduce fan for layer adhesion; watch for stringing |
| ABS/ASA | 240–260 | 100–110 | 45–65°C | Enclosure heat is a game-changer for warp control |
| TPU (95A) | 210–230 | 40–60 | Off–Warm | Slow down; direct drive helps a lot |
| PC | 260–290 | 100–120 | 50–65°C | Needs enclosure heat and controlled cooling |
| PA (Nylon) | 250–275 | 70–90 | 50–65°C | Dry spool; chamber prevents curling |
| PA12-CF / PAHT-CF | 260–290 | 70–90 | 50–65°C | Aggressive dryness, hardened nozzle recommended |
| PET-CF | 250–270 | 70–85 | 45–60°C | Stiff parts, nice surface, careful with retraction |
A note on nozzles: If you plan to print fiber-reinforced materials regularly, use a hardened steel or ruby nozzle. Brass nozzles will erode faster than my motivation after two cups of coffee.
Quality: What the Parts Actually Look Like
I look at layer lines the way some people look at tree rings—story and structure. On the MAX3, the story is mostly “crisp,” with occasional “oh, that was faster than it had any right to be.”
- Surface finish: Matte and consistent with CF filaments, glossy clean with PLA, solid with PETG when cooled thoughtfully.
- Corners: Sharp with Pressure Advance tuned; no blobby hesitation points.
- Bridging: Respectable; dual fans help, but I tweak bridging speeds rather than rely solely on airflow.
- First layers: Reliable. The 6mm aluminum heatbed plate stays flat and stable, so bed adhesion is predictable.
I printed a set of interlocking gears in ABS at a moderate pace. They meshed smoothly, no post-processing required, and the tooth profiles were clean enough that I checked my settings twice to see if I’d accidentally slowed it down more than I meant to.
CoreXY and the All-Metal Build: Stability You Can Feel
Some printers squeak. Others wobble a bit under pressure. The MAX3 does a convincing impression of a granite countertop. Between the all-metal frame, the 10mm wide belts, and those ⌀10mm hardened hollow steel linear shafts, motion is smooth and repeatable. The toolhead stops where it’s supposed to stop, at the speed you told it to, without complaining.
Why That Matters at Speed
- Less oscillation equals fewer ringing artifacts.
- The machine stays squared and aligned longer, which means less tinkering between prints.
- The bed doesn’t sag or warp when it heats up, partly thanks to that thick 6mm plate.
I ran a sequence of three large prints back-to-back with the chamber heat on, and the frame didn’t flinch. Adhesion stayed consistent, and dimensionally, the parts were within expected tolerances.
Heated Chamber: The Secret Weapon for Tricky Filaments
Warping on big ABS parts used to be my white whale. The enclosed heated chamber on the MAX3 changes the game. With a 65°C chamber, I can keep the entire print environment warm, which reduces thermal gradients that cause corners to peel.
- ABS brackets: Flat. No drama. Corners stayed where I left them.
- Nylon housings: Better interlayer strength and fewer post-print surprises.
I still use adhesives—glue stick, textured sheets, or PEI depending on material—and I treat moisture like an arch-nemesis. But the chamber makes stubborn filaments behave like citizens.

Klipper, Input Shaping, and Pressure Advance: The Smart Stuff
Klipper is the unsung hero here. It’s not just the slick web interface; it’s what the firmware does behind the curtain. Input Shaping counteracts vibrations, and Pressure Advance adjusts flow on the fly so you don’t get bulged corners and under-extruded edges.
- Tuning: The printer arrives with sensible defaults. I refined Pressure Advance per filament, which took minutes and paid off instantly in edge definition.
- Remote control: Monitoring prints from another room is oddly satisfying. Camera support and custom macros are available, and the open-source nature means I can tinker without pleading for permission.
If you like to customize your machines, Klipper feels like a friendly playground. If you don’t, the practical presets already take advantage of it.
QIDIslicer: Friendly, Focused, and Not a Maze
I’ve used slicers that felt like tax forms. QIDIslicer, a tuned fork tailored for this machine, feels like it wants me to succeed. The presets are conservative enough to avoid disasters but can be pushed when I’m feeling braver than I should.
- Profiles for standard materials are solid out of the box.
- I created custom profiles for PA12-CF and PET-CF, adjusting flow and retraction slightly; the results were consistent and repeatable.
- Supports release predictably, and tree supports for complex geometry saved me post-processing time.
When I want to go off-menu, QIDIslicer gives me the controls without burying them three levels deep.
Reliability and Maintenance: The Boring Part I’m Grateful For
Everything that moves will eventually need care. On the MAX3, that care is straightforward and infrequent. I check belt tension once in a while; these 10mm wide belts are sturdy and don’t stretch easily. I keep the shafts clean and lightly lubricated. I purge and clean the nozzle between material changes, especially when going from something like PETG to ABS or nylon.
- Filters: If you print a lot of ABS or similar, consider external ventilation. The enclosure keeps heat in, not fumes out.
- Bed surface: Keep it clean. Alcohol wipes have saved more prints than I care to admit.
- Firmware: Open-source Klipper means updates and configuration are accessible, not a locked vault.
The machine’s overall vibe is “you can count on me.” It doesn’t ask for attention constantly, which is refreshing.
Print Examples: From Practical to Peculiar
I asked the MAX3 to help me with both serious tasks and silly ideas. It didn’t judge.
- Tool tray in PETG: Tough, precise compartments, printed fast at 280mm/s. The compartments were square, and the edges clean.
- Camera bracket in ABS-GF: Stronger feel than plain ABS, less flex; chamber heat kept it flat.
- Small run of drone arm prototypes in PAHT-CF: Lightweight, stiff, and consistent, with excellent layer bonding.
- TPU gasket: Printed slow but perfect, free of under-extrusion hiccups. The direct drive really shines here.
- A very large vase-mode lamp in PETG: It sang through this print, and the surface looked like glass-calm water.
It’s not only about printing fast; it’s about the machine encouraging you to try projects you’d have shelved before.
Noise, Heat, and Smell: The Realities of Living With It
Enclosures help with noise. The MAX3 is not whisper-quiet, but it’s not a banshee either. At high speeds, you’ll hear the fans and a kind of orchestral stepper hum—more white noise than whine.
- Noise: Comfortable in a workshop. In a bedroom? Let’s not. You’ll hear it.
- Heat: The chamber maintains warmth responsibly; exterior panels don’t become dangerous.
- Odor: ABS and similar will still smell like ABS. I ventilate, and I recommend you do too.
I’ve run long prints overnight and woken to finished parts that needed nothing but admiration and a bit of cleanup where supports met the model.
Pros and Cons As I Lived Them
I don’t trust reviews without a nerve-exposing list, so here’s mine.
Pros:
- Genuinely fast while maintaining high print quality.
- Large build volume without turning the machine into furniture.
- Enclosed, heated chamber supports engineering materials like ABS, PC, and carbon-fiber nylons.
- Strong, stable CoreXY frame with substantial belts and shafts.
- Direct drive excels with TPU and fiber-filled filaments.
- Klipper firmware with Input Shaping and Pressure Advance feels like a superpower.
- QIDIslicer presets are practical and reliable.
- Ready to print right out of the box.
Cons:
- It’s a big machine; it commands space.
- Fans are audible at high speed; not an apartment stealth printer.
- Fiber-filled filaments require hardened nozzles and impeccable drying—user error shows quickly.
- While it can hit 600mm/s, most high-quality work happens under that number (which is fine by me).
A Quick Comparison With Alternatives I’ve Used
I won’t name and shame, but here’s the vibe.
- Versus smaller, slower bedslingers: The MAX3 is faster, more stable at speed, and prints larger parts without gymnastics. If you never print bigger than a shoebox and don’t care about ABS/nylon, you might not need this class of printer.
- Versus other CoreXY speed machines: The MAX3 competes on speed and quality while standing out for the heated chamber and heavy-duty motion components. The open Klipper stack keeps it flexible long-term.
- Versus “plug-and-play” consumer printers that lock down features: The MAX3 is friendlier to tinkerers and power users without alienating beginners.
It feels like a serious tool that doesn’t make me fill out forms in triplicate to access advanced features.
Who I Think This Printer Is For
- Product designers and prototypers who need big parts fast.
- Hobbyists graduating from their first printer and ready for something with a larger envelope and better motion control.
- Makers who want to print real engineering materials—ABS, ASA, PC, PA, and CF blends—without turning their space into a wind tunnel of warping.
- Anyone who wants Klipper out of the box with sensible defaults.
If your ambitions include full-face helmets, functional brackets, and durable housings, this machine invites those ambitions in.
Tips That Saved Me Time and Filament
A few habits turned this from “great printer” into “favorite coworker.”
- Dry your filaments, especially nylon and CF blends. If you don’t, layer adhesion and surface finish will rat you out.
- Tune Pressure Advance per filament. It takes minutes and makes corners crisp.
- Use the chamber heat strategically. PLA doesn’t want a sauna; ABS and nylon demand it.
- Keep the bed clean and use the right adhesion method for the material.
- Don’t be shy about speed, but respect the geometry. Large flat parts at 350mm/s might be fine; delicate lattice structures prefer a calmer tempo.
- Hardened nozzle for abrasive filaments. Brass nozzles are for gentle materials.
- Check belts and linear shafts occasionally. They’ll treat you well if you return the favor.

Small Things That Made Me Smile
- The first-layer consistency is deeply satisfying. Watching it lay down a perfect sheet is like a soothing ritual.
- The chamber temperature makes overnight prints feel less like a gamble and more like a routine.
- QIDIslicer’s profiles are not a mess; they feel genuinely tuned for the hardware.
- The machine’s open approach didn’t lock me into anything. I can add a camera, craft macros, and adjust behavior without a court order.
A Week of Printing: What I Learned About Its Personality
Printers have personalities. Some sulk under pressure, others act tough and then cough up spaghetti. The MAX3 is steady. It likes to be treated like a machine designed to do real work. Give it a clean bed, a sane profile, and filament that isn’t soup, and it rewards you with parts that look like they came from a much pricier setup.
It’s game for experiments, but it doesn’t excuse sloppiness. If your supports are excessive, it will print them with vigor and then stare at you while you pry them off. If your retraction settings are borrowed from another machine, it will string at high speed and remind you that Pressure Advance exists for a reason. Fair.
Practical Workflow: From Idea to Object
Here’s how a typical session goes for me, in case you like the comfort of routine.
- Sketch: I model in CAD, aiming for printability—forgiving tapers, proper fillets at stress points.
- Slice: Load a profile in QIDIslicer, tweak speed and fan depending on the material and geometry, check supports.
- Prep: Clean bed, check chamber heat if needed, dry filament if we’re in nylon country.
- Print: Start with a fast but not reckless pace. Monitor first layer through the door like a hawk pretending not to be a hawk.
- Adjust: If the model has critical dimensions, print a small test piece first; it’s cheap insurance.
This cadence reduces surprises. The MAX3 rewards that kind of rhythm.
Troubleshooting Moments I Had (And Solved)
- Minor ringing at aggressive speeds on sharp corners: Lowered acceleration slightly and verified Input Shaping profile; ringing disappeared.
- Slight stringing on PETG at high temperature: Reduced nozzle temp by 5–10°C and lowered retraction a hair; improved immediately.
- Nylon corners lifting on a massive part: Chamber heat up, brim added, bed carefully cleaned and re-glued; warp vanished on the next run.
None of these required heroics; they were the standard adjustments that every printer asks for, except the machine responded predictably and stayed in tune after.
The Value Proposition: What I Feel I’m Paying For
I’m paying for speed that doesn’t make me apologize for quality, a build volume that lets me print ambitious parts, and a chamber that keeps tough materials from acting like wild animals. I’m paying for an all-metal, CoreXY backbone that won’t fall out of square. And I’m paying for Klipper, set up sensibly, so I’m not starting from a pile of config files and hope.
I’m not paying for gimmicks. This is a tool, and it behaves like one.
Support and Community: I Didn’t Feel Alone
I didn’t need help often, but when I did, resources were available. The company’s materials are clear, and because it runs Klipper, the broader community knowledge applies. Slicer settings, macros, acceleration experiments—there’s no shortage of people doing the kind of work that helps you skip mistakes.
Open-source means I’m not trapped if I want to add a camera or customize the UI. It’s my machine, and it feels like it.
The Feature Breakdown Table I Wish I’d Seen Sooner
| Category | What I Noticed | How It Helps |
|---|---|---|
| Motion System | CoreXY, 10mm wide belts, ⌀10mm hardened hollow steel linear shafts | Fast, accurate motion with minimal wobble and ringing |
| Build Platform | 6mm thick aluminum heatbed plate | Stable, flat first layers; fewer adhesion hiccups |
| Extrusion | Direct drive extruder | Reliable TPU, consistent flow at speed |
| Heat Management | 65°C heated chamber + dual cooling fans | Stronger ABS/nylon prints, controlled part cooling |
| Firmware | Klipper with Input Shaping and Pressure Advance | High-speed capability without surrendering quality |
| Software | QIDIslicer tailored profiles | Quick wins and easy tuning |
| Assembly | Fully assembled | Print on day one, not day eight |
| Materials | PLA, ABS, ASA, PETG, TPU, PC, PA, PA12-CF, PAHT-CF, PET-CF, ABS-GF | Broad project range from art to functional engineering |
Living With It: The Everyday Test
A printer that dazzles on day one but deteriorates into fussiness is not a partner; it’s a phase. After weeks of use, the MAX3 still starts, runs, and finishes like it means it. The belts haven’t demanded my constant reassurance. The bed is still flat. The chamber warms evenly. Prints still look like I planned them.
I don’t baby it, and it doesn’t punish me for that.
What I Wish Were Different
- I’d love an even quieter fan profile for late-night runs, even if it meant a small speed trade-off.
- An included hardened nozzle would be a nice nod to the reality that many buyers will try CF or GF filaments early on.
These aren’t deal breakers; they’re “wouldn’t it be nice if” notes scribbled in the margins.
The Moment It Won Me Over
I printed a large, flat mechanical cover in ABS—something I’ve historically avoided because it tends to curl like it’s trying to escape. With the MAX3, the first layer went down like a well-planned landing, and the rest followed obediently. When it finished, the part was flat, square, and usable without any heat-gun persuasion. I stared at it the way you stare at a cake you baked that actually rose.
Frequently Asked Things I Asked Myself
- Can it really do 600mm/s? Yes, but you’ll choose your speeds based on geometry and finish. The point is that it stays composed at high speeds, even when you don’t max it out.
- Is it beginner-friendly? Yes, as long as you’re comfortable learning a bit about slicer profiles and respecting materials. Auto-leveling and presets lower the barrier a lot.
- Do I need the chamber heat? If you stick to PLA and PETG, not really. If you want ABS, ASA, PC, nylon, or carbon-fiber blends, it’s essential and profoundly useful.
- Is Klipper scary? Not here. It’s already set up to be helpful. If you want to go deep, you can. If you don’t, you still benefit from it.
If You’re On the Fence
Ask yourself what you want to print. If your ambitions include large, functional parts; a mix of everyday and engineering materials; and prints that finish in hours, not days, the MAX3 matches that brief with a certain quiet confidence. If your prints are tiny trinkets and you exclusively use PLA, you might be paying for capacity you won’t use—but I wouldn’t underestimate how quickly ambition expands once you have the right tool.
Final Thoughts: The Printer That Let Me Think Bigger
I’ve owned printers that were charming and delicate and printers that were brutish and stubborn. The QIDI MAX3 is neither. It’s competent and composed. It lets me think in bigger parts and stronger materials without bracing for the fallout. It’s fast enough to change my workflow and precise enough to make me smug about tolerances. And it does all of this without demanding a personality cult in return.
If you want a machine that balances speed, size, and sophistication—and you’d prefer your prints to look like they were made on purpose—the MAX3 belongs on your shortlist. I didn’t just print with it; I started planning projects around what it made possible. That, more than any single number on the spec sheet, is what sold me.
Disclosure: As an Amazon Associate, I earn from qualifying purchases.