Have you ever stared at a 3D printer the way you might watch a reluctant toaster, waiting for the miraculous moment when something more than heat and worry arrives?

Why I Picked Up This Manual
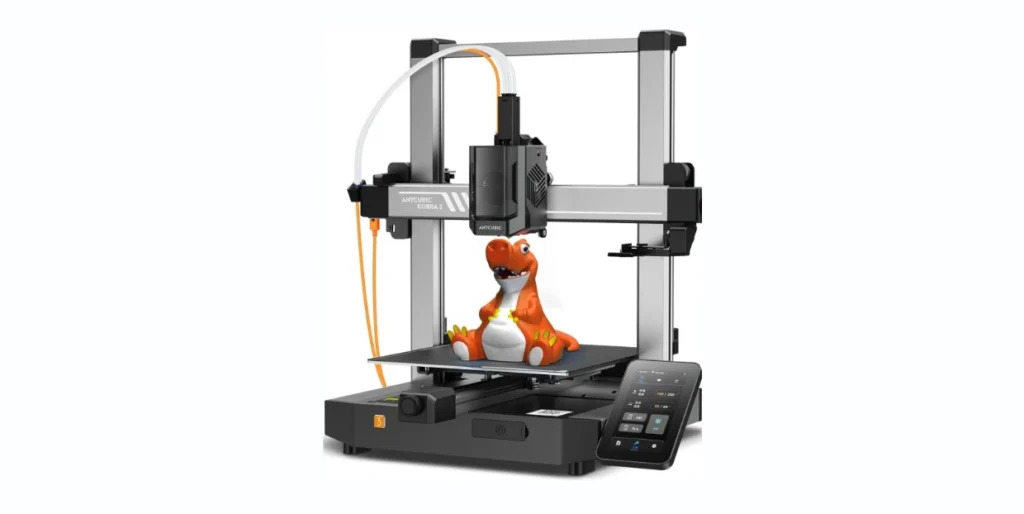
I didn’t grow up with power tools. My childhood toolbox had exactly two items: safety scissors and an inclination to ask adults for assistance. Years later, when my first FDM 3D printer arrived (in a box aggressively optimistic about my mechanical competency), I understood that the machine would need a better operator than me. That’s why I reached for “FDM 3D Printing Manual: A FDM 3D Printer: Beginner’s Guide,” a title so earnest it feels like it came pre-sliced for search-engine friendliness.
My Relationship With 3D Printing
I came to 3D printing not through engineering, but through the same kitchen sink approach that had me once attempting a soufflé with a bicycle pump. I wanted to make useful things (hooks, organizers, those charming calibration cubes that look like they were designed by a pragmatic elf). I also wanted fewer prints that looked like a spaghetti factory had been overrun by heat lamps. The manual promised to show me how to get from noodle heap to proud little prototype—and to do it without shaming me for forgetting the difference between brim and raft.
First Impressions of the Book
The book is clearly aimed at beginners, and it shows. The pacing is steady, the tone is patient, and the structure suggests that someone actually thought about how a new person learns: step-by-step procedures, checklists, troubleshooting decision trees, and occasional humor that feels like the agreeable nod of a seasoned shop teacher. The title’s repetition of “FDM” made me grin—sometimes reassurance starts right on the cover.
What the Manual Promises
The manual presents itself as a full runway from unboxing to reliable prints. It offers to explain all the basics of Fused Deposition Modeling (the molten plastic kind), turn the mystery knobs into understandable settings, and help a hesitant person like me press “Print” without the creeping suspicion that something is about to smoke.
For Actual Beginners, Not Honorary Engineers
I appreciated that the manual uses examples that don’t assume you know what firmware is, or that you won’t panic when someone says “PID tuning” as if it’s a hobby farm. It defines terms, revisits them, and then uses them in plain sentences. If you have never adjusted a Z-offset, don’t worry: by the time the book is done, you’ll treat that task like seasoning soup.
From Unboxing to First Print, With Reality Checks
The manual speaks in timelines. It says, in effect: first get the bed level, then calibrate the nozzle distance, then confirm extrusion, then slice a simple model, then go have a small, celebratory snack while it prints. It doesn’t pretend you’ll print a flawless figurine straight away; it tells you what to do when you get a stringy ghost or a warped turtle.
How the Manual Is Organized
The organization is pleasantly straightforward. I didn’t need to use a glossary until I wanted to impress myself.
Here’s a helpful breakdown of the structure as I experienced it:
| Section/Chapter | What It Covers | Skill Level | Time to Work Through | My Notes |
|---|---|---|---|---|
| Getting Started | Printer anatomy, safety, setup | Beginner | 1–2 hours | Clear drawings and sensible cautions |
| Bed Leveling & Z-Offset | Manual and assisted methods | Beginner | 30–60 minutes | The feeler paper trick, pictured and explained |
| Filaments 101 | PLA, PETG, ABS, TPU, composites | Beginner | 45 minutes | Honest about pros/cons and temp ranges |
| Slicers | Cura, PrusaSlicer basics | Beginner | 1–2 hours | Screenshots, sensible defaults |
| Calibration | Extrusion, temperature towers, flow rate | Beginner–Intermediate | 2–4 hours | Gentle ramp-up, worth the time |
| First Prints | Benchy, calibration cube, simple bracket | Beginner | 2–3 hours printing | Candid expectations and troubleshooting |
| Troubleshooting | Flowcharts for common fails | Beginner–Intermediate | Ongoing | Sticky-note worthy |
| Maintenance | Cleaning, lubrication, belt tension, storage | Beginner | 30–60 minutes each session | Practical schedule-based approach |
| Next Steps | Bed adhesives, enclosures, upgrades | Intermediate | Optional | Light touch, not salesy |
It’s a course, not a lecture. I never felt abandoned mid-chapter with a mysterious acronym and nothing but goodwill.
Writing Style and Clarity
The author writes like a patient friend, the kind who will let you mispronounce “Bowden” once, then gently correct you with a diagram.
Plain English That Keeps Its Promises
The explanations are unhurried and decently humble. Bed leveling, that ritual many guides treat like a quest for enlightenment, gets a clear description and a couple of different techniques. The book suggests you adopt whichever method you can repeat consistently. I found myself nodding along, which is easier than admitting I used to level my bed by feel and superstition.
The Jargon Is Tamed, Not Trashed
I like that the manual doesn’t hide the technical terms; it introduces them, defines them, and uses them. I felt smarter after a few pages, not bullied by vocabulary. When the book says “E-steps,” it doesn’t leave you there; it says why E-steps matter, how to measure, and what bad E-steps look like in finished parts.
Visuals and Layout
The images are functional, the kind you consult with sticky fingers while the printer is whirring.
Illustrations That Actually Help
There are diagrams of hotends, extruders, build plates, and the path of filament, all labeled like they’re on their best behavior. The photos show real life, not only pristine laboratory conditions. I saw fingerprints and slightly scuffed beds, and I felt less alone.
Step-By-Step That Respects Your Time
The manual knows when to use numbered steps and when to tell a story. It saves the long paragraphs for context and keeps the pragmatic tasks modular, like LEGOs you can snap together out of order if you must.
What the Manual Teaches About FDM Printing
The book uses FDM as a framework, not a gatekeeping club. It acknowledges that many people confuse “printer” with “magic box” and assumes you’d like to join the group that knows better.
What FDM Actually Is
FDM is molten plastic laid down in layers, like a very patient ant building a miniature layer cake. The manual explains the heating element, the extruder motor, the nozzle, and the bed, and how they coordinate like a tiny orchestra without the benefit of union rules. It makes the physics accessible and leaves the equations to your old high school binder.
Getting to Know Your Printer’s Anatomy
The sections on gantry styles, belt tension, and the purpose of springs and leveling knobs are confidence-building. I found myself adjusting eccentric nuts (which do sound like a Victorian confection) without worry. The author insists you touch your printer—carefully—and know it physically.
Materials Without the Myth
PLA gets its crown as the easiest, least smelly, and most agreeable material. PETG is positioned as the graduate course in stickiness (to both nozzle and bed), ABS is treated with respect and ventilation reminders, and TPU gets a special note for being silly putty with ambitions. Composites are mentioned as enticing but fussy. I liked the advice that material choice is half the battle and that you can save an entire afternoon by choosing PLA while you’re still learning.
Slicers, Interpreted
The book doesn’t play favorites, but it is practical. Cura and PrusaSlicer are introduced with equal care, and the defaults are presented like training wheels you don’t need to be ashamed of. I felt encouraged to try profiles and only tinker when I had a specific reason. Fancy settings like coasting, pressure advance, and linear advance are described, but the manual’s tone is: learn the basics first, then touch the spicy buttons.
Calibration, but Without Tears
Calibrating is the part most beginners postpone, like flossing. The manual is adamant that calibration is not punishment; it’s the difference between a cube that measures 20 mm and one that measures “whatever destiny chooses.” Bed leveling, Z-offset tuning, E-step calibration, flow rate, temperature towers, retraction tests—each one is explained, and crucially, each has a “how to know you did it right” section. I loved that. The “right” is not perfect; it’s repeatable within your goals.
I Followed the Manual and Printed Things
I decided to test the manual’s promise by treating it like a companion across a weekend. We built confidence, then we built a boat.
Setup Day: My Printer and I Get Acquainted
Using the manual’s guidance, I unboxed and assembled the printer without the screw-related despair I had braced for. There’s a sensitive mix of “hand-tight” and “do not strip this bolt” language that kept me from hurting anything. The safety reminders were not scolding, which is a relief, because telling a person not to touch the hot part of a machine ought to be delivered with grace.
The Ritual of Bed Leveling
I used the paper method, moving the nozzle and feeling for the right drag like a sommelier gauging tannins. The manual recommended checking center and corners, then repeating. I repeated it three times, because I’m a person, not a robot, and my printer seems to enjoy a little moodiness. The book’s “good enough for now” philosophy helped. I’ve read guides that insist on ascetic perfection; this one trusts that I’ll come back and refine later.
Slicing My First Model Without Losing My Mind
The manual gently nudged me toward a calibration cube. I was tempted by the classic tugboat, but the cube makes diagnosis easier. I set layer height and infill according to the book’s “starter” profile and resisted the urge to tinker. Watching the first layer go down—slow, even, and sticky in the right way—felt like the moment a toddler agrees to try a new food and doesn’t immediately spit it out.
Results: From Strings to Sane Prints
My first cube had a whisper of elephant’s foot (the bottom layer flaring just enough to look proud of itself). The manual clearly explained why: either bed too hot or first layer squished. It offered two fixes; I lowered the bed temperature by 5 degrees and raised the Z-offset by a hair. The next cube measured within 0.1 mm, and I high-fived myself in a way I hope no one saw.
I tried a temperature tower next, amazed that anyone thought to make a totem pole of science. The book walked through slicing the model so each segment prints at a different temperature, then interpreting the results like tea leaves. The sweet spot for my PLA was slightly lower than the filament company suggested, which confirmed my suspicion that manufacturers are optimists.
Stringing was my nemesis with PETG, which loves to decorate the air with sticky floss. The manual recommended shorter retraction distances and slower travel speeds. That combination helped more than my old “print and pray” method. It also suggested drying filament—advice I had ignored until now because drying a plastic noodle seemed like performance art. It turns out humidity is real, and the improved prints were sobering proof.
Upgrades and Temptations
Near the end of the weekend, I found the section on “small upgrades that make a big difference.” The manual offered a measured approach: better bed springs, a tool drawer, quality nozzles, maybe a PEI sheet for adhesion. It warned against blaming hardware for problems that are really slicing or calibration. I appreciated the restraint. It was the literary equivalent of the friend who tells you that you do not need another colander; you need to wash the one you have.
Troubleshooting That Actually Troubleshoots
I tested the troubleshooting section by intentionally making mistakes. I know, this is odd behavior. But if I can cause a stringing disaster, I can learn to reverse it.
Flowcharts With Feelings
The decision trees in the manual read like a calm nurse asking diagnostic questions. “Are your corners lifting?” “Is the first layer shiny and squished?” “Does your nozzle leak like a gossip?” Answering these led me to realistic fixes. For warping, the book suggested a brim, enclosed build area, and a slightly higher bed temp. For under-extrusion, it led me to check the extruder gear for chewed filament, then measure E-steps. I did both, and the cure was oddly satisfying.
Case Studies From My Messy Desk
- Warping: I printed a large flat part in ABS because I was feeling defiant. The edges curled like they were waving goodbye. Following the manual, I used ABS slurry on a glass bed (please be careful, it’s not spa day; acetone is… spirited), raised the bed temperature, and printed inside a makeshift enclosure composed of a box and my questionable optimism. The results were much flatter, and the piece stayed put.
- Under-extrusion: My PETG prints had gaps like they were saving material for a rainy day. The manual’s checklist led me to a partially clogged nozzle and a slightly worn Bowden tube end. After cutting a fresh end and swapping in a brass nozzle, my lines bonded properly. It felt like cleaning out a drain and suddenly hearing the sink gurgle with gratitude.
Safety, Maintenance, and the Things People Forget
Some manuals treat safety like an afterthought. This one puts it early and returns to it when relevant, as if it assumes you’re human and sometimes forget that the hot thing is hot again today.
Sensible Safety Without Drama
The book covers ventilation for ABS and ASA, burn risks, and the reality that fans spin and belts move whether you are ready or not. It suggests a fire-safe routine: don’t leave the printer unattended for the first layers of a new print, make sure your smoke detector works, and avoid running the machine overnight unless you know your setup and accept the risk. I appreciated the tone: caution, not fear.
Maintenance That Doesn’t Feel Like Homework
I am not good at scheduled tasks. I am the person who remembers to water plants precisely when they look dramatically faint. The manual gives a realistic maintenance schedule with reminders: clean the bed, check belt tension, lightly lubricate rails if your printer calls for it, inspect the nozzle, and store filament in sealed containers with desiccant. It explains why each task matters and what happens if you ignore it (cue the stringing and the squeaks).
Ethics and the Objects We Make
In passing, the manual mentions copyright and responsible printing, which saved me from accidentally becoming a small-time pirate of character figurines. It also touches on material waste: how to reduce failed prints, reuse purge lines, and not print ten of something when one would do. I like books that remind me to be a better person, without scolding.
Who This Manual Is For (and Who Might Want More)
I handed the book to a neighbor who self-identifies as “average with gadgets” and asked for a verdict. He liked it. That says something.
Beginners Who Want Results Without Ego-Brusing
If you’ve never touched a 3D printer, this is a soft landing. The manual is forgiving, methodical, and encouraging. It’s not trying to make you a firmware flash wizard on day one. It wants you to get a good first layer and to recognize what “good” looks like.
Tinkerers Who Want a Sanity Check
If you’ve been making objects for a while but keep wrestling with the same problems, the troubleshooting and calibration sections are worth the ticket. You might skim the early chapters, but the later ones include the practical fixes you’ll use over and over.
If You’re Already Printing Exotic Filaments
If you’re printing polycarbonate in a heated chamber with hardened nozzles and fusion protein confidence, the manual may feel elementary. It doesn’t go very deep into multi-material units, soluble supports, or speed-focused firmware like Klipper. You may enjoy it the way a pianist enjoys a good primer: for its clarity, but not for novelty.
How It Compares to Other Resources
The 3D printing world is full of excellent educators and YouTube channels with soothing voices. Books have to earn their shelf space.
Versus Other Books and Guides
Compared to more encyclopedic resources, this manual is friendlier. It’s not trying to be a reference book for every scenario; it aims to be the first book you actually read. Where some texts skew toward theory and manufacturing principles, “FDM 3D Printing Manual: A FDM 3D Printer: Beginner’s Guide” stays close to the bench, where filament sticks or doesn’t and your patience is the volatile ingredient.
Versus Online Articles and Videos
Videos are terrific for showing a nozzle gap, but they fly by. The manual lets you dog-ear a page and check a setting in peace. I used both, and the combination works well. I liked that the book’s slicer recommendations matched what I was seeing online, which made me feel like there’s a consensus and I’m not trapped in a contrarian tutorial.
The Bits I Loved
There were moments when I wanted to write thank-you notes in the margins.
Checklists That Prevent Stupid Mistakes
Before each print, there’s a quick pre-flight checklist. Bed clean? Filament dry? Slicer profile matched to material? Z-offset unchanged since last victory? It’s like brushing your teeth—perfunctory but essential. My fail rate dropped when I took these seriously.
The Tone That Treats You Like a Capable Person
Whenever I messed up (and I did, often), the manual assumed I’d get better. It normalized the idea that printing is tuning, not just pressing a button like it’s a burrito. That tone kept me at the machine instead of wandering off to stare at other hobbies on the internet.
Where It Fell Short
Even good manuals have blind spots, the way a helpful friend still forgets your coffee order.
Advanced Topics Get a Light Touch
The book skims over advanced materials beyond the basics and doesn’t spend much time on enclosures, all-metal hotends, hardened nozzles for abrasive filaments, or dual extrusion workflows. It mentions them enough to spark interest but not enough to hold your hand. If you’re eager to print nylon with glass fiber, you’ll need supplemental material.
Firmware and Speed Enthusiasts Will Want More
The manual acknowledges firmware updates but doesn’t escort you through custom flashing, input shaping, or Klipper configuration. That’s fair for a beginner’s guide, but I would have liked a “when you feel ready” appendix for these rabbit holes. A tiny warning: the book may make you want to try everything; your printer will prefer you try one thing at a time.
A Few Images Could Use More Annotations
In a couple of close-up photos, the critical detail (a gap, a glint, a squish) could use arrows or contrast boosts to be truly unmistakable. The text explains it, but I found myself squinting like I was trying to read the mood of a cat.
Value for Money
Books only pay for themselves if they save you time or filament, and preferably both. This one did.
How It Paid Off in My Workshop
After following the manual’s calibration routine, my success rate improved. I used less filament to get a usable part and spent fewer evenings diagnosing my sins. That kind of progress is worth more than the price of a spool, and certainly more than the cost of my earlier mistakes, which I now store in a bucket I optimistically label “prototyping.”
Who Should Buy This
- If you’re on your first FDM printer or about to be: yes, buy it.
- If you have a mediocre success rate and want a structured reset: yes.
- If you run a small makerspace and need a common baseline for new people: yes.
- If you’ve already tuned your machine into a humming factory and know your way around acceleration limits: perhaps consider this for your friend who keeps asking you for help.
Frequently Asked Questions I Had (And How the Manual Answered)
- What’s the easiest first material? PLA. Low warp, low smell, low stress. The manual stands firmly in the PLA-is-your-friend camp.
- Do I need a special adhesive? Maybe not. Clean the bed first. If you do, the book suggests a light glue stick layer or PEI sheet, depending on your printer and material.
- How do I fix terrible first layers? Level bed, set Z-offset carefully, slow the first layer, slightly raise bed temperature, and watch the first five minutes like a hawk on a coffee break.
- Why are my prints stringy? Increase retraction speed slightly, adjust distance, lower nozzle temp a little, ensure filament is dry, and consider coasting/comb settings as a later tweak.
- What’s that grinding sound? Possibly the extruder skipping steps. Check tension on the idler, inspect for partial clogs, and verify E-steps.
- My parts don’t fit together. Do I scale the model? Usually no. Print a dimensional calibration model, adjust flow rate or horizontal expansion, and reprint before altering the original design.
- How often should I maintain the printer? Lightly after each print session (bed clean, debris cleared), more thoroughly every few weeks (belts, lubrication, nozzle check).
- Which slicer should I start with? Cura or PrusaSlicer. Use a community profile for your printer and material, then adjust one parameter at a time.
- Do I need an enclosure? Only for warp-prone materials (ABS, ASA, nylon). PLA prefers a breeze and emotional support.
- How fast can I go? Start slow until your machine and settings are consistent. Speed is a privilege earned by calibration and mechanical stability.
Pro Tips I Wrote in the Margins
- Label your spools with opening date and desiccant status. Time is a humidity thief.
- Keep a small brush near the printer to clean residual strings off the nozzle while warm (carefully).
- Print and save a 20 mm calibration cube with the date and settings noted; it’s your time capsule.
- If your first layer looks perfect, stop watching. Trust, but confirm at layer two.
- Use color to learn. A bright filament shows defects more clearly than black or translucent.
- Log changes. One variable at a time is science; five variables is gambling.
- Don’t chase perfection on a test print. Fix “good enough” when you print a real part.
- Keep spare nozzles. A clogged nozzle becomes a personality trait if you let it.
- Belt twang test: gently pluck like a guitar string; the sound should be low and confident, not wobbly and sorrowful.
- Store your scraper safely. Nothing ruins a victory like a surprise bandaid moment.
What I Learned About Myself While Leveling a Bed
I learned I am someone who likes ritual. I start the printer, I wipe the bed with isopropyl alcohol like I’m setting a tiny dinner table, and I slide a piece of paper under the nozzle as if asking it for a signature. The manual gave me a routine and permission to accept “pretty good” when required. It took away the shame of not being perfect at a hobby that has the audacity to require both patience and heat.
The Details That Make a Difference
The book leans into practicalities: spool placement to reduce drag, filament guides to prevent rub, and the fine art of removing a print without turning the bed into a skating rink. It’s unusually good at expectations. Not all layer lines will vanish, it says; your goal is functional beauty, or beautiful function, whichever gets you through the day. It also notes that sometimes the answer is “print slower.” This is hard to accept when you’ve already waited four hours; it is, unfortunately, correct.
A Few Small Examples, Because Specifics Matter
- First Layer Temp: The manual suggested slightly higher bed temps for the first layer, then lowering a bit for the rest. This reduced elephant’s foot on my parts without sacrificing adhesion.
- Retraction for TPU: It warned me to go minimal with retraction and slower with print speeds for flexible filament. Following this kept the extruder from chewing the filament into modern art.
- Support Settings: It recommended tree supports in some slicers for organic shapes and warned that too-dense supports will weld themselves to your model without serious persuasion. I learned to err on the side of removability.
The Confidence Threshold
There’s a point in learning when the anxiety of not knowing is replaced by the gentler anxiety of optimization. The manual got me there. I now look at a failed print and think, “I see what you did,” which is also how I talk to bread dough that didn’t rise. The big difference is that a Z-offset doesn’t require proofing.
What I Wish Was in the Next Edition
- A short table of “If you’re learning PETG, use these starting numbers. If ABS, these. If TPU, do this.” Some of it is there, but a consolidated cheat sheet would save flipping.
- A brief chapter on when to use adaptive layer height and how to balance speed with surface finish.
- A primer on common firmware screens and settings across popular printers, with careful caveats about not changing acceleration and jerk without a plan.
- A “portfolio” page of common household prints (cable clips, soap dishes, drawer dividers) with recommended profiles, just to celebrate usefulness.
Final Verdict
“FDM 3D Printing Manual: A FDM 3D Printer: Beginner’s Guide” earns its place by being the calmly helpful voice I needed when my printer sounded like an insect orchestra. It doesn’t try to impress you with theory; it cares that your first layer sticks, your nozzle doesn’t clog, and your tenor of panic slowly subsides into competence. I came away printing better, wasting less, and feeling like I could teach a friend without turning into a sermon.
If you’ve just bought a printer or you’ve had one sitting like a decorative appliance you’re afraid to turn on, this is the book that gets you moving. If you’re already swapping hardened nozzles like a pit crew, you may want more depth, but you’ll still appreciate how it teaches the fundamentals without fuss.
I’d call it a solid 4.5 out of 5 for beginners, and a respectful nod from those of us who still occasionally watch the first layer like a nervous parent at a school play. The printer does its little dance, the filament lays down, and for once the manual on the desk doesn’t feel like homework—it feels like a hand on your shoulder saying, “You’ve got this.”
Disclosure: As an Amazon Associate, I earn from qualifying purchases.