Have you ever watched a machine move so fast you wonder if you should applaud, or simply get out of its way?


Why I Chose the Creality Ender 5 Max for My Workspace
I bought the Creality Ender 5 Max because I’m easily tempted by phrases like “700 mm/s” and “400 × 400 × 400 mm build volume.” If a printer promises to be both a marathoner and a weightlifter, I will rearrange my desk, my life, and possibly my social calendar. The promise of precision linear rails, a 64‑point automatic leveling system, and a hotend that can reach 300°C sounded like the grown-up version of a toy I was never allowed to have.
Then there was that 1000W heatbed, which sounded suspiciously like something I’d once used to keep a casserole warm. The idea that I could heat an aluminum build plate to 80°C in about 200 seconds was oddly comforting. I love machines that treat my impatience like a design requirement.

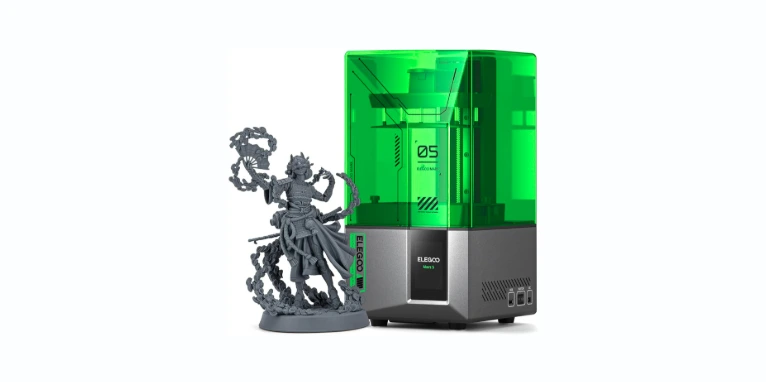
Creality Ender 5 Max 3D Printer, 3D Printing Machine with 700mm/s High-Speed Printing, 400 * 400 * 400 Large Print Area, 64-Point Auto Leveling 300℃ High Temp Precise Linear Rail
$749.00 In Stock
The Promise the Spec Sheet Makes (and How I Took It)
I’m not a spec-sheet worshipper, but when I see numbers, my brain starts calculating scenarios where I become more efficient, more capable, and strangely better at time management. The Ender 5 Max comes advertised as a high-speed, large-format printer with “industry-level” volume. That’s persuasive if you’re printing cosplay armor, architectural models, production jigs, or just want to print a lampshade the size of a terrier.
But speed claims are like dating profiles: charming, occasionally exaggerated, and best validated in person. What mattered to me was whether this machine could put down a truly perfect first layer, finish big projects without drama, and stay consistent. I wanted a printer that didn’t turn me into a babysitter with a spatula.
What Came Out of the Box and How It Felt to Meet It
When the Ender 5 Max arrived, it felt like someone had packaged a small building and delivered it to my doorstep. I wielded a box cutter, briefly wondering if a helmet would be prudent. What I found inside was a solid frame, confidence-inspiring rails, chunky stepper motors, and a bed that looks like it could double as a serving platter at a medieval banquet.
Assembly was straightforward in the way assembling something big rarely is. I followed the instructions, squared things up, checked the belts, and marveled at the linear rails. I’ve used printers with wheels and belts and prayer, but rails always feel like I’ve traded up from a minivan to a subway line—stability, precision, and a touch of ceremony.
The 64-Point Auto Leveling That Saves Saturdays
I have spent too many Saturdays chasing first-layer problems with a piece of paper and a sense of foreboding. The Ender 5 Max’s 64-point automatic bed leveling system was the equivalent of a friend showing up with a spirit level and a plan. The mesh routine scans the bed and quietly accounts for irregularities, giving me that glossy, even first layer without the rituals I remember from the early days of 3D printing.
The first layer is everything. It’s the handshake, the promise, the opening line. If it goes down well, the rest of the print has permission to be beautiful. On this machine, it did, consistently, and without bargaining.
The Quick Spec Breakdown, Because I Like Receipts
When numbers make me happy, I put them in a tidy little table. Here’s what I paid attention to.
| Feature | What It Is | Why I Care |
|---|---|---|
| Build Volume | 400 × 400 × 400 mm | Big enough for helmets, armor, fixtures, art pieces, and printing batches. |
| Max Print Speed | Up to 700 mm/s | For fast prototyping and reduced turnaround times, with tuning and realistic expectations. |
| Leveling | 64‑point auto bed leveling | A perfect first layer without manual fussing. |
| Hotend Temperature | Up to 300°C | Suitable for PLA, PETG, PA, ABS, ASA, and more. |
| Heatbed | 1000W aluminum alloy, 80°C in ~200 seconds (max 100°C) | Heats quickly and evenly, supports engineering-grade materials. |
| Motion | Precision linear rail(s) | Smooth, rigid motion and fewer vibrations. |
| Motors | 42-76 stepper motors on X and Y | More torque and speed for heavy, fast moves. |
| Status Light | 3-color, visible up to 10 meters | Quick visual status check across the room. |
| Materials Supported | PLA, PETG, PA, ABS, ASA, etc. | Versatile for hobby and professional needs. |
I don’t list specs just to be tidy; they tell me how far I can push a machine before it writes me a strongly worded letter.
That First Layer, and the Calm That Follows
If you’ve ever stalked a first layer—nose close to the bed, willing it to adhere—you already understand why the 64-point leveling mattered to me. On the Ender 5 Max, I tapped the auto-level routine, set the Z-offset, and watched lines of filament go down so flat and clean I thought about taking a photo, framing it, and hanging it above my desk as a reminder that life can be simple sometimes.
Once the mesh is dialed in, the printer behaves like it has muscle memory. Even after I removed parts, brushed crumbs off the plate (I know, sacrilege), and started again, the first layer held its nerve.
Speed: What 700 mm/s Means for My Sanity
Speed specs always need context. Yes, the printer can hit 700 mm/s, which is exhilarating to watch. But printing fast and printing well require the right combination of cooling, acceleration, jerk, and line widths. I approached it gradually, like learning to drive a manual transmission without crying.
At moderate-to-high speeds, I saw something I care about: consistent extrusion and crisp corners, even on large pieces. The beefy X and Y motors (42-76) are there for a reason; they don’t whimper when you ask them to move like they mean it. On infill and travel moves, the motion system is confident. On perimeters, with the right settings, I got clean lines without the ringing that haunts lesser setups.
Do I always print at 700 mm/s? No. I peak there for specific geometries and speed tests. For production parts where finish matters, I settle into the 200–300 mm/s range with tuned accelerations, and it’s still wonderfully fast. The important part is that the machine lets me choose without pushing back.
Print Quality When I Turn the Knobs
Quality at speed is where the linear rails shine. On tall prints, especially vases and prototypes with long perimeters, I found layer lines stayed aligned and smooth. Corners stayed sharp enough that I felt a little smug about it. High-speed infill didn’t rattle the frame into a percussion instrument.
With larger nozzles (0.6–0.8 mm), layer adhesion was strong, surfaces were surprisingly tidy, and build times shrank to something reasonable for big projects. With a 0.4 mm nozzle, I got the detail I expected but still took advantage of the speed where it made sense. It’s not a fairy tale; you’ll still see the occasional seam or micro-wobble if you push high speeds on delicate parts, but it’s controllable.
The 400 × 400 × 400 mm Build Volume and What I Did With It
There’s a moment when you slice a full-size object and the preview doesn’t reduce it to a puzzle. That’s the thrill of this build volume. I printed a helmet shell in one piece and didn’t have to negotiate with seams. I printed a batch of brackets in a neat grid, like cookies no one will ever eat. I printed a sculptural lamp shade with a spiral that made guests ask where I bought it, which is—as far as I’m concerned—the highest compliment.
For prop makers, this volume is as convenient as having a friend with a van. For small business owners, it means batch printing without the nesting games. For hobbyists, it means freedom from scaling parts to fit a smaller bed and pretending you wanted it that way all along.
The 1000W Heatbed: What It Feels Like to Go From Cold to “Let’s Print”
The first time I powered the bed, it moved from room temperature to 80°C so quickly I checked a clock. Around 200 seconds later, it was ready, and so was I. This is not the part of printing where I want a meditative pause; I want to start. The aluminum alloy plate spreads heat evenly, reducing those weird cold spots that coin-flip bed adhesion.
The bed is rated to a maximum of 100°C. That’s good for ABS, ASA, and PA, especially with an enclosure. For PLA and PETG, it’s more than enough. I appreciate speed in preheat because it makes quick iterations feasible. You don’t realize how much time you lose in warm-up until you don’t lose it anymore.

300°C: The Hotend That’s Happy to Work Overtime
If you’ve ever wanted to venture beyond PLA and PETG, a hotend that hits 300°C opens doors. I printed ABS and ASA with confidence—especially with the bed at 100°C and a draft-free environment. For PA (nylon), I dried filament thoroughly and kept prints covered; the results were strong, resilient parts that didn’t feel like toys.
Does this mean I print exotic blends every day? No. But it means when I need toughness, UV resistance, or heat tolerance, I don’t have to borrow a printer or compromise. It’s nice when the machine isn’t the limiting factor.
Linear Rails: The Quiet Confidence of Straight Lines
I have a soft spot for linear rails. They don’t grandstand; they just keep things moving smoothly and consistently. On this machine, they contribute to tight motion control and fewer tremors, especially during rapid direction changes and taller builds. Less play in the system means fewer artifacts, which means fewer apologies when someone holds a part up to the light and squints.
Maintenance is simple—keep them clean and lightly lubricated. If you’re used to V-slot rollers, rails feel like a minor miracle. Motion becomes something you stop thinking about so you can focus on everything else.
Motors With Muscle: 42‑76 and the Feel of Authority
The X and Y axes use 42-76 stepper motors. Translation: more torque, better control at speed, and steadier motion under load. On big prints, that matters. On fast travel moves, it matters. On tight infill that could otherwise introduce chatter, it matters a lot.
Torque gives you the confidence to push speed without slop. Even when I ran aggressive travel moves, the machine held its lines. It’s the difference between a jog and a sprint that doesn’t end in a skid.
Noise, Vibration, and the Joy of Things Not Shaking
Printers are never silent, but the Ender 5 Max keeps its voice down. The linear rails guide the motion in a way that reduces wobble, and the frame is rigid enough to handle long builds without turning into an amusement park ride. Fans make their presence known, as fans do, but the overall acoustic footprint is civilized for a machine this size.
When it’s doing high-speed infill, I can hear it, but it’s a sound that says “I’m working,” not “I’m breaking.” There’s a difference.
The 3-Color Status Light: A Beacon for the Busy and Distracted
The status light might sound like a novelty, but it’s useful. Visible up to 10 meters, it lets me know when the machine is idle, heating, or in the middle of a job. Walking into the room and seeing that light saves me from leaning over a screen or interrupting a print with a question it can’t answer.
If you have more than one printer, a quick scan tells you who needs attention. In a shop environment, it’s a gentle nudge that the machines have a language of their own.
Slicer Settings, Software, and How I Made It Behave
I used mainstream slicing software and started with a sensible profile. The key for me was balancing speed and quality in ways that didn’t feel like a compromise. A few guidelines that worked:
- Keep perimeters slower than infill to preserve surface finish.
- Use linear advance or pressure control if your slicer supports it, to keep corners sharp.
- Tune acceleration; speed is headline-grabbing, but acceleration is where prints are won.
- Calibrate flow for each filament and nozzle.
- Create separate profiles for “fast prototypes,” “production strength,” and “pretty things.”
The 64-point leveling mesh should be used. I saved the mesh, rechecked Z-offset with each nozzle change, and treated the first layer like the foundation it is.
Materials I Ran and What Happened Next
- PLA: The default happy place. Bed at 60°C or less, hotend around 200–215°C, first layers like a skating rink. Surface finish was excellent.
- PETG: 235–250°C hotend, 70–85°C bed, slow first layer, minimal fan. Adhesion was strong; I used a light application of glue stick if I wanted to ensure easy part removal.
- ABS/ASA: 245–260°C hotend, bed at 95–100°C. Enclosure recommended. Layer adhesion was good; reduced warping with skirts, brims, and a draft-free environment.
- PA (Nylon): 255–275°C hotend, 70–90°C bed, dried filament. Printed in an enclosure for best results. Parts were tough and functionally satisfying.
The bed’s max of 100°C is a ceiling to remember for some ABS blends that love 110°C, but I still got reliable results with a little strategy and a cover over the machine to keep ambient temperatures stable.
Big Parts, Long Prints, and the Truce I Made With Time
Large prints can be intimidating. They ask for hours, sometimes days, of commitment. The Ender 5 Max’s speed and consistency shrink those timelines. With bigger nozzles and tuned speeds, prints that once took the better part of a weekend became overnight affairs. It’s not just about speed; it’s about reducing the number of days my dining table is held hostage.
I set up filament runout detection strategies and checked spools before starting anything ambitious. Belt tension and a quick calibration cube at new speeds saved me from heartbreak later. It’s amazing how much smoother life gets when you treat preparation as part of the print.
Maintenance That Didn’t Make Me Sigh
Keeping this machine happy was refreshingly straightforward:
- Wipe and lightly lubricate linear rails.
- Keep belts tensioned, not guitar-string tight, just confident.
- Check nozzle condition; replace when worn.
- Clean the bed surface regularly. A clean bed is a happy bed.
- Dust the machine occasionally. It’s a tool, not a relic.
Nothing here felt like a chore. The construction is robust enough that routine care goes a long way.
Power, Heat, and Being a Responsible Adult
The 1000W heatbed means business. I used a dedicated, properly rated outlet and made sure cords weren’t a trip hazard—less glamorous than printing but essential. The bed heats fast; I gave it a moment to soak so surface temperatures equalized before printing. For materials with fumes (ABS, ASA, some nylons), I ventilated appropriately. It isn’t a spa, even if it sometimes smells like one.
I also set printer safety features and never left a high-temperature print unattended in a way that would keep me up at night. Prudence goes hand in hand with power.

The Daily Joy of the Status Beacon
I didn’t expect to like the status light as much as I do. It’s the printer equivalent of a friend waving from across the street to say, “Still good!” When I’m multitasking, the light keeps me sane. I’m less likely to check the machine like it’s a stove and more likely to let it do its job.
Who This Printer Makes Sense For
- Small business owners who need to turn around big parts or batch jobs quickly.
- Prop makers and artists who hate seams and love one-piece prints.
- Engineers and tinkerers who want functional materials at high temps.
- Hobbyists moving up from smaller beds and ready to manage a bigger machine responsibly.
If you only print tiny desk toys occasionally, this might be overkill. If you’ve ever looked at a filament spool and seen potential instead of plastic, this might be your machine.
The Good, the Less Good, and the Minor Quibbles
What I loved:
- The first layer is consistently excellent thanks to 64-point leveling.
- The bed heats fast—like “What sorcery is this?” fast.
- The build volume changes what’s possible in a single piece.
- Motion feels planted and precise with linear rails and high-torque motors.
- Speed is not just theoretical; it’s usable with sane tuning.
- The status light is a surprisingly handy quality-of-life feature.
What I’d keep an eye on:
- At top speeds, you still need careful slicer tuning; physics hasn’t taken a vacation.
- The 1000W bed is powerful; treat power management seriously.
- For ABS and ASA, an enclosure is helpful, particularly on tall prints.
- Make room for this machine; it’s a presence, not a knickknack.
None of these are dealbreakers. They’re just part of living with a tool designed to do big things quickly.
Value and Cost: What It Does for My Workflow
The Ender 5 Max is a time machine in the way all good tools are. It doesn’t invent new hours, but it gives back the ones I used to waste—on warm-up delays, leveling rituals, reprints from first-layer mishaps, and splitting large projects into uneasy puzzle pieces. If you measure value in throughput, capability, and reduced nonsense, it’s a compelling proposition.
For one-offs, I enjoy the room to experiment. For production runs, I appreciate that I can schedule batches without leaving extra calendar padding for mishaps that never arrive.
Settings and Habits That Made Everything Better
A few practical choices that paid off for me:
- First layer: 0.24–0.3 mm, slower speed, slightly higher extrusion. Make it stick, then speed up.
- Perimeters: Slower than infill. Let the outside look good; the inside can hustle.
- Acceleration: Moderate-to-high, tuned per filament. Faster isn’t always better; smarter is.
- Nozzle sizes: 0.6 mm as a default for big pieces; 0.4 mm for detail; 0.8 mm for structural parts.
- Bed adhesion: Clean surface, use glue stick or a sheet for tricky materials.
- Filament drying: For PETG and nylon, drying moved results from “good” to “dependable.”
- Test pieces: Quick cubes and speed towers before long jobs. Five minutes now, hours saved later.
Everyday Comforts: Small Things That Add Up
The machine inspires confidence. The rails don’t wobble out of line. The motors don’t whine when asked to work. The bed doesn’t keep me waiting. And that first layer? It’s the one that lets me walk away and make coffee without composing a prayer to the adhesion gods.
Even the status light feels like a kindness to future me, who tends to wander off and get absorbed in other problems.
Moments That Sold Me
- Watching a glove-smooth first layer spread across a 400 × 400 mm bed without stepping in.
- Printing a functional, large part overnight and waking up to a clean result on the first try.
- Seeing the bed hit 80°C before the cat fully turned around to assess whether this new thing was here to stay.
- Pushing speeds to show somebody and getting a result that looked like something I’d be proud to hand over, not a cautionary tale.
What I Wish I’d Known Before Clearing Space
I wish I’d measured my space twice. The printer is large, and it appreciates elbow room—especially for airflow and access. Also, filament management matters more with big prints and higher speeds. Keep spools feeding cleanly and check that your filament path doesn’t become a plot twist.
I also wish I’d stocked up on larger nozzles earlier. For this build volume, a 0.6 mm nozzle is like upgrading from a teaspoon to a ladle.
The Little Social Life of a Large Printer
I caught myself showing visitors the Ender 5 Max like a proud parent introducing a very tall child who has learned to play the piano. People ask what it can make, and I try not to say “anything” even though I’m thinking it. There’s something oddly social about big prints; they become conversation pieces, prototypes, and occasionally gifts that suggest I was trying to show off and failed to hide it.
The Relationship Between Ambition and Reality
Large-volume printing is a mirror. It reflects your preparation, your settings, and your willingness to adjust. With the Ender 5 Max, I felt like I had a partner that amplified good habits and forgave occasional lapses. It’s fast without being frantic, powerful without being capricious, and steady in a way that makes tough projects feel ordinary.
Final Thoughts, Minus the Trombone
I’ve used many printers, from humble machines that begged for gentle treatment to temperamental wonders that made me question my life choices. The Creality Ender 5 Max sits in a sweet spot: It respects my time, tolerates my curiosity, and rewards my care.
If you need a large print area, value speed that’s not just for show, and want high-temperature capability in a platform that stays true, this is the kind of machine that quietly changes what you think is possible. And if you simply want a perfect first layer without an argument, it does that too.
Pros and Cons, Summarized for My Future Self
Pros:
- Big 400 × 400 × 400 mm build area that reduces seams and increases possibilities.
- 64-point auto leveling that puts down a reliable first layer.
- 1000W heatbed heats fast and evenly, up to 80°C in ~200 seconds (max 100°C).
- Precision linear rails for smooth, rigid motion and better quality at speed.
- High-torque 42-76 stepper motors on X and Y for stable high-speed prints.
- 300°C hotend unlocks engineering materials, from ABS/ASA to PA.
- 3-color status light visible at a distance, making multi-tasking easier.
Cons:
- You’ll want an enclosure for ABS/ASA and some nylons to keep results consistent.
- The machine is physically large; measure your space.
- Speed claims require tuning; hitting 700 mm/s is situational and best for certain geometries.
- The powerful bed demands proper electrical setup and ventilation awareness.
Would I Buy It Again?
Yes. I’d make the same decision and clear the same space. I’d order more nozzles, stock up on filament, and brace myself for the smugness that comes from watching a machine move decisively while I pretend I didn’t have doubts.
A Few Friendly Starter Settings
If you’re unboxing yours and want a quick way to begin:
- PLA: 205°C hotend, 60°C bed, 0.2–0.24 mm layer, 150–200 mm/s infill, 80–120 mm/s perimeters, moderate accelerations.
- PETG: 240°C hotend, 75°C bed, slow first layer, 30–50% fan, 120–180 mm/s infill, 60–90 mm/s perimeters.
- ABS/ASA: 250°C hotend, 100°C bed, enclosure or draft protection, minimal fan, skirts and brims for warping control.
- PA (Nylon): 265°C hotend, 80°C bed, dried filament, enclosure, slower perimeters for adhesion.
Start conservative, let the 64-point leveling do its thing, then nudge speeds up as comfort grows. You can move quickly without becoming reckless.
The Short Version I’d Tell a Friend
This printer is quick, big, and capable. It puts down a first layer like it’s proud of itself, heats fast enough to ruin your patience for lesser machines, and handles high-temp materials with calm authority. If you’re ready for a large-format printer that respects your time and doesn’t demand a blood pact, the Creality Ender 5 Max earns its spot.
And if you’re still wondering whether it can really print at 700 mm/s, the answer is that it can, and you’ll grin when it does. But you’ll stay for the everyday speed, the consistency, and the feeling that your projects aren’t wrestling you to the floor. It’s a partnership, not a performance.
Disclosure: As an Amazon Associate, I earn from qualifying purchases.