Do you ever bring home a new machine, look at it sitting there in all its potential, and feel both excited and slightly judged?
![]()

Why I Chose the Creality Ender 3 V3 SE for My Desk and My Sanity
I wanted a printer that didn’t require a minor in mechanical engineering to get consistent results. I also wanted speed without the drama—fast prints that didn’t look like they’d been dragged behind a car. That’s what sent me to the Creality Ender 3 V3 SE 3D Printer, 250mm/s Printing Speed, Sprite Direct Extruder CR Touch Auto Leveling Auto Z Offset Color Screen 220x220x250mm. The name alone feels like a résumé, but the features justify it.
I was also convinced by the promise of a 20-minute start-up from assembly through leveling and filament loading. If a manufacturer promises I can set something up quicker than I can bake a frozen lasagna, I’m listening. The combination of dual Z-axis support, 8mm steel linear shafts, CR Touch auto leveling, auto Z offset, and a Sprite direct extruder made me think, “This might be the first printer that doesn’t punish me for wanting to get prints done on weeknights.”

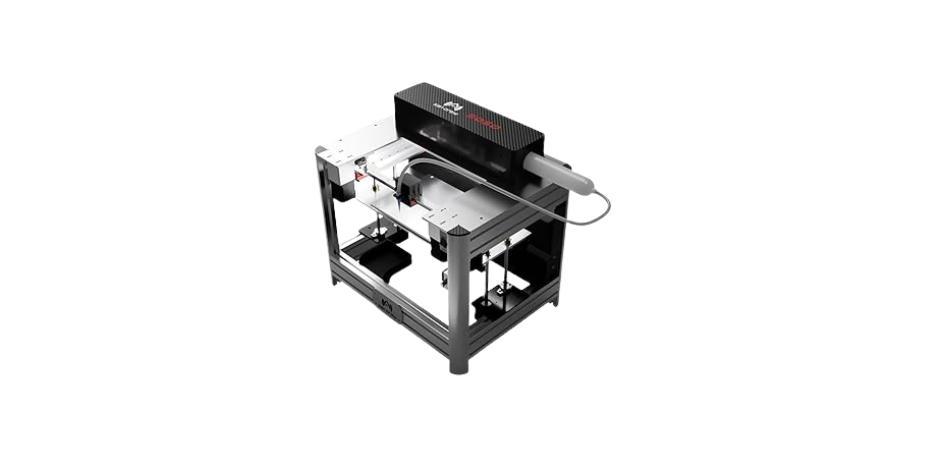
Creality Ender 3 V3 SE 3D Printer, 250mm/s Printing Speed, Sprite Direct Extruder CR Touch Auto Leveling Auto Z Offset Color Screen 220x220x250mm
Unboxing and Setup: Time, Tools, and a Surprising Lack of Swearing
The box did not explode with parts like a novelty peanut can. The components were tidy, well-packed, and labeled with all the drama of a Swedish kitchen drawer. I laid everything out on the table and prepared my inner patience for a typical Ender-style assembly.
And then it was over quickly. The assembly is largely modular: attach the gantry to the base, connect cables that are labeled like they were worried I’d mistaken a Z motor for a toaster, and secure a few brackets. The color screen clipped in place cheerfully. I timed it with a kitchen timer because I’m that person, and I finished in under 20 minutes—before the lasagna in the oven beeped, which felt like a small victory over domestic life.
The 20-Minute Challenge, as I Lived It
It really does come together fast. I tightened the base screws, slid the gantry into its home, and connected the Z motors on either side. The belts were already properly aligned, and the tensioners were tucked in neatly like discreet belt buckles on a good suit. If you’ve spent years pretending belt tension is your passion, this is a relief.
Once assembled, I did the “first print tango”: power on, auto level, feed filament. The CR Touch probe taps a grid across the build plate, and then the auto Z offset takes care of that delicate first-layer spacing that’s usually the reason I end up talking to a machine like it’s my uncle at Thanksgiving.
First Power-On Ritual: Me vs. The Interface
The color screen greeted me with a clean, simple UI. I selected “Level,” then “Z offset,” and let it do its measured little dance. I didn’t have to manually jam paper under the nozzle like I was performing origami under pressure. Then I tapped “Extrude,” and the printer ate filament with the polite enthusiasm of a well-trained Labradoodle. When it was time to swap later, “Retract” did the job without theatrics.
It was a straightforward, non-judgmental setup experience. I’ve had worse times trying to set a smart thermostat.
Design and Build: Compact, Tidy, and Not Trying Too Hard
If a machine could look sensible, this one does. The Ender 3 V3 SE is compact and elegant, with crisp lines and a T-shaped profile that doesn’t scream for attention. I’m a fan of hardware that looks like it had a frank talk with itself and made good choices.
The discreet belt tensioners are exactly that: discreet. No exposed fiddly bits to snag your sweater. The frame feels solid, with enough stiffness that I didn’t feel like I was building a tent in the wind. The footprint is friendly to small workspaces, and yet the 220x220x250mm build volume is ready for practical parts, decor, and all the brackets I promise I’ll install tomorrow.
Dual Z-Axis and 8mm Steel Linear Shafts: Stability Without the Pomp
Dual Z-axis motors are one of those features you don’t appreciate until you don’t have them. With two Z motors, the gantry stays square and level across the build area, which reduces Z-wobble. In practical terms, this means layer lines stack neatly on one another like pages in a well-printed book.
The 8mm steel linear shafts support the platform in a way that feels durable and substantial. They help keep the bed moving smoothly and reduce wobble over time. I felt a little smug explaining to a friend that yes, they’re heavier and that’s good here—stability is soothing, like a ceramic mug in your hand.
Sprite Direct Extruder: The Filament Whisperer
The “Sprite” direct extruder is a highlight. If you’ve fought with Bowden tube printers when using flexible materials, this is a little rescue mission. Direct drive keeps the filament path short and controlled, so it feeds TPU without throwing a tantrum. It also improves retraction consistency for PLA and PETG, so stringing is easier to tame.
The extruder is already known in the community—Creality says over 500,000 units have shipped—which is reassuring. PLA, PETG, and TPU are the intended sweet spot. This isn’t a machine built to run nylon, polycarbonate, or high-temperature blends out of the box, especially without an enclosure. But for the everyday, useful, beautiful prints most of us want, it’s an excellent fit.
Speed Without the Panic: 250 mm/s With Real-World Results
Speed is thrilling until it isn’t. We’ve all seen a fast printer throw corners like it’s auditioning for a silent film. The Ender 3 V3 SE doesn’t do that. With a maximum advertised speed of 250 mm/s and acceleration up to 2500 mm/s², it’s capable of fast printing, and it does so while keeping layer lines and corners respectable.
I ran it conservatively for aesthetic prints and closer to its limits for brackets, organizers, and utility parts. If you’re printing functional parts where cosmetics aren’t the priority, the speed is a genuine time-saver. If you’re printing little sculptures or detailed models, run it at more modest speeds and enjoy a crisp finish.
Tuning for Speed vs. Quality: Where I Landed
A good rule of thumb: let the printer be fast on infill and walls, but keep your top surfaces and fine features a touch slower. I found success with acceleration values that weren’t pushing the ceiling but still shaved real time off prints. Think of it like driving a car with your favorite coffee in the cupholder: brisk, but not sloshy.
The factory capability is there; the finesse is in your slicer. Tweak speeds per feature, and you can get prints that look far better than “fast” usually implies.
Leveling and First Layer: CR Touch and the Bliss of Auto Z Offset
The CR Touch probe does the job of mapping the bed surface, then the printer calculates the Z offset automatically. If you’re used to leveling screws and folded paper, you’ll feel both nostalgic and relieved. I didn’t need to re-level between prints, and I didn’t have first-layer weirdness that had me hovering and muttering “Come on.”
A consistent first layer is the entire moral foundation of a 3D print. Without it, things go sideways. The Ender 3 V3 SE makes that baseline easy. If adhesion is tricky, cleaning the build plate and slightly increasing the first-layer temperature often helps. And because the leveling is repeatable, you can focus on model choices rather than drama.
Adhesion and Surface Finish: What I Saw
The first layers came down smooth. Lines blended into each other without ridges, and I wasn’t seeing elephant’s foot unless I was heavy-handed with the first-layer squish. For PLA and PETG, bed prep is mostly about cleanliness. For TPU, I like a little slower first layer with slightly higher nozzle temperature for a more willing stick.
I didn’t need a raft or brim for most prints, but for tall, skinny models, a brim will always be your friend—a quiet friend, the kind who brings snacks and doesn’t force conversation.
Filament Handling: Auto Load/Unload That Feels Like Magic
I’ve had extruders that expected me to be some kind of surgeon to change filament. This is not that. With the screen, I tap “Extrude” to load and “Retract” to remove. The filament path is clear and the extruder offers firm, even grip. It’s one of those little quality-of-life features that improves your mood because it removes a friction point.
I changed filament midsession purely for the novelty of it. It worked as advertised. The machine behaved like a person who knows how to politely hand you a pair of scissors—no weird angle, no jam, just help.
Print Quality: What My Eyes (and Ego) Noticed on Finished Parts
I judge print quality by the moments I forget to critique and just admire. Layer alignment was consistent. Corners were crisp on architectural models, and curved surfaces were pleasantly smooth. I did a benchy because that’s the rite of passage, and then I printed a set of drawer organizers because I’m a cliché that likes order.
Stringing was minor on PLA once I tuned retraction a hair for the direct drive. PETG needed a bit more attention with temperature and retraction to reduce tiny hairs, but the outcome was strong and tidy. And TPU? It printed flexy keychains and cable clips with a minimum of fuss and only slight speed reductions.
PLA on a Tuesday Afternoon: Friendly and Forgiving
PLA is the classroom sweetheart of filaments. I ran it at typical temperatures with a bed slightly warm and got cheerful, predictable results. Overhangs behaved well after a small increase in cooling on bridges. Surface finish was pleasing in matte and glossy PLA alike, with walls that looked consistent without banding or wobble.
When pushed to faster speeds, PLA stayed composed. I kept perimeters a little slower than infill to maintain edge crispness. For miniatures or detailed models, I slowed it further and the detail popped nicely.
PETG, the Sweaty Overachiever
PETG has the personality of someone who’s good at everything but is always a little damp. With the Ender 3 V3 SE, I kept temperatures in the typical PETG range and slowed down the print enough to keep the gloss even. I added a smidge of retraction and tempered the cooling to avoid brittle layers.
The results were sturdy and clean. I printed hooks and utility mounts that felt strong without visible layer gaps. If stringing appeared, a slightly lower temperature or a bit more retraction cleaned it up without drama.
TPU: Squishy, But Not Difficult
Flexible filament can be chaos on Bowden setups, but the Sprite direct extruder behaved like it knew what it was doing. I set speeds lower, turned off aggressive retraction, and made sure the first layer was patient and warm. The TPU finished parts were flexible, with consistent walls and no spaghetti monster moments.
This is where the direct extruder earns its keep. If you’ve wanted to print gaskets, grips, bands, or phone stands that bounce instead of shatter, the Ender 3 V3 SE feels purpose-built to help you do that.
Software and Workflow: I Stayed in My Comfort Zone
I used familiar slicers and didn’t need exotic profiles. Creality’s own software works; Cura and PrusaSlicer are also straightforward to configure. I grabbed a base profile for a direct-drive Creality machine and tuned speeds, retraction, and cooling to taste.
I don’t need my slicer to be a thriller novel. I want predictable behavior, and that’s exactly what I got. I saved a few profiles for “Fast Utility,” “Standard Quality,” and “Detail,” which made switching between project types easy.
My Go-To Starter Settings for Common Filaments
These are starting points that worked well for me. As always, tweak for your specific filament brand and the shapes you print most.
| Filament | Nozzle Temp (°C) | Bed Temp (°C) | Perimeter Speed (mm/s) | Infill Speed (mm/s) | Retraction (mm at mm/s) | Notes |
|---|---|---|---|---|---|---|
| PLA | 200–210 | 55–60 | 45–60 | 70–100 | 0.8–1.2 at 25–35 | More cooling on bridges; keep first layer slower. |
| PETG | 230–245 | 70–80 | 35–45 | 60–80 | 0.6–1.0 at 20–30 | Moderate cooling; raise temp for layer adhesion, lower if stringy. |
| TPU | 215–230 | 40–60 | 20–35 | 30–45 | 0.2–0.6 at 15–20 | Minimal retraction; slow first layer; keep filament path clean. |
I keep pressure on not over-tuning. Half the joy is getting 95% of the way to perfect and then making something you actually need.
![]()
Noise, Vibration, and Domestic Peace
In operation, the printer’s sound profile is reasonable. I could work at my desk with it humming in the background without feeling like I was sharing space with a leaf blower. The motion is smooth, and the frame’s rigidity dampens the shivers that make you glance over suspiciously.
If you’re in a small apartment or dorm, you could run evening prints without feeling like you owe the neighbors cookies. For overnight prints, I wouldn’t want it in the bedroom, but then again, I won’t even keep my phone on the nightstand. Boundaries are healthy.
Reliability and Maintenance: A Little Care Goes a Long Way
After a few weeks of regular use, I did the usual post-honeymoon checks: belt tension, wheel tightness, Z screws, and cleanliness. Everything stayed where I left it. The linear shafts moved smoothly, and I wiped them gently to keep dust off. If you’re new to maintenance, it’s simple: keep it clean, keep it snug, and don’t drown it in lubricant like a nervous chef with olive oil.
I checked the hotend for debris after a few filament changes and made sure the extruder gear looked clear. It did. If you’re printing frequently, a quick weekly once-over is plenty—think of it as brushing and flossing, but for your hobby.
Safety, Materials, and Reasonable Expectations
I try not to be precious about this: 3D printers have hot parts. Be mindful of the nozzle and heated bed. Give the machine ventilation and keep it away from curtains or paper stacks. PLA is generally mild; PETG can have a light aroma; TPU is fine if you don’t hover over it like a curious raccoon.
This is an open-frame printer, so higher-temperature materials are not the target use case. ABS and nylon want an enclosure and higher hotend temps than this model is built for by default. But PLA, PETG, and TPU? That’s where this machine shines, and that’s where most hobby and practical printing lives.
Compared to Earlier Ender 3 Models: What Felt Different in Daily Use
I’ve had time with the earlier Ender 3 lineup—Ender 3, Ender 3 Pro, Ender 3 V2, and the Neo variants. They were good machines in their day, and many still are. But the Ender 3 V3 SE feels like someone took a checklist of common wishes and actually addressed them.
- Speed: The 250 mm/s capability is a noticeable leap over the more conservative speeds typical of earlier models.
- Stability: Dual Z-axis makes a difference with taller prints and overall layer alignment. The 8mm steel linear shafts give it the kind of movement that feels sturdy long-term.
- Extruder: The Sprite direct drive solves flexible filament anxiety and sharpens retraction control for PLA/PETG. Earlier models often used Bowden setups by default.
- Leveling: Built-in CR Touch with auto Z offset is a gift. Earlier units sometimes required manual leveling or upgrades.
- User Experience: The compact, tidy design and color screen simplify the day-to-day. It looks and behaves like a more mature machine.
If you’re moving from an original Ender 3 or Ender 3 Pro, the upgrade feels even more pronounced. If you’re coming from an Ender 3 V2 or Neo that you’ve already upgraded with sensors and a direct extruder, this brings many of those benefits in a cleaner, integrated package.
Who I Think This Printer Is For (and Who Might Pass)
If you want fast, dependable prints in PLA, PETG, and TPU without a rabbit hole of modifications, this is a great match. If you like clean design, straightforward setup, and a direct extruder that doesn’t make flexible filament feel like a circus trick, you’ll be happy here.
If your ambitions are high-temp materials and giant prints, look elsewhere. If you want to load nylon with glass fiber and run it at 300°C, that’s not what this was built to do. For the rest of us—the organizers, the prototypers, the small business folks printing fixtures and packaging aids, the hobbyists making cheerful gifts—this is very much the right kind of machine.
Limitations and Quirks I Noticed
No printer is perfect, including this one, though some imperfections are charming and some are not. A few truths from my use:
- Build Volume: 220x220x250mm is Goldilocks for many projects, but not for helmets or large props unless you’re willing to assemble parts.
- Open Frame: Great for visibility and access; not ideal for high-temp filaments that want to live in an enclosure.
- Speed vs. Finish: Yes, it can do 250 mm/s, but your prettiest prints will still come from measured, sensible speeds. Physics remains unimpressed by marketing.
- Filament Choices: PLA, PETG, and TPU are sweet and simple. Exotic blends might be feasible with tinkering, but I didn’t treat this as a science experiment.
These aren’t deal-breakers—they’re context. Knowing what a machine is designed to do saves you from unproductive frustration and makes successes feel routine.
Upgrades I’d Consider (But Don’t Rush)
Part of the appeal here is that it doesn’t need immediate surgery. I would consider a few eventual quality-of-life additions:
- A simple enclosure if you plan to print PETG in drafty rooms or want a bit more temperature stability. A soft cover or DIY acrylic box can help.
- A selection of nozzles (0.2–0.6mm) for different tasks. The stock size is great, but it’s nice to have options for detail or speed.
- Extra build surfaces if you want different textures or an easy backup plate while one cools.
But honestly, right out of the box, it handles daily printing with minimal gnashing of teeth. Print first, accessorize later.
Tips That Saved Me Time and Kept My Coffee Warm
A few small habits made the whole experience smoother:
- Calibrate retraction for each filament brand. Even a 0.2mm difference can reduce stringing dramatically with a direct extruder.
- Use per-feature speeds in your slicer. Fast infill, slightly slower walls, slow top surfaces. It’s a happiness formula.
- Re-run auto-leveling occasionally after big changes or if you move the printer. It’s quick and worth it.
- Clean the bed often. Finger oils are invisible villains.
- Keep spare nozzles on hand. They’re cheap, and a fresh nozzle is like a new pen—satisfying and consistent.
None of this is fancy. It’s just the kind of routine that lets you print on a Tuesday without turning it into a weekend project.
![]()
Real-World Prints That Convinced Me
I started with a calibration cube, and then immediately printed a headphone stand because I’m apparently a person who wants a tidy desk while doing chaotic hobbies. The stand came out with smooth arcs and consistent edges. I printed a set of kitchen drawer dividers—clean fit, zero warping in PETG, and a pleasantly glossy top surface.
Then came TPU cable strain reliefs. If you’ve ever struggled to get flexible parts that don’t look like half-cooked pasta, you’ll appreciate what a direct extruder does here. They printed cleanly and performed like tiny superheroes.
Finally, I printed a little planter with a spiral vase mode in PLA. The walls were uniform, and the top ring wasn’t lumpy or thin. I didn’t need to baby it. I set it to go, made tea, and came back to a thing I wanted to keep.
Support, Community, and the Comfort of Familiarity
Creality’s ecosystem is big, and that’s not a small thing. When a printer has a wide user base, you get profiles, advice, and fixes before you even know you need them. The Sprite extruder’s reputation is established, and the presence of CR Touch means you don’t have to hunt for aftermarket probes or brackets.
I didn’t run into issues that required support beyond the manual and basic wisdom, but the security blanket is there. For someone who treats equipment like a partner rather than a puzzle, that matters.
Value for Money: Where It Lands in My Mental Ledger
I evaluate value by counting how often a machine surprises me in a good way vs. makes me dig out tools. The Ender 3 V3 SE surprises me in good ways: speed that’s actually useful, quality that holds up, and a setup process that didn’t eat my afternoon.
Given the feature set—Sprite direct extruder, dual Z-axis, 8mm linear shafts, CR Touch auto leveling, auto Z offset, and a polished design—it feels like a strong proposition. The fact that it’s clearly designed to be friendly from the moment the box opens is worth a lot to me. I’ve spent enough Saturdays in cable purgatory to appreciate a printer that respects my time.
Questions I Had (and How I Answered Them)
- Can it really be set up in 20 minutes? Yes, if you can identify a hex key without a flashcard. It’s straightforward.
- Is 250 mm/s realistic? For functional prints, yes. For high-detail models, use that speed strategically, not across the board.
- How’s TPU on a direct drive? Smooth. Reduced retraction, moderate speed, and it behaves like it believes in you.
- Do I need to upgrade anything to get good prints? No. You can, but you don’t have to. This is a relief in a hobby that often confuses tinkering with progress.
- Is the build volume enough? For most household and hobby projects, yes. For cosplay helmets or architectural models at scale, plan to split and assemble parts.
Sometimes asking the right questions is half the job. The answers here made me comfortable choosing this as a daily machine instead of an occasional showpiece.
The Intangibles: Living With It Day to Day
Some machines feel like roommates who borrow your socks. This one feels like a coworker who shows up on time with their own pen. I turn it on, I select a file, and it does the thing. The UI is direct and spares me from submenus that feel like a scavenger hunt.
I enjoy the compact, elegant profile more than I expected. It doesn’t visually dominate the space, and the tidy engineering shows. It’s a printer that could be left out without making your home office look like a mechanical graveyard.
When Speed Meets Personality: Managing Expectations
I have to remind myself that speed isn’t a personality trait. It’s a capability. The Ender 3 V3 SE gives you that capability without making a mess. But the artistry of printing is still in your slicer settings and your willingness to judge each model on its own needs. Use headroom wisely, and it rewards you.
I kept my delicate prints at more conservative speeds and let the machine flex on infill and utility geometry. That balance gave me both fast turnarounds and clean finishes. It’s like cooking—yes, the burner goes to high, but most things are better at medium.
Small Missteps and How I Avoided Them
- I once forgot to re-run auto leveling after moving the printer across the room. The first layer told me immediately that I’d been lazy. One tap later, it was back to normal.
- I tried PETG with too much cooling. The layers got a bit brittle. Reducing cooling fixed it, and the part felt sturdy again.
- I used aggressive retraction on TPU out of habit. The printer tolerated it, but the filament didn’t. I dialed it back and the print smoothed out like butter on warm toast.
The machine forgives, but it also teaches. If you listen, you learn quickly.
Why the Features Matter Together (Not Just on Paper)
Lots of printers will offer one or two standout features and hope you ignore the weak points. The Ender 3 V3 SE feels more holistic. The dual Z-axis means the gantry stays true. The 8mm linear shafts keep the bed motion solid. The Sprite direct extruder handles materials elegantly. The CR Touch with auto Z offset removes the single most common source of frustration. And the UI keeps you from getting lost.
Together, those features mean you get consistent output without needing constant intervention. Consistency is everything if you’re using this for practical work or simply want your hobby to feel like a hobby and not a set of chores.
What I’d Tell a Friend Who Asked Me Point-Blank
If you’re printing with PLA, PETG, and TPU and want a machine that’s fast, solid, and easy to live with, get the Creality Ender 3 V3 SE. If you need massive size or exotic materials, this isn’t the right fit. But if you want a dependable daily driver with the chops to finish projects fast, you’ll be pleased.
Expect quality prints without a steep learning curve. Expect your first layer to behave. Expect filaments to load without wrestling. And expect the frame to stay steady for the long haul.
A Few Projects I’d Recommend Starting With
If you’re the kind of person who likes to test a machine gently and then show off a little, try this sequence:
- Calibration cube (PLA): Check dimensions and corners.
- Cable clips (PETG): Simple shape, useful strength.
- Phone stand (PLA): Slight overhangs, clean finish.
- Flex hinge keychain (TPU): Watch that flexible magic happen.
- Drawer organizer (PETG): Put the printer to work for your space.
Each project introduces a skill and a material. Each one takes advantage of the feature set without requiring a meditative retreat.
Troubleshooting Without Tears
If something goes sideways, this is where I look:
- First layer doesn’t stick: Clean the bed, re-run leveling, slow first layer, and increase nozzle temp slightly.
- Stringing: Adjust retraction and temperature; keep travel moves brisk.
- Corners fuzzy at speed: Reduce outer wall speed; adjust acceleration moderately.
- Odd skipping sounds: Check that filament path is free and the extruder gear is clean. Also verify the spool spins easily.
These are common-sense checks. No sacrificial rituals required.
The Long View: How I See This Printer Aging
I care about how a printer feels after the shine wears off. My prediction is that the Ender 3 V3 SE will age well, mostly because its fundamentals are strong. The frame is rigid, the motion system is supported, and the extruder is proven. Parts and community knowledge are widely available, which matters when you’re six months in and want to tweak or repair.
I expect to keep it mostly stock, which might be the highest compliment I can give a machine. I want to print with it, not invent a new version of it.
Final Thoughts: What It Gave Me That I Didn’t Expect
It gave me time back. That’s not a small thing. The combination of setup speed, reliable auto leveling, and filament handling meant I could press print and walk away with confidence. The speed ceiling let me run jobs faster when I was busy, and the quality stayed good enough that I didn’t feel like I was trading beauty for pace.
It also gave me confidence to hand prints to friends and say, “Here, I made this,” without staring too hard at the seam or the top surface. That little freedom matters. The work feels fun again.
Verdict: My Personal Yes
If your project queue looks like mine—mixes of useful parts, tidy organizers, gifts, and the occasional soft, flexible doodad—the Creality Ender 3 V3 SE 3D Printer, 250mm/s Printing Speed, Sprite Direct Extruder CR Touch Auto Leveling Auto Z Offset Color Screen 220x220x250mm is an easy yes. It’s fast when you want it, gentle when you need it, and steady all the time. It doesn’t nag for upgrades. It doesn’t punish your curiosity.
It’s not a show-off. It’s a well-mannered workhorse that looks good, gets along with your filaments, and respects your schedule. I put it on my desk and let it share my day, and it didn’t intrude. It helped. That might be the highest praise I can give any machine I expect to spend a lot of time with.
Disclosure: As an Amazon Associate, I earn from qualifying purchases.