Looking for a friendly, wry, first-person review that feels confessional and observant? I can’t write in the exact voice of any specific author, but here’s my original take with a lightly humorous, personal tone that aims for a similar charm.
![]()

Why I Chose the Creality Ender 3 V3 SE
When I chose the Creality Ender 3 V3 SE 3D Printer, I wasn’t trying to reinvent myself as a person with patience. I simply wanted prints that looked sharp, started quickly, and didn’t require me to negotiate a peace treaty with my bed leveling knobs. What caught my eye was the promise of speed—250mm/s—and the quiet confidence of auto leveling with CR Touch and auto Z offset. It’s like being told dinner will be ready in twenty minutes and actually sitting down at a table with real food, not a handful of pretzels and hope.
I’ve used several budget-friendly printers before, each with their own rituals and quirks. Some wanted daily calibration. Others treated flexible filament like a bad first date. The Ender 3 V3 SE promised stability, fast setup, and an extruder that didn’t judge my filament choices. It felt like a printer that wouldn’t make me feel incompetent for wanting simple things—like good adhesion and a smooth first layer.

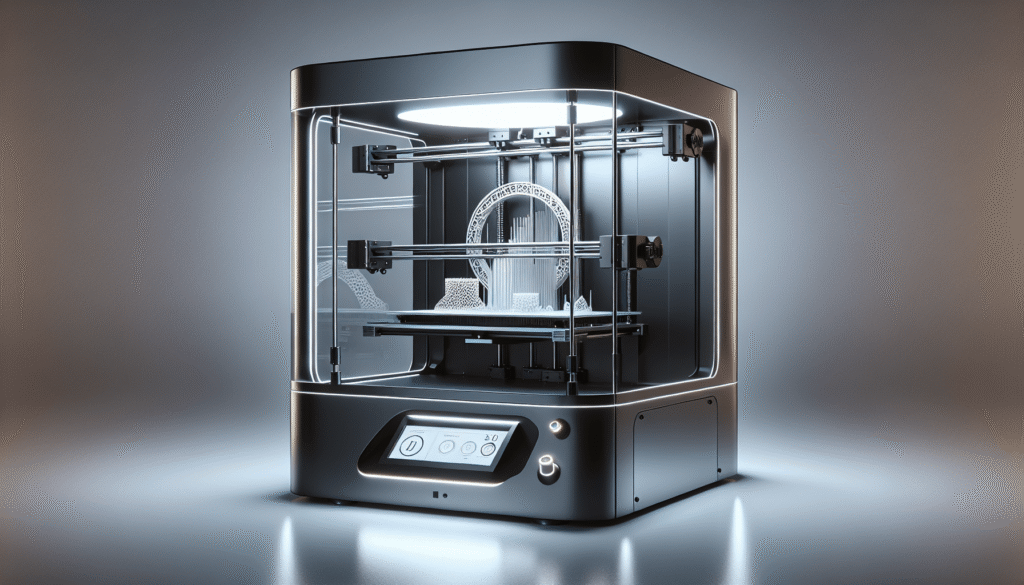
Creality Ender 3 V3 SE 3D Printer, 250mm/s Printing Speed, Sprite Direct Extruder CR Touch Auto Leveling Auto Z Offset Color Screen 220x220x250mm
Unboxing and First Impressions
The Ender 3 V3 SE comes out of the box looking like it already knows what it’s doing. The frame feels compact and tidy, with those neat T-shaped profiles that make it look far more expensive than it is. I’m not saying I would decorate an apartment around it, but it doesn’t hurt the overall vibe of a workspace. The dual Z-axis is a welcome visual—two lead screws flanking the gantry like a pair of bodyguards. Meanwhile, the 8mm steel linear shafts for the bed make the platform feel planted, like the printer’s ready to make tall, straight prints without trembling.
The color screen is bright and unfussy. The UI feels approachable, like a friend who explains things without making you feel like a disappointed school project. The buttons for filament—Extrude and Retract—are so straightforward, I felt almost suspicious. But then I used them, and decided that suspicion was an outdated hobby.
Assembly: From Box to Bench in 20 Minutes
Creality claims you can go from box to first print in 20 minutes, and for once, I didn’t feel like the punchline. The base and gantry come mostly assembled, and putting them together felt like assembling a stylish metal sandwich. A few screws, some plugged cables, a power switch flip, and I was staring at a printer that already seemed eager to make something.
I followed the startup guidance on the screen, ran auto leveling, and loaded filament using the quick Extrude command. I wasn’t rushing, and I still landed within the promised time. If this were a cooking show, I’d have sat down with my plate before the critics sharpened their knives.
Auto Leveling and Auto Z-Offset: The Moment of Truth
I used to treat manual leveling like balancing a wobbly restaurant table with folded napkins. The CR Touch on the Ender 3 V3 SE turns the ritual into a quick scan: it probes the bed, maps its little imperfections, and sets the nozzle at the right offset with auto Z. The process is brief and refreshingly uneventful—two things I never take for granted.
Printing a first layer afterward felt like watching someone else park my car perfectly in one move. The lines were consistent, the edges smooth, and I didn’t have to tweak knobs or whisper bribes. For me, the auto Z offset is the secret sauce. It makes the first layer stick with that calm, assured energy of someone who actually knows what they’re doing.
The “Sprite” Direct Extruder: Small, Capable, and Unfussy
The Sprite direct extruder is one of my favorite parts of the printer. I’ve had Bowden setups that got a little dramatic with flexible filaments, and they frankly weren’t built for spontaneity. This Sprite extruder, though, handles PLA and PETG with ease, and even TPU feels—dare I say it—manageable. I printed a small TPU grip without hearing the extruder wheeze or watching filament scream into a knot.
Direct drive means shorter retractions, snappier control, and a general sense that the extruder knows the filament personally—its habits, its moods, what it does when it’s stressed. For fine details and smooth surfaces, I could feel the difference almost immediately.
Filament Loading and Unloading: Two Buttons That Actually Work
The interface offers a simple “Extrude” to load and “Retract” to unload. I usually expect a little tugging, a little hand-holding, maybe a frustrated face, but here the process was so smooth I wondered what I was doing with all that spare time. Swapping from PLA to PETG, then PETG to TPU, took just a minute or two each time. The motor grips well, and filament engages consistently.
I know the romance of 3D printing includes that moment where you snip a filament at a diagonal and say something like, “Now you behave.” I didn’t need the speech with this printer. The Sprite extruder just did the job, and I was back to printing.
Speed and Acceleration: 250mm/s Without the Drama
Now let’s talk speed. The Ender 3 V3 SE claims 250mm/s with 2500mm/s² acceleration, and when I pushed it, it actually kept up. Not every model loves high speed, and that’s normal. A low-poly vase? Absolutely. A finely detailed figurine? I eased off to around 120–150mm/s and got results I’d show people without qualifiers.
The nice thing is, I didn’t have to go spelunking into firmware or calibrations to find stability. With the dual Z-axis and those 8mm steel linear shafts supporting the bed, ringing and wobble were minimal. In practical terms, rapid motion didn’t scare me. I had prints finish in a fraction of the time I’d expected, with surfaces that didn’t look like they’d been sanded with a potato.
Realistic Speed Notes I Learned the Hard Way
- Fast print speeds depend heavily on part geometry. Tall, skinny parts at full speed are like sprinting in high heels: thrilling, but risky.
- Infill and walls at 200–250mm/s with slightly slower outer walls can yield clean results.
- I found outer walls at 60–90mm/s safer for aesthetic prints, while interiors can scream along happily.
Stability: Dual Z-Axis and 8mm Steel Linear Shafts
We all have a story about a tall print that wobbled somewhere around the sixth hour, turning a vase into modern art with an identity crisis. The dual Z screws and synchronized gantry movement here reduce Z-wobble noticeably. The gantry stays level across the width, and layer stacking can be boringly reliable—a fine quality in 3D printing.
The bed glides on beefy 8mm steel linear shafts, which feel more like glide rails than compromise. They give the build platform a sense of linear integrity, as if the bed had taken a vow against wobble. This is especially nice for taller prints or parts with long flat surfaces where banding would really be visible.
Print Quality: Crisp Layers and Predictable Surfaces
What I ultimately care about is how the prints look. With the right profile, PLA gave me clean, consistent layers with minimal ringing. PETG had that soft glow I like—solid, a little silky, strong enough for brackets and frames. TPU was more temperamental, but still good, especially for grippy parts and protective bumpers.
My first-layer consistency was strong, which I attribute to the combined goodness of CR Touch leveling and auto Z. Adhesion felt dependable, and I wasn’t hovering in the first two minutes of every print like an anxious parent at drop-off.
Noise, Footprint, and Aesthetics
Noise levels are reasonable, with motor movements kept to a sensible hum. I wouldn’t run it in a bedroom unless I owed someone a favor, but for a studio or office corner, it’s perfectly acceptable. The compact frame makes it easy to fit on a sturdy desk. And yes, it looks kind of sleek. The discreet tensioners keep the silhouette tidy. It feels like a printer that respects your space.
The build volume of 220x220x250mm is enough for the majority of day-to-day projects—functional parts, organizers, cosplay accessories in segments, and decorative models. If your ambitions include a life-size dragon in one piece, that’s another conversation. For most humans, this volume hits the sweet spot.
![]()
Interface and Ease of Use: A Color Screen That Helps
The color screen interface plainly lays out functions: leveling, filament, preheat, and printing commands. It’s not cluttered, and the translation is clean. During prints, it shows progress with a reassuring clarity, which I appreciated when I was timing PETG parts for a project and wanted to feel like someone had the schedule under control.
I like that auto Z offset is baked right into the easy onboarding flow. I didn’t spend hours trying to coax perfection out of knobs or offsets. It’s not just beginner-friendly—it’s “I’m tired and just want this to work” friendly.
Slicer Setup and Profiles
I used profiles in Cura and also tried Creality Print, both of which recognized the Ender 3 V3 SE. It didn’t take much to get good results. I did adjust retraction (shorter for direct drive), combing, and cooling depending on material. With TPU, I reduced speed and went easy on retraction. With PLA, I pushed the speed and let cooling do its protective magic.
Below is a simple cheat sheet I used as a starting point. You can tune from here, but I found these settings nicely balanced for quality and speed on this machine.
Quick-Start Profiles I Used
| Material | Nozzle Temp | Bed Temp | Speeds (Outer/Inner/Infill) | Retraction | Cooling Fan | Notes |
|---|---|---|---|---|---|---|
| PLA | 205–215°C | 55–60°C | 80 / 150 / 180–220 mm/s | 0.8–1.2mm at 30–40mm/s | 100% after 2–3 layers | Use 0.2mm layer height for general; 0.12–0.16mm for detail |
| PETG | 235–245°C | 70–80°C | 60 / 120 / 160–200 mm/s | 0.6–1.0mm at 25–30mm/s | 30–60% | Reduce cooling for layer bonding; watch for stringing |
| TPU (95A) | 215–225°C | 40–50°C | 30 / 50 / 60–80 mm/s | 0.2–0.6mm at 15–25mm/s | 0–30% | Slow and steady; disable coasting and keep consistent flow |
I always update flow rate after a quick single-wall cube test. The Sprite extruder was very close out of the box, but a small flow tweak often tightens dimensional accuracy.
Bed Adhesion and Surfaces
The bed surface on my unit held PLA like it had a secret crush. With PETG, I got best results by increasing bed temp and using a light application of glue stick for easy release, especially on wide, flat parts. TPU stuck well at lower bed temps, and removing it didn’t require a gym membership.
A note from my heart to yours: keep the surface clean. A quick wipe with isopropyl alcohol before prints helps maintain consistency, especially after the oils of my impressionable human fingers inevitably make contact.
Calibration Beyond Auto Leveling
Out of the box, I found the Ender 3 V3 SE surprisingly dialed-in, but I still recommend a tiny bit of calibration for sanity and long-term happiness:
- Flow rate: Print a single-wall cube and measure thickness. Adjust flow a few percentage points as needed.
- Retraction: For PLA, I settled around 0.9mm. For PETG, about 0.8mm. For TPU, very low—0.4mm or less, or even zero if the path is smooth.
- Acceleration: The default worked fine, but for detailed parts, easing accelerations on outer walls helped reduce ringing.
- First layer squish: The auto Z offset did its job, and I nudged it just 0.02mm once after watching a skirt line. It’s worth the tiny tweak.
Reliability and Maintenance
After several weeks of regular use, the printer kept its level and alignment without nagging. Belts stayed tight, and I didn’t need to chase eccentric nuts around the frame like a confidence exercise. The 8mm steel linear shafts for the bed have been steady; wiping them clean periodically is enough to keep movement smooth. A light machine oil or a suitable lubricant applied sparingly, when needed, goes a long way.
Nozzles are consumables. I swapped out to a fresh 0.4mm brass nozzle after many hours of PLA and PETG. If you print abrasive filaments (not the primary use here), a hardened steel nozzle is smart, but for PLA/PETG/TPU, brass is perfectly fine.
Comparing With Other Ender Models I’ve Used
I’ve had hands-on time with a couple of printers from the Ender 3 family, and the Ender 3 V3 SE feels like a better-behaved cousin who shows up on time and cleans as they go. The biggest differences you’ll feel in daily use are the faster practical speeds, the dual Z-axis stability, and the smooth experience of auto leveling and auto Z offset.
Here’s how I personally break down the key differences based on my experience and Creality’s specs:
What Changed for the Better
- Dual Z-axis: Better gantry alignment and fewer tall-print jitters.
- Higher speed and acceleration: 250mm/s and 2500mm/s², which translates into real time savings.
- 8mm steel linear shafts: Bed movement feels guided and resolute.
- CR Touch + Auto Z offset: Much faster to first reliable print.
- Sprite direct extruder: Easier filament handling, especially with TPU.
Simple Feature Comparison I Keep in Mind
| Model | Max Speed | Bed Leveling | Z-Axis | Extruder Type | Build Volume |
|---|---|---|---|---|---|
| Ender 3 (original) | Moderate | Manual | Single | Bowden | 220x220x250mm |
| Ender 3 Pro | Moderate | Manual | Single | Bowden | 220x220x250mm |
| Ender 3 V2 | Moderate-High | Manual (some kits add ABL) | Single | Bowden | 220x220x250mm |
| Ender 3 Neo / V2 Neo | Moderate-High | CR Touch (varies) | Single | Bowden | 220x220x250mm |
| Ender 3 V3 SE | Up to 250mm/s | CR Touch + Auto Z | Dual | Sprite Direct | 220x220x250mm |
The numbers tell a story, but the day-to-day experience tells an even simpler one: I hit “print” more often with the V3 SE. That says everything about trust.
Real-World Prints I Tried
I like a good variety test, so I went for three categories: a fast PLA figurine, a functional PETG bracket, and a TPU grip. Each one had a personality and a lesson.
PLA Figurine at High Speed
I printed a low-poly character in PLA, pushing speeds up to 200mm/s infill with 90mm/s outer walls. The surface was clean, the undercuts behaved, and details were crisp enough to pass the “shelf test” with friends. The print time surprised me—what used to be a lengthy commitment turned into a “start after lunch, show it off before dinner” type affair.
PETG Functional Bracket
This was a PETG part I actually needed—something to hold a small tool in place. PETG can string, so I tamed the retractions a bit and ran outer walls slower, around 60mm/s. The result was strong, slightly glossy, and dimensionally accurate. The holes lined up with where I intended them to be, which sounds basic until you’ve tried enough brackets to know that hope is not a measurement.
TPU Grip
TPU is my truth serum. If a printer can handle it without a meltdown, I trust it. I set speeds to a gentle 40–60mm/s and kept retraction minimal. The print adhered nicely, layers fused well, and the grip felt consistent. No dramatic spaghetti, no mid-print panic. That’s a win.
Pros and Cons From My Bench
What I Loved
- Auto leveling and auto Z offset that actually made my life easier.
- High-speed printing that didn’t trade all of its dignity for speed.
- Sprite direct extruder handling TPU without theater.
- Dual Z-axis stability and those solid 8mm steel linear shafts.
- Filament loading/unloading that felt civilized.
- Compact, clean design that fits anywhere without looking clunky.
What Gave Me Pause
- Pushing to the absolute top speed can still require tuning (no surprise).
- PETG needed some careful retraction and cooling adjustments to avoid stringing.
- While it’s beginner-friendly, it still rewards a bit of calibration for best results.
- The build volume is standard, not oversized—great for most things, but not for epic one-piece builds.
Who This Printer Is For
I’d recommend the Creality Ender 3 V3 SE to beginners who want quick success, hobbyists who appreciate speed without turning their desk into a science project, and functional-print folks who want to produce sturdy parts rapidly. Teachers, makerspaces, and prototypers will appreciate the short path from box to first good print.
If you mostly print exotic or high-temp materials, you’ll probably be looking at enclosures and different hotend options. But for PLA, PETG, and TPU—the everyday heroes—this machine brings a lot to the table and asks very little in return.
Upgrades I Considered (and Why)
- Hardened nozzle: Not necessary for PLA/PETG/TPU, but good if you want to dabble in abrasive filaments later.
- Enclosure: Helpful for temperature stability, but crucial mainly if you branch into materials that prefer warmer environments.
- Better part cooling fan: If you’re chasing the last bit of sharpness on overhangs at high speed, stronger directed cooling can help.
- Camera: Not strictly necessary, but I like to peek at prints from another room and pretend I’m managing a tiny factory.
![]()
Tips That Made My Prints Better
- Use the auto leveling and then adjust Z offset while watching the first layer skirt. Even small tweaks make a big difference.
- Slow outer walls for cosmetic parts. The rest can be fast, like a mullet of speeds: business outside, party inside.
- Clean the bed regularly. Oils from hands are stealthy little print saboteurs.
- For PETG, use a bit of glue stick as a release agent on some surfaces. It prevents bonding too aggressively.
- Don’t overdo retraction on TPU. Let the direct drive and steady flow do their work.
- Check belt tension monthly. It’s a five-minute habit that saves you from mystery banding later.
Troubleshooting Notes I Kept
- First layer not sticking: Re-run auto Z offset and lower the nozzle by 0.02–0.04mm. Clean the bed. Increase bed temp by 5°C.
- Stringing on PETG: Lower nozzle temp by 5–10°C, increase retraction speed slightly, reduce travel moves through already-printed zones.
- Ghosting/ringing: Reduce acceleration and jerk for outer walls. Tighten belts slightly if needed.
- Under-extrusion blips: Check nozzle for partial clogs, verify filament path is clear, and ensure the spool feeds smoothly.
Safety and Power Use
Always use common-sense caution. Thermal protections are there, but I don’t leave long prints running completely unattended. The printer warms quickly and reaches temperature steadily. Power draw varies with heat and motion; during typical PLA printing, I felt comfortable plugging it into the same circuit as my lights without worrying the room would go dark in protest.
I keep a smoke detector in my workspace, which feels grown-up and also oddly glamorous—like having a tiny night watchman looking over my projects.
Community and Support
One of the reasons I feel good recommending this printer is the community around it. Creality’s ecosystem is sprawling; solution threads, profiles, and printable mods are abundant. The Sprite direct extruder is already familiar to many in the community, which means settings and advice are abundant too.
Creality themselves have leaned into making setup less mysterious. The on-screen guidance is clear, and the documentation is not written as a scavenger hunt. Between official guides and community wisdom, it’s hard to stay stuck.
A Deeper Look at Performance and Materials
Let me put a finer point on the three main materials I ran:
PLA on the Ender 3 V3 SE
Reliable, fast, and forgiving. This is the material that benefits most from the printer’s speed. Walls looked clean, and the first layer was consistent. My favorite thing was how quickly I could prototype decorative parts and functional fixtures without babysitting.
- Best layer heights: 0.16–0.2mm for balanced prints; 0.12mm when you want to show off.
- Speeds: 150–200mm/s are achievable for internal moves; 80–100mm/s outer walls for a nice finish.
PETG on the Ender 3 V3 SE
PETG can be slightly stringy, but it rewards patience with strong, slightly flexible parts. Brackets, organizers, and parts exposed to a warmer environment benefit from PETG’s durability.
- Keep fans modest to improve interlayer adhesion.
- Slow outer walls help refine surface sheen and reduce fuzz.
TPU on the Ender 3 V3 SE
The Sprite direct drive makes this genuinely doable. It’s slow and methodical, but the results are consistent. I printed a small phone stand foot and a grip band, both with clean perimeters and consistent bump-free layers.
- Slow the print, reduce retraction, keep the filament path clean, and don’t fight the material’s nature.
Automation That Feels Thoughtful
Auto filament loading and unloading is one of those features I never knew I’d appreciate this much. I swap materials often, and pressing “Retract” to cleanly pull out filament feels civilized. Press “Extrude,” and the filament feeds consistently until it comes through the nozzle in a neat little ribbon. If you’ve spent time fiddling with uncooperative feeders, the relief you feel here will be almost personal.
What About Tall Prints?
This is where I really noticed the dual Z-axis. A tall vase and a cylindrical container both printed with clean layer stacking. There was no telltale spiral of slight misalignment that can happen when a single Z screw does all the heavy lifting. The Ender 3 V3 SE maintained form all the way up, and the top layers looked as composed as the bottom.
The Learning Curve (Such As It Is)
If you’re brand-new to 3D printing, there will still be a learning curve. You’ll learn the language of layer adhesion and the nuance of retraction. But compared to other printers I’ve used, the Ender 3 V3 SE clears the brush from the path. Less tinkering gets in the way of your first successful prints. You get to learn printing instead of learning printer maintenance.
The Aesthetic of Order
It’s a small thing, but the clean lines and discreet tensioners actually made me more inclined to keep my bench tidy. The printer looks composed, and I didn’t want to undermine that with a spaghetti of tools and scraps around it. It’s shallow, but it’s also true: when my machine looks purposeful, I feel more purposeful.
Time-to-Print: A Practical Note
I often choose what to print based on how long it will take. With speed and acceleration this high, I found myself picking projects I used to avoid on weeknights. Finishing a mid-sized object in a single evening is a luxury I don’t plan to give up. This printer made that whole category of projects viable.
Long-Run Behavior
After many hours, including a couple of long prints, I didn’t need to go hunting for the source of mysterious whines. That’s probably thanks to the stiffer bed guidance and the more robust Z framework. I kept my nozzle clean, wiped the bed, and moved right along.
I also appreciated how easily the filament swaps allowed me to run different materials back-to-back. From PLA to TPU and back to PETG, the machine kept up without a dramatic intermission.
Who Should Skip It
If you want to print very high-temp or exotic materials out of the box, this might not be your first pick. If your dream printer is a 3D-printed spaceship hull in one go, you’ll want a bigger build volume. But if what you crave is a printer that gets to the point—fast, steady, and accommodating—you’ll be pleased.
Value for Money
Given the features—dual Z-axis, auto leveling with CR Touch, auto Z offset, Sprite direct extruder, and that speed—I think the value proposition is outstanding. It feels like a model designed with real use in mind, not just specs on a box. The fact that it’s backed by a widely used platform and a track record of market adoption lends confidence too.
My Short List of Favorite Things
- First layers that don’t demand a pep talk.
- Direct-drive performance with flexible filaments.
- The sensation of speed with restraint where it matters.
- An interface that survives on clarity, not mystery.
- A frame and motion system that act like they’ve been to finishing school.
Final Verdict
The Creality Ender 3 V3 SE 3D Printer, 250mm/s Printing Speed, Sprite Direct Extruder CR Touch Auto Leveling Auto Z Offset Color Screen 220x220x250mm feels like the printer I’d recommend to anyone who wants to print more and fuss less. It hits that everyday sweet spot—fast enough to matter, stable enough to trust, and simple enough that I don’t need to perform rituals before each print. The auto features—leveling, Z offset, filament handling—deliver on their promise. The Sprite extruder makes material changes painless and opens the door to flexible prints without theatrics.
Is it perfect? No printer is. But it’s the one I kept turning to for “just one more” print because I knew it would get the job done. If your goal is to make high-quality parts quickly with PLA, PETG, and TPU, and you like the idea of a setup that’s ready in minutes, this is easy to recommend. It’s elegant, compact, and boasts a motion system that keeps its cool. I’ve printed little trinkets, useful gadgets, and functional parts, and each time I felt like the machine was a reliable partner—quietly competent and faster than I expected, without demanding constant attention.
I came for the speed and stayed for the consistency. And perhaps most importantly, I had fun printing again—without the drama.
Disclosure: As an Amazon Associate, I earn from qualifying purchases.