Have you ever found yourself wondering how to safely clean a resin 3D printer without turning your workspace into something resembling a science experiment gone awry? I once stood in my own workshop, looking at my resin 3D printer with both admiration and a little trepidation. After all, this wonderful machine had created many of my favorite designs, but maintaining it seemed like a daunting task. Understanding the complexities of its cleaning process feels somewhat like unlocking a secret—one that I am all too happy to share.
Understanding the Anatomy of a Resin 3D Printer
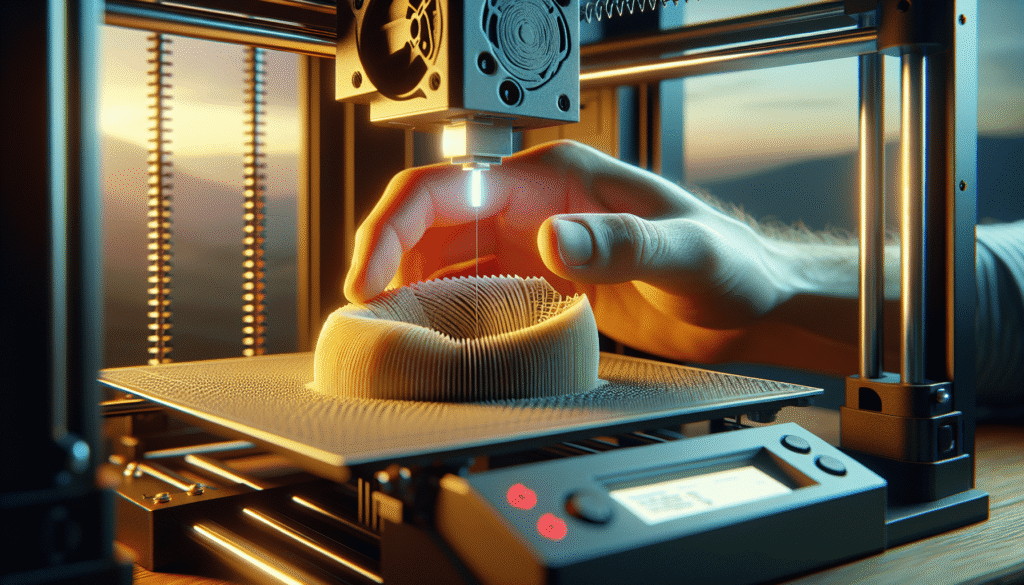
Before plunging into the depths of cleaning, it helps to know what exactly we’re dealing with. A resin 3D printer, or SLA (Stereolithography) printer, is somewhat different from its more common FDM (Fused Deposition Modeling) cousin. We have a build platform, a resin tank, the almighty laser or LCD, and—my personal nemesis—sticky, uncured resin. Knowing each part allows us to approach cleaning with purpose, rather than misguidedly attacking our beloved gadgets with harsh chemicals or scrub brushes.
Core Components
Here are the core components that need your occasional attention:
| Component | Function |
|---|---|
| Build Platform | Where the magic of print happens |
| Resin Tank | Holds the resin used for creating the models |
| Laser/LCD Screen | Cures the resin during the printing process |
Understanding these components is the first step in achieving cleanliness nirvana. Each requires specific handling, much like how one would approach pets of different temperaments.
Safety First: Gear Up
Picture this: me, a pair of goggles perched on my nose, thick gloves engulfing my hands, delicately navigating the cleaning process as if defusing a miniature bomb made of resin. Safety cannot be understated. Resin, while wondrous in many ways, can be harmful. With the right protection, however, we can confidently tackle the task at hand.
Essential Safety Gear
- Nitrile Gloves: Keep those hands free of sticky resin.
- Safety Goggles: Protects eyes from splashes and accidental sprays.
- Mask or Respirator: Avoid inhaling any resin fumes that might hang in the air.
Resin is best buddies with UV light (I’m talking SPF 1000 type of friendship), so ensure your workspace has good ventilation and isn’t filled with stray UV rays that could possibly cure resin unintentionally.
")
Preparing the Workspace
A resin 3D printer’s cleaning process can feel like an arts and crafts project: fun, productive, and requiring considerable preparation. Start by laying out a drop cloth or newspaper. This buffer zone is crucial for catching any rogue drips or spills, saving your work surfaces from an unwelcome makeover.
Setting the Stage
Ensure you have a well-lit area—nothing screams cleaning mishap like dim lighting. Also, make sure you’ve got:
- Reusable Towels/Rags: Ideal for wiping down surfaces.
- Alcohol Solutions: Preferably 90% Isopropyl alcohol for dissolving resin.
- Plastic Scraper or Spatula: Use for removing cured resin without damaging delicate parts.
Much like preparing ingredients before cooking, these items ensure we have everything needed within arm’s reach, making the process smooth and easy.
Removing Resin Safely
Picture a careful extraction mission: tools laid out, every movement deliberate and cautious. The first order of business is to remove any unused resin. Empty the resin tank into your bottle, using a filter to catch any cured resin bits that could compromise future prints.
The Resin Removal Process
- Pour Carefully: Use a resin filter to ensure clean transfer.
- Scrape Residue: Employ the plastic scraper to remove any stubborn remnants.
- Rinse and Repeat: Use the alcohol solution for a thorough clean.
Always remember to store leftover resin in its original container, far away from sunlight. Much like avocados, resin isn’t a fan of prolonged UV exposure.
")
Cleaning the Resin Tank
The resin tank requires a gentle touch, almost like convincing a cat to take a bath. It’s crucial not to scratch the bottom film, as this could lead to print errors.
Step-by-step Resin Tank Cleaning
- Empty: Pour remaining resin into its original bottle.
- Spray with Alcohol: A good misting with isopropyl alcohol works wonders.
- Wipe Gently: Use a lint-free cloth to avoid leaving behind any fibers.
Patience is key here, treating each step like a meditative journey rather than an obstacle.
The Build Platform: Where Prints Come to Life
You’re halfway through, and now the build platform beckons. It’s the stage on which your creations are born, so treat it with the reverence it deserves.
Cleansing the Build Platform
- Detach with Care: Ensure it’s securely held before you extract.
- Scrape Gently: Use that trusty plastic spatula.
- Buff and Polish: A little isopropyl and a soft cloth make the magic happen.
Think of the build platform as the star performer, and give it a little spa day on occasion.
LCD Screen: The Heart of Creation
The LCD screen—or laser in some setups—is like the conductor of an orchestra, ensuring everything proceeds harmoniously. Clean it sparingly and with utmost caution.
Maintaining the LCD
- Zero Pressure: Gently dust off any debris with a microfiber cloth.
- Minimal Moisture: If necessary, use a barely damp cloth.
- Avoid Alcohol: It’s no fan of isopropyl, so keep it out of its space.
The goal is non-invasive cleaning, akin to meditating next to an undisturbed lake—peaceful yet effective.
The Finishing Touch: Reassembly
After breaking down and cleaning each part, we’re on the home stretch—the reassembly. Like piecing together a puzzle, align each component carefully, ensuring everything fits snugly back into place.
Ensuring a Seamless Reassembly
- Inspect Components: Make sure everything’s dry and devoid of contaminants.
- Fit Carefully: Align each component and connect securely.
- Check for Bubbles: Any air pockets can lead to unexpected print results.
The process is meditative, a return to order from the preceding madness. Much like baking after kneading dough, my last steps involve prayers for a hassle-free future print.
Regular Maintenance for Longevity
Integrating regular cleaning into your routine ensures not only the longevity of your beloved printer but also precision in every creation. Over time, the once-daunting task simplifies, becoming second nature.
Establishing a Routine
- Weekly Check-ups: Light dusting and resin checks.
- Monthly Deep Cleans: Repeat the full cleaning regimen.
Think of it as healthcare for your printer, keeping it in tip-top shape and ready to deliver masterpieces at a moment’s notice.
Troubleshooting Common Issues
Every now and then, even with the best care, things go awry. Resin refuses to behave, the printer chuckles evilly, sending failed print batches like a passive-aggressive ghost.
Addressing Issues
- Layer Separation: Check resin level and print settings.
- Print Doesn’t Adhere: Inspect build platform calibration.
- Cured Residue: Ensure tank is completely clear.
Address these with the persistence of a detective and the calm of a Zen master.
Cleaning isn’t merely an obligation; it’s an opportunity—a chance to commune with the machine, appreciating its complexities, its intricacies. Much like tending to a beloved garden, the effort yields creations beyond our wildest imaginings. By approaching cleaning with curiosity and care, maintaining a resin 3D printer can become a satisfying ritual. And who knows, perhaps like me, you’ll find a bit of joy and a splash of personality in the task.